Network Query Language (NQL) David Pallmann
Wiley Computer Publishing
John Wiley & Sons, Inc.
71328_Pman_CH02I
12/13/01 5:12 PM
Page 32
71328_Pman_FM
12/21/01 4:50 PM
Page i
Network Query Language (NQL) David Pallmann
Wiley Computer Publishing
John Wiley & Sons, Inc.
71328_Pman_FM
12/21/01 4:50 PM
Page ii
To my dear wife, Rebekah Publisher: Robert Ipsen Editor: Ben Ryan Development Editor: Kathryn A. Malm Managing Editor: Angela Smith New Media Editor: Brian Snapp Text Design & Composition: D&G Limited, LLC Designations used by companies to distinguish their products are often claimed as trademarks. In all instances where John Wiley & Sons, Inc., is aware of a claim, the product names appear in initial capital or ALL CAPITAL LETTERS. Readers, however, should contact the appropriate companies for more complete information regarding trademarks and registration. This book is printed on acid-free paper. Copyright © 2002 by David Pallmann. All rights reserved. Published by John Wiley & Sons, Inc., New York Published simultaneously in Canada. No part of this publication may be reproduced, stored in a retrieval system or transmitted in any form or by any means, electronic, mechanical, photocopying, recording, scanning or otherwise, except as permitted under Sections 107 or 108 of the 1976 United States Copyright Act, without either the prior written permission of the Publisher, or authorization through payment of the appropriate per-copy fee to the Copyright Clearance Center, 222 Rosewood Drive, Danvers, MA 01923, (978) 750-8400, fax (978) 750-4744. Requests to the Publisher for permission should be addressed to the Permissions Department, John Wiley & Sons, Inc., 605 Third Avenue, New York, NY 10158-0012, (212) 850-6011, fax (212) 8506008, E-Mail: PERMREQ @ WILEY.COM. This publication is designed to provide accurate and authoritative information in regard to the subject matter covered. It is sold with the understanding that the publisher is not engaged in professional services. If professional advice or other expert assistance is required, the services of a competent professional person should be sought. Library of Congress Cataloging-in-Publication Data: Pallmann, David. Network query language (NQL) / David Pallmann. p. cm. ISBN: 0-471-20766-7 (acid-free paper) 1. Internet programming. 2. Network Query Language (Computer program language) I. Title. QA76.625 .P35 2002 005.2'762--dc21 2001006061 Printed in the United States of America. 10 9 8 7 6 5 4 3 2 1
71328_Pman_FM
12/21/01 4:50 PM
Page iii
Contents
Foreword Introduction Acknowledgments Chapter 1
Chapter 2
xi xiii xxii
Presenting Network Query Language (NQL)
1
A First Look
1
Appropriate Uses for NQL
2
Why a New Language?
3
Design Philosophies
3
The Right Building Blocks
6
Role Independence
10
Tutorial: Directory
11
Chapter Summary
16
Developing in NQL
17
The Development Environment
17
The Development Process
20
The Debugger
22 iii
71328_Pman_FM
iv
12/21/01 4:50 PM
Page iv
Contents
Chapter 3
Chapter 4
Chapter 5
Compiling NQL Scripts
24
Deploying NQL Scripts
24
Tutorial: Pie
26
Chapter Summary
31
Language Fundamentals
33
Statements
33
Code Blocks
35
Expressions
36
Functions
36
Comments
37
Labels
37
Literals
38
Variables
38
The Stack
44
The Success/Failure Condition
48
Error Handling
49
Directives
49
Tutorial: Setting the Time
50
Chapter Summary
56
Flow of Control
57
Control Statements and Functions
57
If, Then, and Else Statements
59
Loop Statements
61
Functions
65
switch-case
67
Parallel Processing
68
Timing Execution
75
Terminating Execution
75
Tutorial: FastSearch
76
Chapter Summary
80
Expressions, Operators, and Functions
83
Expressions
83
Operators
84
Functions
93
71328_Pman_FM
12/21/01 4:50 PM
Page v
Contents
Chapter 6
Chapter 7
Chapter 8
Chapter 9
Tutorial: Phone
121
Chapter Summary
129
Working with Files
131
File Input/Output
131
File Operations
138
Directory Operations
142
Tutorial: FindFiles
145
Chapter Summary
149
Transferring Files
151
Background on FTP
151
FTP Operations
153
Tutorial: FtpReceive
162
Chapter Summary
166
Working with Databases
167
Database Fundamentals
167
NQL’s Database Support
172
Tutorial: Movie-Reviews
184
Chapter Summary
188
Working with XML
191
XML Fundamentals
191
XML Operations
194
Tutorial: RealEstate
208
Chapter Summary
216
Chapter 10 Accessing Web Sites
219
The World Wide Web
219
Web Primitives
220
Controlled Browser
224
Site Crawling and File Downloading
236
Web Services
240
Tutorial: BookSearch
241
Chapter Summary
244
Chapter 11 Processing HTML
247
Types of Pattern Matching
247
HTML Pattern Matching
248
v
71328_Pman_FM
vi
12/21/01 4:50 PM
Page vi
Contents
Data Pattern Matching
255
HTML Table Processing
261
Regular Expressions
271
Web Queries
276
HTML Operations
286
Chapter Summary
288
Chapter 12 Sending and Receiving Email
291
An Overview of NQL’s Email Capabilities
291
Email Protocols
292
Message Formats
293
Email Support in NQL
298
Tutorial: ScanMail
306
Chapter Summary
310
Chapter 13 Accessing Newsgroups
313
An Overview of NQL’s Newsgroup Capabilities
313
Newsgroup Support in NQL
314
Tutorial: Prospects
317
Chapter Summary
320
Chapter 14 Searching Directory Servers
323
An Overview of NQL’s LDAP Capabilities
323
LDAP Directory Support in NQL
325
Tutorial: NameSearch
328
Chapter Summary
332
Chapter 15 Terminal Emulation
333
The Basics of Terminal Emulation
333
Terminal Emulation Operations
334
Tutorial: Unix
339
Chapter Summary
344
Chapter 16 Interacting with Applications
345
Exporting to Microsoft Office
345
Interacting with Applications Using Automation
350
Tutorial: Outlook
354
Chapter Summary
360
71328_Pman_FM
12/21/01 4:50 PM
Page vii
Contents
Chapter 17 Socket Communications
361
Background on Socket Communications
361
Socket Programming in NQL
363
Tutorial: Client/Server
367
Chapter Summary
374
Chapter 18 Serial Communications
377
Serial Programming in NQL
377
Tutorial: Scale
381
Chapter Summary
384
Chapter 19 Synchronization
385
Inter-process Communication
385
Inter-process Locking
391
Chapter Summary
395
Chapter 20 E-Commerce
397
Credit Card Transactions
397
Open Financial Exchange
405
Tutorial: Approval
409
Chapter Summary
414
Chapter 21 Graphics
415
Image Operations
416
Acquiring Images from TWAIN Devices
425
Tutorial: Counter
429
Chapter Summary
434
Chapter 22 Agent Characters
437
Microsoft Agent
437
Agent Operations
438
Tutorial: Hamlet
442
Chapter Summary
449
Chapter 23 Fuzzy Logic
451
Introduction to Fuzzy Logic
451
Fuzzy Logic Support in NQL
454
Tutorial: Concerts
457
Chapter Summary
464
vii
71328_Pman_FM
viii
12/21/01 4:50 PM
Page viii
Contents
Chapter 24 Neural Networks
465
Introduction to Neural Networks
465
Neural Network Support in NQL
474
Tutorial: Recognizing Symbols
481
Chapter Summary
486
Chapter 25 Bayesian Inference
489
Introduction to Bayesian Inference
489
Bayesian Computations in NQL
491
Tutorial: HealthTest
493
Chapter Summary
496
Chapter 26 Interacting with the Desktop
497
Desktop Operations
497
Tutorial: MP3
510
Further Exercises
516
Chapter Summary
516
Chapter 27 Network Monitoring
519
Introduction to Network Monitoring
519
Network Monitoring Operations
520
Tutorial: Discover
525
Chapter Summary
528
Chapter 28 Web Applications
531
Background on Web Applications
531
Web Programming in NQL
533
Tutorial: Library Search
540
Chapter Summary
567
Chapter 29 Supporting Mobile Devices
569
Mobile Applications
569
Mobile Programming in NQL
574
Tutorial: DeviceType
584
Chapter Summary
589
Chapter 30 System Actions and Information
591
System Actions
591
System Information
593
71328_Pman_FM
12/21/01 4:50 PM
Page ix
Contents
Tutorial: Restart
597
Chapter Summary
600
Chapter 31 Calling NQL as a Component
603
Calling NQL from Other Languages
603
Tutorial: vbNQL
620
Chapter Summary
624
Chapter 32 NQL Cookbook
625
AddDatabase
625
AppendTextFile
626
AppendUnicodeTextFile
627
DeleteDatabase
627
FtpReceive
628
FtpSend
629
GetWeb
629
GetWebData
630
GetWebFile
630
QueryDatabase
631
ReadMail
632
ReadMailFile
632
ReadNewMail
633
ReadNewsgroup
634
ReadNewsgroupHeaders
634
ReadTextFile
635
ReadUnicodeTextFile
636
WriteTextFile
636
ReadXML
637
SendHtmlMail
638
SendMailWithFile
638
SendMultiMail
639
SendTextMail
640
UpdateDatabase
640
WriteTextFile
641
WriteUnicodeTextFile
641
WriteXML
642
ix
71328_Pman_FM
x
12/21/01 4:50 PM
Page x
Contents
Appendix
NQL Versions and Editions
643
A Brief History of NQL
643
NQL 1.1 vs. NQL 2.0
644
Windows Edition vs. Java Edition
646
Index
647
Foreword
Information is a company’s greatest asset. Within the maze of corporate networks and back office systems that asset is typically locked in place, a prisoner of the system that produced it, network that carried it, the client that displayed it. Reusing information presented by an existing system in a new application is tantalizingly easy to talk about but difficult in practice to do. Certainly newer open system architectures make this easier, but there is always some legacy system which is either not open or inaccessible through programmable interfaces. These are the villains of the system integrator’s world. The situation that is so frustrating is that you can see the data that you want to use on the screen—it’s right there in front of you, perhaps in three different systems—and you could describe to a six-year-old what steps to take to come up with the desired result. Why can’t computers connected to networks do the same? I first met David Pallmann in 1998 when he came to pitch his ideas about standard ways to access data on network-connected computers. David was spellbinding with his rapid-fire presentation on how the Network Query Language (NQL) could harvest in situ data and repurpose it in new applications. Because combining information from multiple separate systems together to produce larger results has been my passion and profession for many years, David and I hit it off. David’s idea with NQL was to produce a common approach for accessing networked data, much like SQL made access to relational databases uniform. Initially David and his company NQLi focused on building agents to access data from World Wide Web pages using NQL. They built a variety of systems for their clients using NQL, including StockVue, a product that uses NQL to harvest and reassemble information about investments.
xi
xii
Foreword
As they built these applications, David and his team added new capabilities to the language—features that were motivated by the needs of real-world application developers. When I first encountered NQL, it had primitives supporting Web access, as well as normal control structures, pattern scanning, and output commands for taking harvested information and presenting it in HTML pages. Over the next two years, NQL blossomed into a very complete programming system, adding support for such essential topics as XML, filling out support for networked data facilities such as news, mail, ftp, telnet, and Web site crawling, adding access to non-networked data in local databases and file systems, and finishing off the system with lots of niche, but important, capabilities such as support for genetic algorithms, fuzzy logic, and parallel processing. Ho, hum, you say. YAPS: Yet Another Programming System. We’ve all seen similar capabilities in a variety of different systems—perhaps not as well integrated together, but they exist. Wait, the best is yet to come . . . .The NQL Programming Environment. I don’t know about you, but I never get things right the first time I try something. I am constantly trying things out, refining them, trying other approaches. I hate the delay and brittleness of the edit, compile, link, debug cycle. I much prefer the edit, run cycle that an interpreted system allows. Furthermore, although a programmer at heart, I’d much rather tell a computer to watch carefully what I am doing and then make a procedure based on those actions. (For the hard core: I love EMACS keyboard macros). One of the strongest features of NQL is that it is interpreted. As such, it earns all of the honors that go to such systems. As a developer, you interact with NQL through the NQL Client, a full featured programming environment for creating, modifying, and debugging NQL programs. You can use the editor to write your programs, but also there are a number of wizards which will build NQL program fragments for you. One such wizard, the browser recorder, allows you to visit a Web site, drill down to the page that contains the information you are interested in and then identify the specific area of that page that contains the information, putting that information in an NQL variable for subsequent processing. With this program-by-example wizard, you identify the place to visit for subsequent information harvesting of that moment’s version of the information—the lead story in the living/arts section of a newspaper, the current price of soybeans, or the front page picture on your favorite sports Web site. Further programming in NQL would allow you to build and export an HTML page that combined these items into one consolidated presentation—or deliver an XML representation of these items, plus XML representations of other information retrieved from local SQL databases to another application. One last observation: By staying at a high level in the types of objects and operations on those objects, NQL allows you to stand on the shoulders of other successful system developers, take information components from those systems, and deliver your audience the value of selective combinations, decisions, and derivations based on those components. Let me stop now and let you read the book. Harry Forsdick VP Advanced Technology Genuity, Inc.
Introduction
This book describes a new programming language, Network Query Language. Network Query Language is a kind of shorthand for Internet and network programming that lets you easily combine and leverage technologies such as XML and the Web. If you like Stuctured Query Language (SQL) for database programming, you’ll love NQL for network programming. If you have a need to create commercial-grade connected applications such as bots, intelligent agents, middleware, and Web applications, you’ll find NQL well worth looking at. For investing a small amount of time in getting to know the language, you’ll receive a startling savings in development time. Network Query Language runs on all major computing platforms, and you’ll find a copy of it on the CD at the back of this book. You can also download the language from www.nqli.com.
Overview of the Book and Technology Welcome to a language that breaks some of the rules and isn’t afraid to venture into new territory. Where else can you crawl a Web site and download files with a single statement? Or create, train, and run a neural network with a five-line script? Network Query Language equips you with extensive capabilities in four functional areas that are usually lacking in other programming languages: Communications, conversion, distributed processing, and artificial intelligence.
xiii
xiv
Introduction
Network Query Language is intended for both experienced developers and beginners. If you’re a seasoned developer, you’ll find NQL saving you oodles of time. Tasks that used to take you a month can be accomplished in a week, and what used to take a week can be accomplished in a day. For the junior programmer, you’ll find NQL very easy to pick up. The language avoids cryptic punctuation, does not assume a computer science background, and uses simple, easy-to-remember keywords. The three hallmarks of NQL are unparalleled ease of use, lightning-fast development, and sheer power. It’s not uncommon for developers to tell us they’ve created solutions and put them into production within 24 hours of their first exposure to NQL. Network Query Language has interesting roots. My colleagues and I didn’t set out to create a new programming language, but we ended up creating one out of necessity. After five years of developing custom solutions—such as intelligent agents, corporate portals, content servers, shopping bots, search engines, and middleware—we had used many different languages and found all of them unsatisfying. A pattern was emerging: No matter what language we used for a project, the building blocks we needed to use on a daily basis were missing. It offended us that programming languages don’t contain built-in statements for tasks such as interacting with Web sites, sending and receiving email, working with XML, and applying artificial intelligence techniques. We decided to do something about it. Network Query Language was born when we developed over 500 powerful building blocks and wrapped an SQL-like language around them. If NQL sounds similar to SQL, that’s no accident: SQL is our hero, one of the great success stories of the computer industry. It turned long, proprietary database programs into short, generic queries. There were numerous benefits. Database programs could be written in significantly less time. Short queries were less likely to contain bugs than large database programs, and they could be developed far more rapidly. A more junior level person could perform database programming. Structured Query Language was such an elegant idea that although 25 years have gone by, it is still with us and is used pervasively. We believe today’s Internet and network programming situation is remarkably similar to the database problems of the past and cries out for an SQL-like remedy. Our intention with NQL is to appeal to the same paradigm. The things that are true of SQL are also true of NQL: Large programs become short, simple scripts. Extremely rapid development becomes the norm. Junior people can do powerful things. Best of all, you don’t have to choose between NQL and your favorite programming language. Although NQL can be used as a stand-alone solution, it can also be called as a component from another language. If you prefer, you can continue using languages such as Visual Basic, C++, or Java and call NQL when needed to be that missing puzzle piece in a project. Be forewarned, however, that NQL is addictive and you may find yourself using it more and more. This book’s aim is to serve as a handbook: Your field guide to NQL, if you will. It introduces the language, takes you on a guided tour, teaches through the use of examples, and provides reference information.
How This Book Is Organized The organization of this book is such that it can be read straight through or consulted topically. Readers who are new to the language will find introductory material at the
Introduction
beginning and a smooth progression from chapter to chapter. Each chapter stands on its own, however; readers already familiar with NQL can go directly to an individual chapter for assistance in a particular subject. Chapter 1, Presenting NQL, gives you a first look at Network Query Language without getting into too much of the nuts and bolts. The chapter covers the appropriate uses for NQL, its design philosophies, and the unique features that distinguish it from other languages. Chapter 2, Developing in NQL, guides you through the use of the NQL development environment. The chapter describes how to enter and edit code, run scripts, use the debugger, and deploy solutions. Chapter 3, Language Fundamentals, covers the syntactical rules of NQL, including statements, functions, comments, code blocks, literals, and variables. The chapter also describes the stack and the success/failure condition, two constructs which allow statements to work together efficiently. Chapter 4, Flow of Control, describes how program flow is governed in NQL. The chapter discusses loops, functions, parallel processing, and timing. Chapter 5, Expressions, Operators, and Functions, explains the rules for combining constants, variables, operators, and functions together in expressions. It also documents the built-in functions of NQL and how user-defined functions are specified. Chapter 6, Working with Files, visits the subject of file input/output in NQL. The ability to create, open, append, read, and write files is discussed. File and directory operations are also covered. Chapter 7, Transferring Files, describes how files can be transferred to and from remote systems using File Transfer Protocol (FTP). It also covers file and directory operations. Chapter 8, Working with Databases, discusses how to query and modify databases. Several database protocols are supported, permitting access to the vast majority of databases. Chapter 9, Working with XML, explores the retrieval, parsing, and generation of XML documents. One of NQL’s most attractive features is its ability to convert data to and from XML. Chapter 10, Accessing Web Sites, focuses on interfacing with the World Wide Web. Material covered includes accessing Web pages, submitting forms, crawling Web sites, and downloading files. Web services are also covered. Chapter 11, Processing HTML, attacks the problem of how to programmatically mine data from Web pages. Multiple methods of extracting information from HTML documents are covered. Chapter 12, Sending and Receiving E-mail, examines NQL’s messaging capabilities. The mechanics of sending e-mail messages, receiving them, and acting upon them are covered. Chapter 13, Accessing Newsgroups, shows how to access newsgroups, also known as forums or discussion boards. Reading newsgroup postings allows your
xv
xvi
Introduction
programs to gather information on public perceptions of a subject or who the interested parties are. Chapter 14, Searching Directory Servers, covers how to access directory servers with the LDAP protocol. Searching directory servers allows your programs to connect better with their local environment and locate people, systems, and resources. Chapter 15, Terminal Emulation, enters the world of connecting to UNIX systems, minicomputers, and legacy systems. Your programs can mimic terminal-based interactive users, sending commands, waiting for responses, and capturing screens of output. Chapter 16, Interacting with Applications, is about cooperation between your programs and other software. OLE Automation permits you to exchange information with other programs or control them. Exporting allows your scripts to create documents, spreadsheets, and presentations. Chapter 17, Socket Communications, describes TCP/IP socket programming in NQL, which you would use to implement a protocol NQL does not already support, or your own custom protocol. Chapter 18, Serial Communications, discusses how to perform serial port communications in NQL, which you would use to read and write data to and from a local device connected to your computer. Chapter 19, Synchronization, is concerned with creating distributed applications, where multiple agents must cooperate to work as a team. Methods of communications and synchronization are covered. Chapter 20, E-Commerce, explores electronic transactions, which NQL supports for several major credit card providers. Open Financial Exchange is also covered, which makes automated interaction with financial institutions possible. Chapter 21, Graphics, explains how to work with graphic images in NQL. Images can be dynamically created, modified, saved, and converted to other formats. The chapter also covers reading images from digital devices. Chapter 22, Agent Characters, discusses how to create animated agent characters that speak, move, and perform actions. Chapter 23, Fuzzy Logic, describes the use of fuzzy logic, a form of soft computing. Fuzzy logic allows your programs to represent real-world quantities more accurately and make better decisions. Chapter 24, Neural Networks, covers how to create, train, and run neural networks. Neural networks are powerful due to their ability to learn, and are useful for applications that require pattern matching or prediction. Chapter 25, Bayesian Inference, focuses on Bayes’ Theorem and how it can be applied to compute probabilities. Bayesian inference allows causes to be inferred from effects, rather than the usual inferring of effects from causes. Chapter 26, Interacting with the Desktop, enumerates the options NQL offers for interacting with the desktop. This includes opening documents, displaying console windows, rendering text-to-speech, and playing multimedia files.
Introduction
Chapter 27, Network Monitoring, focuses on the use of the SNMP protocol to interact with network devices. Network devices can be discovered, monitored, and controlled. Chapter 28, Web Applications, explores the use of NQL to drive solutions that can be accessed from Web browsers. Like ASP and Perl, NQL scripts can power Web applications. Chapter 29, Supporting Mobile Devices, explains how to write Web applications that can be accessed by mobile devices. A variety of PDAs and phones can be supported. Chapter 30, System Actions and Information, covers actions the operating system can perform, such as powering down the computer; and information the operating system can supply, such as the current user’s privileges. Chapter 31, Calling NQL as a Component, is about the use of NQL as a callable object from other development environments. It is possible to gain the benefits of NQL without giving up the use of your favorite programming language. Chapter 32, NQL Cookbook, is just what it sounds like: a collection of recipes for putting NQL to work for a particular task. For each task listed in this chapter, a step-by-step procedure and sample script are included. Appendix A, NQL Versions and Editions, is your ammunition against version and platform confusion. It describes editions of the language and platform differences. Past and present versions of NQL are also described.
Who Should Read This Book If you need to develop connected applications quickly, this book (and Network Query Language) are for you. Since NQL appeals to both junior and experienced developers, the book doesn’t assume that you have a deep background in computer science. It is assumed that you understand the rudiments of programming, however. Programmers, IT personnel, Web masters, and content engineers can all put NQL to good use in short order. If you really want a firm grounding in NQL, then by all means read the book straight through and try each of the tutorials. If you’re short on time or have a looming deadline, here are some recommendations: If you’re a junior programmer, read Chapters 1 through 5 carefully, which will give you a good grounding in essentials. Go through the tutorials in these chapters and make sure you understand them. The remaining chapters of the book are topical, so when you need to do something new, like sending mail messages, go to the appropriate chapter. You might want to briefly scan through all of the chapters to develop a feeling for what NQL is capable of. You will find many common tasks addressed in Chapter 32, including scripts that can serve as templates for your own solutions. For experienced programmers, you’ll probably want to skim through Chapters 1 through 5 to get a feel for the language, taking note of NQL’s distinguishing
xvii
xviii
Introduction
characteristics and pausing for an extended read when you come across something interesting. The remaining topical chapters can be read in any order desired, and contain tutorials for getting up to speed quickly. If you plan to use NQL to drive Web applications or mobile applications, you’ll want to read Chapters 28 and 29 carefully. If you plan on calling NQL as a component from another language, see Chapter 31. The cookbook in Chapter 32 provides many ready-to-run scripts for putting NQL to use right away.
Conventions This book uses certain conventions for showing code examples and reference forms of statements and functions.
Names of Statements, Functions, and Parameters In the body text of the book, names of statements, functions, and parameters are often italicized. For example, “the replace function requires two parameters, a search-string and a replace-string.”
Code Examples Code examples appear in monospaced type. open filename while read(line) { show line } close
When part of a code example is left to the imagination, an italicized line beginning and ending with an ellipsis (...) appears. open filename while read(sLine) { ...do something with sLine... } close
Small code examples are in-line with the body text; code examples that are larger or are especially significant are cited by a listing number, such as “Listing 8.1.”
Introduction
//movie-reviews - reads movie reviews out of sample Access database and displays results dbpath = "c:\\Program Files\\NQL\\Samples\\Scripts\\Database\\movies.mdb;" dbprotocol "ado" if opendb("Driver=Microsoft Access Driver (*.mdb); DBQ=" dbpath) { boolean bHaveData = select("select * from movies") while bHaveData { dumpvars bHaveData = nextrecord() } } else { show "Unable to open the database " dbpath } closedb
Listing 8.1
Database example.
Statement and Function Reference Forms When a statement or function is first introduced, its reference form is usually given. Reference forms appear in monospaced type. Although NQL will accept upper-, lower-, or mixed-case keywords, the official rendering of these keywords in the language is lower case, and that is how they appear in this book. end
Parameters are italicized, indicating the places where you need to supply values. Statement reference forms indicate a keyword and some number of parameters. Function reference forms indicate a return type, a keyword, and some number of parameters in parentheses. open filespec boolean open(filespec)
Parameters that must be variables are indicated by the word var. When a variable list (one or more variables) is needed, the term var-list is used. clear var output var-list
xix
71328_Pman_FM
xx
12/21/01 4:50 PM
Page xx
Introduction
Square brackets [ ] indicate optional elements. An ellipsis (...) within square brackets indicates elements that can repeat multiple times. nextline [var] for var = [initial, ] final [, increment] sendmessage recipient, subject, message1, type1 [ ... , messageN, typeN]
If there are many statements or functions to be listed, they are arranged in a table.
Planned Features Some NQL language features described in this book are described as planned features. This means that these features were on the drawing board for Network Query Language and were considered likely to be included in the 2.0 release, but a final decision had not been committed to as of the time of this writing. In tables of statements and functions, an asterisk signifies a planned feature. In body text, the phrase Planned feature: precedes discussion of planned features.
Names of Web Sites Many of the sample scripts in this book access Web sites. Rather than using actual Web site names, this book often uses generic placeholder names such as www.my-site.com, www-my-news-site.com, and www.my-retail-site.com.
Tools You Will Need To get the most out of this book, you’ll need a copy of Network Query Language so that you can try things out. Even if you don’t own a copy, you can obtain an evaluation edition, either from the book’s companion CD-ROM or the Internet. The version of NQL reflected in this book is Version 2.0, so you’ll do best to have NQL 2.0 or later installed. If you can only get NQL 1.1 for your platform, this book will still be useful to you. Appendix A will help you keep your sanity if you happen to be using a different version of NQL.
What’s on the CD-ROM The companion CD-ROM contains software and code examples. The software on the CD-ROM includes three versions of Network Query Language: ■■
Network Query Language for Windows version 2.0 (60-day evaluation)
■■
Network Query Language for Windows version 1.1 (60-day evaluation)
■■
Network Query Language for Java version 1.1 (60-day evaluation)
71328_Pman_FM
12/21/01 4:50 PM
Page xxi
Introduction
As of this writing, the Windows edition of NQL 2.0 was just nearing readiness. If you’re running on a non-Windows platform, visit www.nqli.com or www.networkquerylanguage.com to determine what the latest version of NQL is, and what platforms it is available for. If you can’t get your hands on NQL 2.0 or later for your type of computer, take heart. NQL 1.1 is available in both a Windows edition and a Java edition that runs on all major computing platforms. If you have to use NQL 1.1 instead of NQL 2.0, see Appendix A for some helpful information. The CD-ROM also contains all of the NQL script code cited in the book as tutorials. When you go through each chapter’s tutorial, you have the choice of entering script code by hand or copying the script from the CD-ROM. If a tutorial script requires supporting files, these are included as well. Lastly, the scripts from Chapter 32, the NQL cookbook, are also included on the CDROM. These ready-made scripts can reduce your learning curve significantly.
Where To Go from Here It’s my sincere desire to see you and the rest of the world’s software developers do more powerful things in a shorter timeframe. Network Query Language can be instrumental in making that happen. If it becomes part of your standard collection of programming tools you will find yourself being a programming superstar more often, and with less effort! In this book, I’ve sought to justify the reasons for NQL’s existence; entice you with its power, brevity, and ease of use; educate you through tutorials; and equip you with essential reference information. The rest is up to you and your imagination. I am happy to hear from readers, and can be reached at
[email protected]. David Pallmann Mission Viejo, California
xxi
71328_Pman_FM
12/21/01 4:50 PM
Page xxii
CHAPTER
Acknowledgments
Although I am the inventor of Network Query Language, I can hardly take sole credit for it! Many talented people have contributed to the NQL effort over the years. Christopher Hunter and John Ross have been integral to the language all along, from its earliest inception to present day. In version 2.0, Brandon Bethke and Jed Stumpf also served major architectural roles, taking charge of the compiler and runtime systems. The language also benefited from the ongoing engineering efforts of Robert Apodaca, Scott Bishop, Mike Campbell, Brian Connolly, Matt Grofsky, Ashur Novick, Peter Tran, and Bill Walker. Gentlemen, I salute you all. It takes more than engineers to see a new product developed. I would like to thank Denny Michael and Doug Tullio, both of whom believed in NQL enough to dedicate years to seeing it advance from an interesting concept into a commercial-grade product. Their tireless efforts provided the conditions under which NQL could be developed. To my wife Becky and daughters Susan and Debra, I must express my heartfelt thanks for your support, without which it would have been impossible to write a book. Putting up with a husband and dad with his nose in a laptop every waking moment can’t have been enjoyable. The good news is, I’m back! I am indebted to the fine folks at John Wiley & Sons for making the writing and editing process easy for me, and for their dedication to professionalism.
xxii
71328_Pman_CH01I
12/14/01 1:47 PM
Page 1
CHAPTER
1 Presenting Network Query Language (NQL)
This chapter gives you a first look at Network Query Language (NQL). It is often instructive to gaze at something new from 30,000 feet before zooming in on the minute detail, and that is certainly true of computer languages. Before diving into the nuts and bolts of NQL, we want to consider the big picture: Its proper uses, its design philosophies, and its unique features. This chapter offers a first look at NQL, discusses appropriate uses for the language, and examines its unique qualities. The chapter ends with a tutorial in which you will enter, save, and run your first NQL program.
A First Look It is traditional when introducing new languages to show a “Hello, World” program. So let’s get that out of the way. The one-line script that follows displays “Hello, World” on the screen. show "Hello, World!"
That’s hardly very interesting, so let’s look at something slightly more ambitious (and useful). The following script is a complete NQL program. get "http://www.my-news-site.com" match '
{headline}'
1
71328_Pman_CH01I
2
12/14/01 1:47 PM
Page 2
Network Query Language while { output headline, link nextmatch }
Even if you’ve never seen NQL before, you can probably make an educated guess about the purpose of this program. It accesses a news Web site, locates the news stories, and outputs the headlines and links as eXtensible Markup Language (XML). A few things should strike you about this program: ■■
It is very small.
■■
It is very clear.
■■
It does something that is not easy (or even possible) in many mainstream programming languages.
Appropriate Uses for NQL Network Query Language is ideally suited for creating connected applications such as bots, agents, spiders, middleware, Web applications, and mobile applications. Bots are automated programs (the term bot comes from the word robot). Bots are essential because of infoglut. The amount of information on the Internet is constantly growing, and the same is true of electronic information within corporate networks. Yet a human being’s ability to read, digest, and work with information is essentially fixed. Thus, there is an information gap that grows worse each every day. Bots come to the rescue by automating tasks for people and making life manageable again. Agents are bots that serve an individual. In the real world, we employ human agents for all kinds of purposes: Travel agents, insurance agents, real estate agents, accountants, attorneys, and so on. Agents specialize in an area and represent our personal interests. The same is true of software agents: They are very good at a specific task, and they have a clear understanding of their master’s wishes. Spiders are bots that crawl the Internet, indexing Web pages and constructing the databases that power search engines. Spiders can be used for other purposes beside search engines, such as creating site maps. Middleware applications connect two or more systems or applications, helping them to work in harmony as part of a larger system. Middleware is valuable because it avoids having to change major systems, instead taking the approach of interfacing between them. Web applications are the modern gateway to interfacing with companies and other organizations. Web applications perform such diverse functions as conveying information, searching databases, initiating actions, and effecting transactions. Mobile applications are Web applications that support Personal Digital Assistants (PDAs) and cellular phones rather than desktop Web browsers. Mobile applications have to be concerned with supporting a variety of devices and accommodating a small display size, different output formats, and a simple user interface.
71328_Pman_CH01I
12/14/01 1:47 PM
Page 3
Presenting Network Query Language (NQL)
Why a New Language? Network Query Language came about after repeated disappointment with mainstream programming languages. It wasn’t that these languages were especially deficient; rather, what has changed is the focus of modern software development. Since the rise of networking and the Internet, there has been a shift toward new kinds of applications that stress communication, content transformation, distributed processing, and smarter software. That means the statements and functions that have been standard in languages for decades no longer serve us so well. In an age where programmers are performing new tasks and meeting new challenges, we need some new tools in our toolbox.
Design Philosophies It is no accident that NQL scripts are powerful yet remain small and elegant—that is a reflection of the design philosophies that went into the language. The benefits to you are more power, clarity of code, speedier development, and the ability to extend the language further.
Power NQL is an extremely powerful language. It has far more built-in capabilities than other programming languages. There are over 500 statements and functions in NQL, many of which aren’t found elsewhere. This unrivaled collection of building blocks is at your immediate disposal. Many of the one-liners in NQL accomplish things that would normally require large, exceedingly complex programs in their own right. Many difficult tasks become simple in NQL. It might be beyond you to directly write programs that interact with Web sites, send and receive email, export data to applications, or perform artificial intelligence—but these kinds of activities are ridiculously easy in NQL.
Clarity NQL is intended not only for professional programmers, but also for anyone who needs to quickly create a connected application, such as IT personnel, content engineers, and Webmasters. With this in mind, NQL makes no assumptions about computer science background or prior programming experience. The result is a language that has a simpler syntax than Visual Basic yet retains its power. The names of statements and functions in NQL have been selected to be as straightforward as possible. Whereas some languages use ornate names for historical reasons, NQL’s keywords tend to be one or more real words found in the dictionary. It is easy to discern the meanings of statements with intuitive names like openmail, sendmessage, and firstunreadmessage.
3
71328_Pman_CH01I
4
12/14/01 1:47 PM
Page 4
Network Query Language
Likewise, the use of cryptic punctuation has been strenuously avoided. If an NQL statement requires parameters, they simply appear to the right of the statement. If there is more than one parameter, they are separated by commas. A newline separates statements, so there’s no need for an end-of-statement character such as the semicolon used in C++ and Java.
Rapid Development NQL promotes rapid development. The aim is to turn months into weeks, weeks into days, and days into hours. Features that facilitate rapid development include the following: ■■
A fast, friendly development environment
■■
A scripting language design that does not require a separate compilation process
■■
Powerful building blocks built directly into the language
■■
A clear, compact syntax
■■
A safe, forgiving runtime environment
When you craft a program in a standard programming language, you typically combine hundreds, thousands, or tens of thousands of instructions. Naturally this takes time to write and debug. When programming in NQL, programs are composed of far fewer statements because of the powerful building blocks built into the language. Sometimes a complete NQL script is just a handful of statements. Tiny programs mean faster development, a smaller likelihood of errors, and faster debugging. Let’s consider a case in point. Say you want to crawl a Web site and download files, a task that is easy to talk about conceptually but is not trivial to program. Site crawling requires a careful understanding of Web technologies in order to be done well and normally an intermediate to senior level developer would be needed to implement such a program. In a language like C++ or Java, crawling a Web site requires 20 or so pages of code. In NQL, the task can be accomplished in just one statement, because site crawling and file downloading are concepts built into the language.
Familiarity NQL also stresses familiarity. Some languages make the error of being unique to the point of alienating developers. Although NQL has many unique features and a unique grammar, it also provides plenty of things programmers will find familiar. Among these are the following: ■■
Typed variables
■■
Operators and expressions
■■
Multi-statement code blocks
71328_Pman_CH01I
12/14/01 1:47 PM
Page 5
Presenting Network Query Language (NQL)
// Retrieve news headlines from a news site main page, // output to a text file (news.text), and // open the results on the desktop. String headline String link Integer stories Create "news.txt" Get "http://www.my-news-site.com" stories = 0 Match '• {headline}' While { Write headline & "," Write link & "\r\n" stories = stories + 1 NextMatch } Close OpenDoc "news.txt"
Listing 1.1 Visual Basic-like phrasing.
■■
Standard flow of control statements
■■
User-defined functions
To illustrate the point, take a look at the script code in Listings 1.1, 1.2, and 1.3. All three scripts perform identically, but they don’t look all that similar. If you’re from a Visual Basic background, Listing 1.1 probably looks most familiar to you. If you come from a C++ or Java background, you’re probably more at-home with Listing 1.2. NQL supports a number of conventions from Visual Basic, C++, and Java, possessing aliases in many cases. Most statements can also be treated as functions. If you’ve used assembly language or a stack-oriented language such as Forth or PostScript, you may relate best to Listing 1.3. The use of NQL statements and the stack allows one to program in terms of instructions that work together, just like the instructions in a microprocessor. As you can see, there is a great deal of freedom in how programs are expressed in NQL. Capitalization is immaterial, as is indenting and the use of white space (that is, spaces, tabs, and blank lines).
5
71328_Pman_CH01I
6
12/14/01 1:47 PM
Page 6
Network Query Language
/************************************************* * Retrieve news headlines from a news site page, * * output to a text file (news.text), and * * open the results on the desktop. * *************************************************/ string headline, link int stories = 0 if create("news.txt") { get "http://www.my-news-site.com" while match('• {headline}') { write headline "," write link "\r\n" stories=stories+1 } close opendoc "news.txt" }
Listing 1.2 C++/Java-like phrasing.
Customizable and Extensible NQL is a customizable language. Every keyword in the language can be redefined. The same is true for every error message. This level of customization makes it easy to handle internationalization. All it takes to change keywords or messages is editing and compiling a message file. As powerful as NQL is, it can be extended. Anyone can write new statements for the language, which become seamless additions indistinguishable from the core statements in the language. In the Windows edition of NQL, a Dynamic Link Library (DLL) (created in any language) can implement new statements. In the Java edition of NQL, a Java class can implement new statements. Third parties with experience in specific areas of technology or industries can leverage their expertise and make contributions to NQL.
The Right Building Blocks What are the building blocks that make NQL special? They fall into four main categories: communication, data conversion, automation/distributed processing, and intelligent behavior. Connected applications frequently need to draw on building blocks in these categories. For example, consider an agent that retrieves news stories from a Web site every 24 hours and stores them as XML in a local database. The agent utilizes commu-
71328_Pman_CH01I
12/14/01 1:47 PM
Page 7
Presenting Network Query Language (NQL)
; Retrieve news headlines from a news site page, ; output to a text file (news.text), and ; open the results on the desktop. STRING STRING INT
HEADLINE LINK STORIES
CREATE GET
"news.txt" "http://www.my-news-site.com"
STORIES =0 MATCH
'• {HEADLINE}'
WHILE { WRITE HEADLINE | "," WRITE LINK | "\r\n" STORIES =STORIES+1 NEXTMATCH } CLOSE OPENDOC "news.txt" END
Listing 1.3 Assembler-like phrasing.
nication to retrieve Web pages, conversion to generate XML, automation to run every 24 hours, and intelligent behavior to identify news articles on Web pages.
Communication NQL is full of support for Internet and network protocols. The communication facilities allow you to retrieve information from just about anywhere, whether on the Internet or corporate network. They also allow you to deliver information, results, or notifications to people and systems, whether nearby or remote. The communication facilities include the following: Web sites. The ability to read Web pages, crawl Web sites, and interact with Web sites. File input/output. Reading and writing disk files. File Transfer. Sending and receiving files between computers. Databases. Querying databases, and adding, updating, and deleting database records.
7
71328_Pman_CH01I
8
12/14/01 1:47 PM
Page 8
Network Query Language
Email. Sending and receiving email. Newsgroups. Scanning newsgroups. Directory Servers. Querying directory servers. Terminal Emulation. Accessing UNIX systems and legacy systems. Interaction with Applications. Controlling applications under program control, and exporting. Sockets. TCP/IP input/output. Serial Communications. Serial port input/output. e-Commerce. Processing credit card transactions and accessing financial servers. Network Monitoring. Detecting network devices, reading their status, and sending them commands. Mobile Devices. Recognizing mobile devices and outputting data in their content languages. Web Services. Accessing XML-based services over the Internet. Text-to-speech. Speaking content on the desktop. Audio. Playing sound and music files on the desktop. Video. Playing movie files on the desktop.
Data Conversion and Analysis Because NQL can work with data in different ways and perform conversions between common data types, it is possible for scripts to transform content. Coupled with NQL’s communication capabilities, scripts are able to acquire content, analyze and transform it, and deliver the results to users in just the format they desire. Some of NQL’s datarelated capabilities include the following: XML. Parsing, validating, creating, importing, and exporting eXtensible Markup Language, the standardized data language for representing all kinds of content. HTML. Parsing, generating, importing, and exporting HyperText Markup Language, the data language of Web pages. Delimited data. Reading, writing, importing, and exporting delimited data files. Images. Creating, manipulating, and converting graphic images. Date/Time. Obtaining current date and time, converting to and from various formats. Filtering. Removing unwanted data. Ranking. Analyzing and reordering information so that the most relevant items appear first. Conversion. Transforming data into other formats. Strings. Manipulating strings and text, and generating formatted output.
71328_Pman_CH01I
12/14/01 1:47 PM
Page 9
Presenting Network Query Language (NQL)
Automation and Distributed Processing Connected applications are frequently automated and/or distributed. Automated solutions run all by themselves, either on a schedule or in response to events. Distributed solutions require cooperation between multiple programs working together as a team. Scheduling. Performing tasks at set dates and times, and repeating tasks at regular intervals. Inter-process communication. Communication between agents for cooperative processing on a large scale. Synchronization. Locking and unlocking to manage access to shared resources and to coordinate processing. Application control. Launching applications, on local or remote systems, and passing them command line arguments, data, or keystrokes.
Intelligent Behavior and Analysis An essential ingredient in constructing reliable software with good decision-making capabilities is intelligence. NQL includes the following features that can be used to make software smarter: Neural Networks. Adaptive software that learns and can be applied to pattern recognition, prediction, and organizational tasks. Bayesian Inference. Predictive statistics that determine causes from effects. Fuzzy Logic. Algorithms dealing with fine degrees of belief and probability. Pattern Matching. Ability to recognize objects based on patterns or landmarks. Categorization. Procedure of examining text and Web pages and assigning them categories.
Miscellaneous In addition to the four main categories just covered, there are some additional NQL capabilities worth mentioning. They include the following: Agent characters. Desktop characters that can display information, speak, and perform actions. Registry access. Reading and writing information to the system registry. System information. Determining operating system, current directory, available memory and resources, and other information. System actions. Powering down, shutting down, or rebooting the computer, and logging off the current user.
9
71328_Pman_CH01I
10
12/14/01 1:47 PM
Page 10
Network Query Language
Role Independence Network Query Language stresses role independence, allowing you to utilize NQL wherever convenient. NQL scripts can execute on the desktop, on a server, as a Web application, and as a component. This means you can use NQL to be that missing puzzle piece in your enterprise, taking on the size, shape, and location needed.
Desktop On workstations, NQL scripts may run as desktop agents. The agents can be out of sight or can take on a console appearance that resembles an MP3 player. The desktop is a logical choice for these kinds of applications: ■■
Applications that need to speak, play audio, or play video on the desktop
■■
Applications that need to interact with users
■■
Applications that need to be on the desktop for permission/security content reasons, such as an agent that reads incoming email messages
■■
Applications that need to perform on-screen notification, such as displaying messages or animating agent characters
■■
Applications that need to launch, export to, or otherwise interact with other desktop applications
Servers On servers, NQL scripts can perform actions that service entire departments or organizations rather than individuals. Servers are logical places for these kinds of applications: ■■
Applications that need to respond to clients
■■
Applications that need to process large amounts of data based on queues, lists, or databases, such as shopping bots
■■
Middleware that interconnects two or more systems
■■
Scheduled applications that run in the background
Web Servers On Web servers, NQL applications can operate as CGI applications, just as applications in languages like ASP, JSP, PHP, and Perl do. Web servers are a logical place for the following kinds of applications: ■■
Web applications, accessible from desktop Web browsers
■■
Mobile applications, accessible from PDAs and phones
■■
Applications that need to be accessible from anywhere in the world
71328_Pman_CH01I
12/14/01 1:47 PM
Page 11
Presenting Network Query Language (NQL)
Components NQL can be called as a component, which gives you the luxury of continuing to use other languages and development environments but still tap into NQL’s power when you need it. Some instances where you might want to call NQL as a component include the following: ■■
When you are extending existing projects already developed in another language
■■
When you have programmers already comfortable in working with a different language
■■
When you want to add communication, conversion, and intelligence features easily to extensible applications, such as Microsoft Office
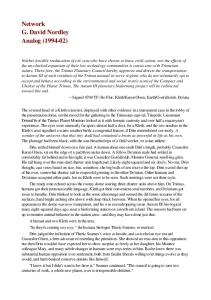
Tutorial: Directory Now that you know something about NQL’s capabilities, let’s develop and run a complete application. In this tutorial, you will create a script that examines a disk directory, creates a Web page that lists the files, and opens the Web page in a browser on the desktop. The result will be a Web page like the one shown in Figure 1.1. There are four steps in this tutorial: 1. Launch the NQL development environment. 2. Enter the Directory script. 3. Run the Directory script. 4. Understand the Directory script. When you are finished with this tutorial, you will have seen how to do the following in NQL: ■■
Retrieve the names of files in a disk directory.
■■
Create a Web page and write HTML to it.
■■
Open a Web page in a browser on the desktop.
Let’s begin!
Step 1: Launch the NQL Development Environment Launch the NQL development environment. On a Windows system, this can be accomplished by clicking on the NQL Client desktop icon, or by selecting Program Files, Network Query Language, NQL Client from the Start Menu. On other platforms, you should have a desktop icon and/or command line method of launching the NQL Client.
11
71328_Pman_CH01I
12
12/14/01 1:47 PM
Page 12
Network Query Language
Figure 1.1 Directory Web page.
At this point, you should have the NQL development environment active on your desktop, with an empty code window. Now you’re ready to enter your first NQL script.
Step 2: Enter the Directory Script In the NQL development environment, enter the script shown in Listing 1.4 and save it under the name directory.nql. Enter the script, then save it by clicking the Save toolbar button (which has a disk icon). If you prefer, you may copy directory.nql from the companion CD. If you have installed the companion CD on your system, you will have all of the book’s tutorial materials in a \Tutorials directory on your hard drive. Click the Open toolbar button (folder icon), and select directory.nql from the Tutorials\ch01 folder. At this point, the script in Listing 1.4 should be in your code window, either because you entered it by hand or because you opened the script from the companion CD. You are now ready to run the script.
Step 3: Run the Directory Script Now, take a deep breath and run the script. You can do this by selecting Build, Run from the menu, clicking the Run toolbar button, or pressing F5. Almost immediately, a
71328_Pman_CH01I
12/14/01 1:47 PM
Page 13
Presenting Network Query Language (NQL)
//directory - creates a Web page that shows the contents of a disk directory string path = "c:\\" int size = length(path) path = path & "*.*" if !dir(path) { end } create "directory.htm" write write write write
"Directory of {path}" "" "Directory: {path}" ""
while nextline(file) { file = mid(file, size+1) write "" file " | " files = files+1 if files>=4 { write "
" files = 0 } } write "
" write "" close opendoc "directory.htm" end
Listing 1.4 Directory script.
Web page should open up on the desktop that shows a directory of the files in c:\. If this does not happen, check the following: 1. Make sure you have a c: drive. If you don’t, change the path in the script. 2. Make sure there are files in the c:\ root directory. If there aren’t, change the path in the script.
13
71328_Pman_CH01I
14
12/14/01 1:47 PM
Page 14
Network Query Language
3. Ensure that you are running directory.nql from a disk directory that you can write to. If not, copy the script to a different location, such as your primary hard drive. 4. Ensure that you have a default application for displaying .htm files (most systems assign a Web browser for this purpose). 5. Check the NQL client’s Errors tab for error messages. At this point you should have seen the directory script run, generating a Web page that lists the files in a disk directory. Although we haven’t discussed how it works yet, you’ve seen the results of an NQL script first-hand, in this case exercising NQL’s abilities to read disk directories, generate Web pages, and open files on the desktop. In the next step, we’ll dissect the script and explain exactly how it works.
Step 4: Understand the Directory Script We now want to make sure we understand every part of the directory script. The first line is a comment line. //directory - creates a Web page that shows the contents of a disk directory
Next, a variable named path is declared and initialized. The word string indicates that path is a string variable. The path is set to c:\, the directory to be displayed in the Web page. string path = "c:\\"
A second variable named size is now declared and initialized. The data type is integer, and the value is the length of the path string. The variable size will be used to separate the filename from the path prefix later in the script. int size = length(path)
The path is appended with *.* so that it is now a full wildcard directory specification of c:\*.*. path = path & "*.*"
A directory of the path is requested using the dir function. If a directory cannot be obtained, dir returns false and the script ends. If the directory is obtained, it is stored on the stack as a list of filenames separated by newlines. if !dir(path) { end }
It is now time to create the Web page and write some initial HTML to it. The create statement creates a new file and opens it, overriding any previous file of the same
71328_Pman_CH01I
12/14/01 1:47 PM
Page 15
Presenting Network Query Language (NQL)
name. We call the Web page directory.htm. The write statements output some initial HTML, ending in the beginnings of a table. create "directory.htm" write write write write
"Directory of {path}" "" "Directory: {path}" ""
Now to loop through the filenames returned by the dir function earlier. A while loop uses nextline to get the next line from the data on the stack. The loop runs as long as there are files left to process, leaving the current file to work with in the variable named file. while nextline(file) {
Within the loop, the filename is reduced to eliminate the path (drive and folder) portion, using the mid function and the size variable calculated earlier. The file name is then written out as an HTML table element. If more than four files across have been written, additional HTML is written out to move to the next table row. file = mid(file, size+1) write "" file " | " files = files+1 if files>=4 { write "
" files = 0 } }
Once all of the files have been written to the HTML, the table needs to be finished and the final HTML suffix code needs to be output. More write statements take care of this. write "
" write ""
The HTML file is now finished and can be closed with close. close
Lastly, we want to open the newly created Web page on the desktop. The opendoc statement accomplishes this. opendoc "directory.htm"
15
71328_Pman_CH01I
16
12/14/01 1:47 PM
Page 16
Network Query Language
An end statement terminates the script. end
At this point, you’ve not only seen an NQL script in action, you’ve also had a look under the hood as well. The remaining chapters of this book go into more detail about the families of NQL statements and functions.
Further Exercises You could amend this example in a number of ways. Once you’ve learned more about NQL from the chapters that follow, you may want to come back to this example and try your hand at extending it. Here are some interesting modifications that can be made: ■■
Show different types of files in different colors. For example, .doc files in blue and .xls files in green.
■■
Show more information about each file than just its name, such as the size of the file.
■■
For text files, display an excerpt from the file.
Chapter Summary Network Query Language is oriented toward the development of connected applications such as bots, agents, spiders, middleware, Web applications, and mobile applications. The design philosophies behind NQL yield power, clarity, and rapid development while retaining familiarity to programmers and permitting extensibility. NQL contains over 500 building blocks that fall into four main categories: communications, data conversion, automation/distributed processing, and intelligent behavior. Powerful scripts can be created quickly from just a handful of these building blocks. NQL features role independence, which means it can be put to use anywhere it is needed. Scripts can run on the desktop, on servers, on Web servers, and as components. Although complete applications can be developed in NQL, it is also possible to combine NQL with other languages. You’ve had your first look at NQL. Hopefully you’ve seen a lot to get excited about. The chapters that follow explore the language’s rules and capabilities in detail, with plenty of examples along the way.
71328_Pman_CH02I
12/13/01 5:12 PM
Page 17
CHAPTER
2 Developing in NQL
Working effectively in a programming language involves more than the language itself. Various processes must be mastered, including entering and revising code, running programs, debugging programs, and deploying programs. The NQL development system includes a graphical development environment with an integrated debugger. This chapter describes the development environment and the procedures for writing programs, testing them, and deploying them. In the tutorial at the end of the chapter you will enter, run, debug, revise, save, and deploy an NQL script that creates pie charts.
The Development Environment The NQL development environment is neither as primitive as Notepad nor as sophisticated as development tools that have been around for many years. What you’ll find is a reasonable code editor with the primary features a developer needs. Of course, you’re free to use another development environment if you choose. Since NQL scripts are just text files, various programming editors and text editors can be used to write and modify NQL scripts. Most likely, though, you’ll want to use NQL’s development environment for the simple reasons that you can run and debug your scripts from the same environment in which you write them, and have direct access to the integrated documentation.
17
71328_Pman_CH02I
18
12/13/01 5:12 PM
Page 18
Network Query Language
Depending on your operating system, the NQL development environment may be launched in different ways. It is normally referred to as the NQL client. Under Microsoft Windows, the NQL client can be accessed from both a desktop icon and the Start Menu. Clicking on a .nql file will also cause it to open in the NQL client. Figure 2.1 shows the NQL development environment.
Capabilities First and foremost, the development environment lets you enter programs, save them, load them, and revise them. It also lets you run them and debug them. The full set of capabilities provided by the development environment is listed below. Coding. Entering and editing code. Opening scripts. Loading existing scripts from disk into the editor. Saving scripts. Saving code from the editor to disk. Foreground execution. Running scripts in the primary thread (foreground). Background execution. Running scripts in worker threads (background). Debugging scripts. Single-stepping scripts through the debugger. Halting execution. Stopping a running script. Searching. Finding and replacing text in scripts.
Figure 2.1 The NQL development environment.
71328_Pman_CH02I
12/13/01 5:12 PM
Page 19
Developing in NQL
Supplying input. Entering input data to scripts in XML or other formats. Viewing output. Viewing output data from scripts in XML or other formats. Reviewing execution. Viewing the execution log after a script has run. Reviewing errors. Viewing the error log after a script has run. Bot generation. Compiling a script into a desktop .bot file. Executable file generation. Compiling a script into a desktop .exe file. Printing. Printing scripts. Authorization. Viewing or updating license information. Documentation. Displaying the NQL online documentation. Formatting. Formatting code. Reporting problems. Submitting technical support inquiries. Updating. Checking for updated software. Scheduling. Registering a script for execution at a specific date and time.
The User Interface Familiarity with the development environment’s user interface is an important first step in becoming comfortable with NQL. The main screen of the development environment includes a menu, toolbars, an editing area, and a series of tabbed windows at the bottom of the screen. The menu includes File, Edit, View, Format, Build, Tools, and Help main topics. The toolbars provide easy access to the most commonly used menu items. The editing area is the dominant part of the main window, where code is entered, viewed, and revised. This area is formatted in a monospaced Courier 10 font by default, but this can be changed in the options settings. Like most editors, text entered is normally inserted. By pressing the Insert key, you can toggle between text that inserts and text that overwrites. To the right of the code window is a reference window for looking at topical families of NQL statements and functions. Double-click on an entry to insert NQL statements into your code. The tabbed areas at the bottom of the window are labeled Output, Error Log, Execution Log, Find in Files, and Help. The Output tab shows script output. As a script runs, it may produce output in XML or other formats. After a script completes, any output produced by it will be displayed in the Output tab. By clicking on the Output tab, you can view this output or copy it to the clipboard. The Error Log tab lists any errors that occurred during script execution. If you click on an error in the error log, you will be taken to the source code line where the error is.
19
71328_Pman_CH02I
20
12/13/01 5:12 PM
Page 20
Network Query Language
The Execution Log tab lists a complete summary of the script execution. The execution log can be turned on, turned off, or routed to a file rather than memory. You probably don’t want the execution log on during production use of your scripts, but it certainly is helpful when you are initially testing and debugging them. You can turn the Execution log on or off from the Tools, Options menu item. The Find in Files tab is used to show the results of the Find in Files menu item, which searches multiple files on disk for a search string. The Help tab is for dynamic help. As you move throughout the code editor, every time you set focus on an NQL keyword in your code, the Help tab becomes topmost and shows you reference information about that statement or function. You can turn this behavior on or off from the Tools, Options menu item.
The Development Process Entering and running a script is easy. At its simplest, one launches the development environment, types in a script, and runs it. Since NQL is a scripting language, there’s no compilation step. Running a script compiles and executes it at the same time. This is similar to how other scripting languages such as Active Server Pages or Perl work.
Entering a New Script To enter a new script, simply launch the NQL development environment. If the development environment is already loaded, a new script can be started by selecting File, New from the menu; clicking the New toolbar button; or entering Ctrl+N. The code editing area blanks, ready for you to enter your script. Once a script is entered, you will probably want to save it and try it out.
Saving a Script to Disk After entering a script, it can be saved to disk by selecting File, Save from the menu; clicking the Save toolbar button; or entering Ctrl+S. There are two variations of the Save command: ■■
File, Save saves the current document. There is no prompting for the script name if it is already known. If the document is new, this command is the same as File, Save As.
■■
File, Save As always prompts for a directory and script name.
NQL scripts are always saved with a file type of nql.
Loading a Script from Disk An existing script may be loaded into the code editor by selecting File, Open from the menu; clicking the Open toolbar button; or entering Ctrl+O. A dialog prompts for the
71328_Pman_CH02I
12/13/01 5:12 PM
Page 21
Developing in NQL
directory and script file name to open. The script opens in the code editor, where it may be viewed or revised.
Executing a Script A script in the editor can be executed in several different ways. The standard way to execute scripts is in the foreground. Other ways to run scripts are in the background or through the debugger. Initially, NQL displays a run dialog each time you run a script, as shown in Figure 2.2. This dialog may be turned off by clearing the Show this dialog each time a script is run check box. The run dialog can be recalled when running a script through the debugger.
Running a Script in the Foreground To run a script in the foreground, select File, Run from the menu; click the Run toolbar button; or enter F5. The script begins execution and an hourglass (or your operating system’s equivalent) display. The development environment displays a message when the script completes. If you want to halt the script prematurely, you may select File, Cancel All Scripts or click the Stop toolbar button. After a script completes running, there may be updated information in the Output, Error Log, and/or Execution Log tabs.
Running a Script in the Background Running a script in a background thread allows you to continue working in the editor while it runs. To run a script in the background, select File, Run in Background Thread
Figure 2.2 The run dialog.
21
71328_Pman_CH02I
22
12/13/01 5:12 PM
Page 22
Network Query Language
from the menu; click the Run in Background toolbar button; or enter F6. The script begins execution, but you are free to enter and run scripts. The development environment displays a message when the script completes. If you want to halt the script prematurely, you may select File, Cancel All Scripts or click the Cancel All Scripts toolbar button. After a script completes running in the background, there may be updated information in the Output, Error Log, and/or Execution Log tabs.
Running a Script in the Debugger To run a script in the debugger, select File, Trace (Single Step) from the menu; click the Trace run toolbar button; or enter Shift+F5. The script begins execution and an hourglass (or your operating system’s equivalent) display. The development environment displays a message when the script completes. If you want to halt the script prematurely, you may select File, Cancel All Scripts or click the Stop toolbar button. After a debugging session completes, there may be updated information in the Output, Error Log, and/or Execution Log tabs.
The Debugger The debugger allows you to trace through scripts a line at a time, examining variables and other internals as execution progresses. The debugger displays a debug console dialog each time it is about to execute a statement in the script, shown in Figure 2.3. This dialog is the control panel for the debugging session. Information on the debug console includes the following: ■■
The current location in the script
■■
The current success/failure condition
■■
The next statement to be executed
■■
The number of errors
■■
The contents of all defined variables
■■
The contents of the stack
Debug Commands From the debugging console, the following command buttons are available: Step. Execute the next statement, then redisplay the debug console. The Enter key is mapped to this button by default, so by repetitively pressing Enter you can step through your script one statement at a time. Skip. Pass by the next statement without executing it.
71328_Pman_CH02I
12/13/01 5:12 PM
Page 23
Developing in NQL
Figure 2.3 The debug console.
Run. Run the remainder of the script normally, without the debug console. Halt. Terminate the script and end the debugging session. Input. View the input stream, if any. Output. View the output stream, if any.
Debug Statements Some statements in NQL are designed to help debugging. The debugging-related statements are listed below. ■■
The show statement displays a message on the screen.
■■
The dump statement shows the contents of the stack on the screen.
■■
The dumpvars statement shows the names and contents of all variables on the screen.
■■
The breakpoint statement returns control to the debugger.
23
71328_Pman_CH02I
24
12/13/01 5:12 PM
Page 24
Network Query Language
Compiling NQL Scripts Although it is not necessary to explicitly compile an NQL script, there may be times when you want to deploy an NQL-powered solution without placing the source code in plain view. With most scripting languages this is not possible, but NQL provides two methods for distributing programs without putting the source code in plain view. The NQL client can compile NQL scripts in two ways, .bot files and .exe files.
.bot Files NQL scripts can be compiled into an intermediate form known as a .bot file. A .bot file allows you to place an NQL program in compiled form on another computer without the source code. Creating a .bot file is easy. From the development environment, select Tools, Make Bot File. A file with the same name as your script and a type of bot will be created. The .bot file will run on any system that has the NQL runtime system installed.
.exe Files Under Microsoft Windows, a desktop .exe file can be generated from an NQL script. An .exe file allows you to deliver an NQL program in the form of a Windows standard executable file. Executable files are visible on the desktop when they run. You can choose from a variety of skins, or appearances. Figure 2.4 shows the default skin. Creating an .exe file is easy. From the development environment, select Tools, Make Agent EXE. A file with the same name as your script and a type of exe will be created. The .exe file will run on any Windows system that has the NQL runtime system installed.
Deploying NQL Scripts Once you’ve created an NQL script and have tested it, you will need to decide how to deploy it. NQL scripts can be run from many different contexts, including the following:
Figure 2.4 Desktop .exe appearance.
71328_Pman_CH02I
12/13/01 5:12 PM
Page 25
Developing in NQL ■■
As a manually-launched desktop application
■■
As a scheduled application
■■
As a server application
■■
As a Web application
■■
As a component
Manually-Launched Applications To manually launch an NQL application, place the .nql script file on the target computer. Under Windows, the script is run by right-clicking the .nql file and selecting Run. You can also create Windows desktop shortcuts to NQL scripts just as you can to any file or program. You can also generate a .bot or .exe file in place of the .nql file. To execute a .bot file, right-click it and select Run. A generated .exe is launched like any other application, through a desktop icon or the Start menu.
Scheduled Applications The NQL development system includes NQL Agent, a scheduling agent for putting script execution on a timer. The scheduler launches scripts at pre-specified times. On Windows, NQL Agent is launched by selecting Programs, NQL Network Query Language, NQL Agent from the Start Menu. NQL Agent shows up as an alarm clock icon in the system tray (bottom right) area of the desktop. Double-clicking the icon makes a scheduler window visible on the desktop, shown in Figure 2.5. Scripts can be scheduled by date and time in NQL Agent. They can also be run manually. Scheduled scripts can be repeated at regular intervals. For example, you might schedule a script that performs backups to run at midnight and repeat every 24 hours.
Figure 2.5 NQL Agent.
25
71328_Pman_CH02I
26
12/13/01 5:12 PM
Page 26
Network Query Language
Server Applications NQL scripts can be run on servers, either because they respond to clients or because they perform organization-wide services. Server NQL applications can be launched manually, set up as NT services, or scheduled.
Web Applications NQL scripts can be run as CGI applications, in the same way that languages like Perl, ASP, and JSP scripts can. When NQL is installed on a Web server, it offers to configure the Web server to recognize .nql files in a Web address as NQL scripts to execute. To deploy an NQL script on a Web server, simply place the .nql file(s) in a Web directory. Chapters 28 and 29 describe the use of NQL on Web servers in detail.
Tutorial: Pie To apply what we’ve learned in this chapter, this tutorial will have you enter code in the development environment, debug and correct the program, and deploy it on the desktop. The program will create a pie chart such as the one shown in Figure 2.6. The focus of this tutorial will be the process you go through to develop in NQL, not the mechanics of how this particular script works (if you want to know that, refer to Chapter 21, which discusses graphics). There are six steps in this tutorial: 1. Launch the NQL development environment. 2. Enter the pie script.
Figure 2.6 Pie chart.
71328_Pman_CH02I
12/13/01 5:12 PM
Page 27
Developing in NQL
3. Run the pie script. 4. Revise the script to correct errors. 5. Save the script. 6. Generate a desktop agent. When you are finished with this tutorial, you will have seen how to do the following in NQL: ■■
Enter a script by hand in the development environment.
■■
Run a script.
■■
Correct a faulty script.
■■
Save a script.
■■
Deploy a script.
Step 1: Launch the NQL Development Environment Launch the NQL development environment. On a Windows system, this can be accomplished by clicking on the NQL Client desktop icon, or by selecting Program Files, Network Query Language, NQL Client from the Start Menu. On other platforms, you should have a desktop icon and/or command-line method of launching the NQL Client. At this point, you should have the NQL development environment active on your desktop, with an empty code window. Now you’re ready to enter the tutorial script.
Step 2: Enter the Pie Script In the NQL development environment, enter the script shown in Listing 2.1. You do this by clicking in the code editor window to set focus, then typing in the script. Even if you prefer copying sample scripts from the companion CD, you should enter the script by hand in this case since the purpose of this tutorial is to acquaint you with the development environment. At this point, the script in Listing 2.1 should be in your code window, either because you entered it by hand or because you opened the script from the companion CD. You are now ready to run the script.
Step 3: Run the Pie Script Now, take a deep breath and run the script. You can do this by selecting Build, Run from the menu, clicking the Run toolbar button, or pressing F5. If all is well with the script, a pie chart will be created and opened on the desktop. However, that does not happen here. If you entered the script as described in the previous step, you receive an error message instead from the compiler. That’s because we
27
71328_Pman_CH02I
28
12/13/01 5:12 PM
Page 28
Network Query Language
draw a pie chart createimage 200, 200 drawpie 0, 0, 100 drawpieslice 25, "#ff0000" drawpieslice 60, "#00ff00" drawpieslice 15, "#0000ff" saveimage "pie.jpg" closeimage opendoc "pie.jpg"
Listing 2.1 Pie script.
deliberately gave you a script with some faults, so that you can get some experience in correcting errors. At this point, you should have a not-quite-perfect script that is crying out for correction.
Step 4: Revise the Script to Correct Errors The first problem with the script, pointed out by the compiler, is that something is wrong with the first line. draw a pie chart
This is clearly a comment, but it is missing the initial characters for a comment. In NQL, // or ; begins a comment. Correct the code in the editor by following these steps: 1. Click or use the arrow keys so that the text cursor is at the beginning of the first line of the script. 2. Enter // so that the first line of the script now reads as follows: //draw a pie chart
Now run the script again, by pressing F5. A pie chart will open up on the desktop, as shown in Figure 2.7. There’s good news and bad news at this point. The compiler error on Line 1 no longer appears, which is good. But the pie chart is not painting the pie slices in colors, which is bad. We have another error to fix.
71328_Pman_CH02I
12/13/01 5:12 PM
Page 29
Developing in NQL
Figure 2.7 Faulty pie chart.
The problem here is a missing statement. We need to add a statement to the script that causes it to draw shapes that are filled, rather than hollow. To make this change, move to the blank line after createimage in the script, and add this line: drawstyle "solid"
The complete script should now look like Listing 2.2. Now, run the script once again. This time, the pie chart displays as expected.
//draw a pie chart createimage 200, 200 drawstyle "solid" drawpie 0, 0, 100 drawpieslice 25, "#ff0000" drawpieslice 60, "#00ff00" drawpieslice 15, "#0000ff" saveimage "pie.jpg" closeimage opendoc "pie.jpg"
Listing 2.2 Corrected script.
29
71328_Pman_CH02I
30
12/13/01 5:12 PM
Page 30
Network Query Language
At this point, you should have a properly working script that generates a threecolor pie chart.
Step 5: Save the Script Now that we have a working script, let’s be sure to save it. Do so with these steps: 1. Select File, Save from the menu (or, click the Save toolbar button or press Ctrl+S). 2. In the Save As dialog window that appears, save the script as pie.nql in a disk directory (such as c:\). At this point, your working script should be saved on disk as pie.nql.
Step 6: Generate a Desktop Agent Lastly, we want to deploy the script on the desktop so it is easy to run at any time. We’ll do this by generating an .exe file for the desktop. Here are the steps: 1. From the development environment, select Tools, Make Agent EXE from the menu. The Make Agent EXE dialog window appears. 2. If you wish, make changes to the options on the dialog window, for example to customize the appearance of the desktop agent. 3. Click OK. 4. A pie.exe file is created in the same directory where you saved pie.nql. 5. Create a desktop shortcut to the pie.exe file. Now try running your agent by double-clicking its desktop icon. It should briefly appear as it runs, leaving a pie chart open on the desktop. At this point, you should have successfully created and corrected an NQL script, created a desktop .exe file from it, and deployed it on the desktop.
Further Exercises You could amend this example in a number of ways. Once you’ve learned more about NQL from the chapters that follow, you may want to come back to this example and try your hand at extending it. Here are some interesting modifications that can be made: ■■
Drive the pie chart with real data instead of fixed values. For example, the pie chart could reflect values read from a disk file or a database.
■■
Give the graphic that is generated a title and captions for the pie slices.
■■
Put the agent on a schedule, so that it runs at a pre-determined date and time.
71328_Pman_CH02I
12/13/01 5:12 PM
Page 31
Developing in NQL
Chapter Summary The NQL Client is the development environment for Network Query Language. As an editor, it allows you to enter, revise, load, and save code as script files. You can also run and debug scripts. Online help is integrated into the development environment. The debugger allows you to single-step through scripts, examining stack data, variables, and other indicators as a script proceeds. The NQL client can generate .exe files from NQL scripts, allowing programs to be self-contained as .exe files with a desktop console appearance. The client can also generate .bot files from scripts, which are binary forms of scripts that avoid the need to distribute source code to end-user systems. NQL scripts can be deployed in numerous ways, including manual execution, scheduled execution, installation on a server, part of a Web site, or as a component called by other programming languages. You now know the basics of the development process. You can move forward with confidence, trying things out in NQL as you learn more about the language.
31
71328_Pman_CH02I
12/13/01 5:12 PM
Page 32
71328_Pman_CH03I
12/13/01 5:10 PM
Page 33
CHAPTER
3 Language Fundamentals
Like any other programming language, NQL has basic rules of the road. This chapter covers the rules of syntax and describes statements, functions, literals, variables, expressions, operators, and comments. There is also discussion of two central elements of NQL, the stack and the success/failure code. The tutorial at the end of the chapter obtains the current time from an atomic clock and sets your computer’s time.
Statements As in most languages, the fundamental unit of code in NQL is the statement. There are three kinds of statements in NQL: Standard statements, assignment statements, and function calls. Statements normally appear on a line by themselves. The following three-line script contains exactly three statements. string Name Name = "Gary Botka" show Name
Standard statements are made by specifying keywords that are not case-sensitive. Some statement keywords are followed by parameters; if so, multiple parameters are separated by commas. Parameters can be terms (variables, literals, or function calls) or
33
71328_Pman_CH03I
34
12/13/01 5:10 PM
Page 34
Network Query Language
expressions combining terms and operators. The following statements are all standard statements, some of which have a parameter or two: Line 1 has no parameters, line 2 has one parameter, line 3 has three parameters, and line 4 has no parameters. In this case, all of the parameters are string literals. openmail messageattachment "pricelist.xls" sendmessage "New Price List", "[email protected]", "Latest price list." closemail
Assignment statements evaluate an expression and assign the result to a variable. They are formulated as a variable name, an equals sign, and an expression. The following statements are examples of assignment statements. x = 5 total = subtotal + tax + freight FirstName = left(Name, Find(Name, " ")-1)
Function call statements are calls to functions you define. You can call functions within expressions, but you can also call a function on a line by itself as if it were a statement. The following statements don’t exist in NQL natively, but if you had defined your own functions with these names, this is how you could call them. The first function, ObtainSearchCriteria, takes no parameters. The second function, SubmitSearch, takes two parameters. ObtainSearchCriteria SubmitSearch "Google", sTerms SubmitSearch "Yahoo", sTerms SubmitSearch "Excite", sTerms SubmitSearch "AltaVista", sTerms
Continuation Lines Like Visual Basic, NQL statements are one-per-line; as with C, C++, and Java, there is no terminating semicolon required at the end of each statement. What if a statement is too long to fit on a single line? If a statement ends in an operator or a comma, NQL realizes it should continue on to the next line. The following code shows several statements that continue on to multiple lines. TimeString = sDayOfWeek & ", " & sMonthName & " " & sDayOfMonth & ", " & sYear & " " & sHours & ":" & sMinutes & ":" y = x + x/1 + x/2 + x/3 + x/4 + x/5 + x/6 + x/7 + x/8 + x/9 show CurrentWeekSalesDomestic, CurrentWeekSalesForeign, CurrentMonthSalesDomestic, CurrentMonthSalesForiegn, CurrentQuarterSalesDomestic, CurrentQuarterSalesForeign
It is important to understand that none of the preceding three statements would be accepted by NQL if it were not for the dangling operator or comma at the end of each
71328_Pman_CH03I
12/13/01 5:10 PM
Page 35
Language Fundamentals
line. The first statement assembles a string, and the final character on the line is the concatenation operator (&), which cues NQL to include the next line as part of the statement. The second statement performs an arithmetic computation, and the final element of the line is the addition operator (+), which indicates that the next line is also part of the statement. The third statement is made up of three lines, which NQL realizes because the first two lines end in commas.
Multiple Statements per Line Although NQL statements are normally phrased one-per-line, it is possible to combine them. For example, consider the following code, which you might wish to consolidate into fewer lines. if sSort1 > sSort2 { sTemp = sName1 sName1 = sName2 sName2 = sTemp }
The colon (:) allows multiple statements to be strung along on the same line. The preceding code can now be rewritten in a single line. if sSort1 > sSort2 { sTemp = sName1 : sName1 = sName2 : sName2 = sTemp }
Code Blocks Statements can be grouped into sections called code blocks, surrounded by curly brace characters ({ }), which are executed or skipped as a complete unit. The following code shows the use of a code block with an if statement. If the condition is true (that is, if count is greater than or equal to 500), the statements in the code block execute. If the condition is false, the entire code block is skipped. if count >= 500 { show "The count has reached 500" close end }
The if, then, else, while, for, thread, switch, and every statements all use code blocks. Code blocks can be nested, as the following code illustrates. Here, an if statement occurs within a while statement within a for block. for f = 1, files {
35
71328_Pman_CH03I
36
12/13/01 5:10 PM
Page 36
Network Query Language open filename[f] while read(line) { if line != "" { show line } } close }
One difference between C, C++, and Java is that code blocks are not optional. In the preceding program, you might be tempted to leave out the curly braces for the show line statement, since there is just one statement following the if statement. This is not legal, however. In NQL, statements like if, for, and while are always followed by code blocks.
Expressions Any statement parameter may be an expression, and the right side of any assignment statement may be an expression. An expression is one or more terms, where a term is a variable, a number, a string literal, or a function call. Multiple terms in an expression are combined with operators. Chapter 5, “Expressions, Operators, and Functions,” describes expressions and operators in detail. Each statement in the following code contains an expression. OrderSubtotal = 0.00 OrderDate = date() & " " & time() OrderSubtotal = OrderTotal+ItemPrice("PDC-001") OrderSubtotal = OrderTotal+ItemPrice("PDC-300") OrderSubtotal = OrderTotal+ItemPrice("PDC-018") OrderTax = OrderSubtotal * TaxRate OrderTotal = OrderSubtotal + OrderTax CustomerCode = upper(left(CustID, 2))
Functions One of the terms that may appear in an expression is a function. As mentioned earlier, functions can be viewed as statements or as part of an expression. Functions accept a parameter list (zero or more terms), perform a task, or return a result. NQL has about 80 built-in functions, and you may define your own custom functions. When calling a function in an expression, the function name is followed by parentheses. If there are parameters, they appear within the parentheses, comma-separated. The following code calls a getpage function to retrieve a Web page and a clip function to return a section of the page.
71328_Pman_CH03I
12/13/01 5:10 PM
Page 37
Language Fundamentals Page = getpage(URL) Body = clip(Page, " 0 { SubtractHours = 7 } else { continues
Listing 3.2 Time script.
51
71328_Pman_CH03I
52
12/13/01 5:10 PM
Page 52
Network Query Language
SubtractHours = 8 } //convert the hour to our local time (PST) push Time left 2 pop Hour push Time mid 3 pop Time if Hour >= SubtractHours { Hour = Hour - SubtractHours } else { Hour = 24 - (SubtractHours - Hour) } Time = Hour & Time //set the local computer time settime Time //acknowledge that the time has been set show "The computer time has been set to " Time
Listing 3.2 Time script (continued).
If you prefer, you may copy time.nql from the companion CD. If you have installed the companion CD on your system, you will have all of the book’s tutorial materials in a \Tutorials directory on your hard drive. Click the Open toolbar button (folder icon), and select time.nql from the Tutorials\ch03 folder. At this point, the script in Listing 3.2 should be in your code window, either because you entered it by hand or because you opened the script from the companion CD. You are now ready to run the script.
Step 3: Run the Time Script Now run the script. You can do this by selecting Build, Run from the menu, clicking the Run toolbar button, or pressing F5. If all goes well, a few seconds will pass and the script will display the message, The computer time has been set to xx:xx. Your computer’s date and time will have been set accordingly. If this does not happen, check the following:
71328_Pman_CH03I
12/13/01 5:10 PM
Page 53
Language Fundamentals ■■
Make sure you have entered the script correctly.
■■
Make sure you have a working Internet connection.
■■
Check the NQL client’s Errors tab for error messages.
At this point you should have seen the time script run, obtaining an accurate time from an atomic clock and setting your computer’s time to match. In the next step, we’ll dissect the script and explain exactly how it works so that you appreciate how the various elements in NQL interacted to make this happen.
Step 4: Understand the Time Script We now want to make sure we understand every part of the time script. The first line is a comment line. //time - set the time from the U.S. Naval Observatory
The next few lines retrieve the time from the Naval Observatory’s Web server. After a comment line, there is a get statement which accesses a Web address. If get is successful, a success condition results and the Web server response is pushed onto the stack. If get fails, a failure condition results and the else code block executes, displaying an error message and ending the script. //retrieve the time string from the data source get "http://132.163.135.130:14/" else { show "Unable to access data source, cannot set the time" end }
The time string that comes back from the server is in an odd format. To make it easier to work with the time string, the next section of the script changes the time string a bit. Remember, the time string—the response from the Web server—is on the stack at this point. A trim statement removes leading or trailing spaces from the time string. It is then popped off of the stack into a variable named sTime. A dummy character is inserted at the beginning of sTime, and the resultant string is pushed back onto the stack. We still have just one value on the stack, a time string, but it is now in a normalized format that we can process easier. //alter the time string for optimal pattern matching trim pop sTime sTime = '(' & sTime push sTime
53
71328_Pman_CH03I
54
12/13/01 5:10 PM
Page 54
Network Query Language
Now we are ready to interpret the time string. A match statement divides the time string into its component pieces: A Julian date number, a date, the time of day, and a daylight savings time indicator. The match statement does this by comparing its pattern with the time string on the stack, setting variables and the success condition if a match is found. If match can’t make sense of the data, a failure condition results and the script executes the else code block, displaying an error message and ending. //parse the time string into its component pieces match '({JulianDate} {Date} {Time} {DST} ' else { show "Invalid or unexpected data, cannot set the time" end }
The time needs to be converted to local time, which is assumed to be Pacific Standard Time in this script. The first step is to determine the number of hours to subtract from the reported time to come up with local time. The daylight savings time indicator is factored into the computation. //Convert the time to local time (PST). //If daylight savings time, then subtract 7 from the hour to get our time. //Otherwise, subtract 8. if DST > 0 { SubtractHours = 7 } else { SubtractHours = 8 }
Once the variable SubtractHours has been set, the hour needs to be separated from the rest of the time so it can be adjusted. This is done by pushing the time on the stack, keeping just the left two characters, and popping the result off as the variable Hour. The remainder is determined by pushing the time on the stack, discarding the first two characters, and popping the result as Time. //convert the hour to our local time (PST) push Time left 2 pop Hour push Time mid 3 pop Time
71328_Pman_CH03I
12/13/01 5:10 PM
Page 55
Language Fundamentals
We can now subtract SubtractHours from Hour to come up with the right hour of the day. With the adjusted hour, a complete local time can be computed, which is stored in Time. if Hour >= SubtractHours { Hour = Hour - SubtractHours } else { Hour = 24 - (SubtractHours - Hour) } Time = Hour & Time
Now at last the local computer’s time can be set. The settime statement sets the computer date and time from the time string. //set the local computer time settime Time
One final item of business remains. A show statement displays a message window, acknowledging that the time has been set. //acknowledge that the time has been set show "The computer time has been set to " Time
To be sure, there are shorter ways to write this script, but this version serves to illustrate how NQL statements interoperate in a sort of longhand way. At this point, you’ve observed the elements of NQL working together to perform a task. You’ve seen statements, functions, variables, literals, the stack, and the success/condition code unite to retrieve data from a Web site, adjust it for local needs, and use the results.
Further Exercises You could amend this example in a number of ways. Once you’ve learned more about NQL from the chapters that follow, you may want to come back to this example and try your hand at extending it. Here are some interesting modifications that can be made: ■■
Rewrite the time script to be much shorter. Use functions and expressions in place of statements where possible. See if you can get the script to less than half of its original size.
■■
Find a different time source than the one supplied and adapt the script to work with it. You’ll have a different Web address to issue and a different response format to interpret.
55
71328_Pman_CH03I
56
12/13/01 5:10 PM
Page 56
Network Query Language
Chapter Summary There are three kinds of statements in NQL: ■■
Standard statements consists of a keyword followed by parameters.
■■
Assignment statements set a variable to the value of an expression and take the form variable = expression.
■■
Function calls allow user-defined procedures to be treated like statements. They can also be used within expressions.
Some statements are followed by code blocks. ■■
A code block is a group of statements enclosed in curly braces.
■■
The if, then, else, while, for, thread, switch, and every statements are all followed by code blocks.
Any statement’s parameter may be an expression, and the right side of any assignment statement may be an expression. ■■
Expressions are one or more terms joined by operators.
■■
Terms may be literals, variables, or the results of functions. Functions in turn also take parameters which may themselves be expressions.
There are twelve data types in NQL for variables: binary, boolean, currency, datetime, float, fuzzy, html, integer, object, string, unicode, and xml. ■■
Variable declaration can be required or left optional through the use of the declare and autodeclare directives. Non-declared variables are always of type string.
■■
Variables of any data type can be declared as one-dimensional arrays.
■■
NQL automatically converts between data types as needed.
The stack is an integral part of NQL. The stack is a general-purpose last-in, first-out work area that can be used as a temporary workspace. The stack is very useful for recursive processing. Many NQL statements work together through the stack. ■■
The push and pop statements add data to the stack and remove data from the stack, respectively.
The success/failure condition is set by most NQL statements. ■■
The if, then, else, and while statements can respond to the success/failure condition.
There are three types of error handling: errors ignore, errors halt, and errors continue. The default is errors continue. Scripts may include code from other scripts via the include directive. You now know the fundamentals of NQL. Chapter 4, “Flow of Control,” and Chapter 5 will build on that knowledge with explanations of how flow of control, expressions, operators, and functions work in NQL.
71328_Pman_CH04I
12/13/01 5:08 PM
Page 57
CHAPTER
4 Flow of Control
The control statements and structures of a language are your tools for expressing the flow of logic. Network Query Language contains the typical constructs for testing conditions, repeating code while certain conditions are true, looping, and selecting code based on a case value. The language also provides multi-threading capabilities for parallel processing. Other control-related features include spawning new processes and timing out execution after a specified interval. This chapter describes all of the language features that relate to flow of control and parallel execution. The tutorial at the end of the chapter uses multi-threading to check multiple search engines and find the fastest one at the moment.
Control Statements and Functions The NQL statements related to flow of control are enumerated in Table 4.1. There are function versions of many of the statements. The NQL flow-of-control functions are enumerated in Table 4.2. Each of the statements and functions are described individually in the following sections.
57
71328_Pman_CH04I
58
12/13/01 5:08 PM
Page 58
Network Query Language Table 4.1 Control Statements STATEMENT
PARAMETERS
DESCRIPTION
elapsedtime
Returns the script’s (or thread’s) elapsed time.
else
Executes a code block if there is a failure condition.
elseif
[condition]
end
Executes a code block if there is a failure condition and the specified condition is true. Terminates the script.
every
interval
Repeats a code block at regular intervals
for
[start,] end [, increment]
Executes an iteration loop.
result-type function-name
(parameter-list)
Declares a function.
function-name
parameter-list
Calls a function as a statement.
goto
label
Jumps to the specified label.
if
condition
Executes a code block if the condition is true.
isthread
[run-ID]
Checks to see if a spawned thread is running.
isthreadrunning
[run-ID]
Checks to see if a thread is still active.
loop
var, label
Decrements a variable and, if >= 0, jumps to the specified label.
runid share
Returns a thread’s run ID. var-list
then
Shares variables with spawned threads. Executes a code block if there is a success condition.
thread
[run-ID]
Spawns a thread to execute the code block that follows.
threaderrors
[run-ID]
Returns the number of errors a thread has encountered.
threadstatus
[run-ID]
Returns a status phrase for a thread.
71328_Pman_CH04I
12/13/01 5:08 PM
Page 59
Flow of Control Table 4.1 Continued STATEMENT
PARAMETERS
DESCRIPTION
timeout
interval
Sets a timeout interval for the script.
waitallthreads waitthread
Waits for all spawned threads to complete. [run-ID]
Waits for a specific thread to complete.
while while
Executes a code block as long as there is a success condition. Executes a code block as long as the condition is true.
condition
Table 4.2 Control Functions FUNCTION
DESCRIPTION
datetime elapsedtime()
Returns the script’s (or thread’s) elapsed time.
type function invocation(varies)
Calls a user-defined function to return a value.
boolean isthread([run-ID])
Checks to see if a spawned thread is running.
string isthreadrunning([run-ID])
Checks to see if a thread is still active.
int runid()
returns a thread’s run ID.
int threaderrors([run-ID])
Returns the number of errors a thread has encountered.
string threadstatus([run-ID])
Returns a status phrase for a thread.
If, Then, and Else Statements Most languages have conditional action statements, as follows: if condition, then action. Furthermore, many also support the extended version: if condition, then action-1, else action-2. NQL supports these constructs with if, then, else, and elseif statements. The if statement has two forms. The first form checks a condition and executes a code block if the condition is true. if condition { statement(s) }
59
71328_Pman_CH04I
60
12/13/01 5:08 PM
Page 60
Network Query Language
The following code example shows the if statement being used to display a result count only if the result count is greater than zero. if ResultCount>0 { show ResultCount " new records were processed" }
The second form of the if statement tests an expression and sets the NQL success/failure condition. This can be combined with other statements such as then, else, and while to control program flow. if condition
The then statement executes a code block if there is a success condition. Then can be combined with if as well as any other NQL statement that sets the success/failure condition. The following code checks for new mail and executes a code block only if there is new mail. openmail firstunreadmessage then { ...do something with new mail... } closemail
The counterpart to then is else. Else can be combined with if and then for traditional if-then-else logic, as the following code demonstrates. if count = 1 then { show "1 item was located" } else { show count " items were located" }
It is interesting to note that the preceding code functions perfectly well even if the then statement is missing altogether. The reason for this is as follows. As written previously, the if statement sets only the success/failure condition because it is not immediately followed by a code block. The then statement checks the condition and decides whether or not to execute its code block. In the version of the code without a then statement, the program works this way: The if statement both tests a condition and decides whether or not to execute the code block that immediately follows it.
71328_Pman_CH04I
12/13/01 5:08 PM
Page 61
Flow of Control
The fact that then and else are separate statements leads to interesting flexibility in programming. In addition to coupling if-then and if-then-else in the traditional way, statements like then and else can be used all by themselves as a way of testing the results of other statements. For example, the following code uses else to handle a communication failure when retrieving a Web page. get WebAddress else { show "Unable to retrieve web page" }
The elseif statement is, as its name implies, a combination of else and if. Like else, elseif executes a code block if there is a failure condition. Like if, elseif tests an expression that must evaluate to true in order to execute its code block. Both must be true in order for the code block to execute. The following code shows the use of elseif. if x==3 { ... } elseif x==4 { ... } elseif x==5 { ... } else { .. }
Since if, then, else, and elseif are dependent on the success/failure condition, you may be concerned that statements within the code blocks could foil the expected execution. This does not occur because NQL saves and restores the state of the success/ failure condition when entering and leaving code blocks.
Loop Statements There are five types of looping statements in NQL: ■■
The while loop
■■
The for loop
■■
The every loop
61
71328_Pman_CH04I
62
12/13/01 5:08 PM
Page 62
Network Query Language ■■
The goto statements
■■
The loop statement
The types of loops are described in the following sections.
while Like most modern languages, NQL includes a while statement whose purpose is to repeatedly execute a block of code as long as a specified condition is met. There are two syntax forms for while. The first is the form found in most other languages: A condition is specified, and the code block continues to execute as long as the condition is true. while condition { ...statement(s)... }
The second form of while does not state a condition. Instead, the while loop cycles as long as the NQL success/failure condition is success. This form is often useful in NQL programming because it allows the result of the previous statement to be linked to the flow of program control. while { ...statement(s)... }
The while loop may not execute even once, should the specified condition evaluate false from the start. It is also possible for a while loop to continue endlessly, should its specified condition remain true. More typically, a while loop executes a number of times until its condition is no longer met; execution then proceeds with the statement following the while block. The following code sample uses a while loop to find repeatedly all occurrences of news stories from a Web page. get URL while match(Pattern) { output link, headline }
The following code sample accomplishes the same thing, but uses the second form of the while statement. In this case, it is very important that the final statement in the code block, nextmatch, set the success/failure condition. get URL match Pattern while
71328_Pman_CH04I
12/13/01 5:08 PM
Page 63
Flow of Control { output link, headline nextmatch }
You can exit a while loop prematurely with the break statement.
for The NQL for loop resembles the iterative loop feature of many languages, with a starting value, a final value, and an increment. The form of for is shown here: for [starting-value,] ending-value [, increment] { ...statement(s)... }
The starting value, ending value, and increment are all expressions that are evaluated numerically as integers. The following code uses a for loop to count to 10. for i = 1, 10, 1 { show i }
If only two parameters are specified in a for statement, the increment is presumed to be 1. If there is only one parameter, both the starting value and the increment are presumed to be 1. Thus, all three versions of for shown are functionally identical. for pos = 1, Len, 1 for pos = 1, Len for pos = Len
You can exit a for loop prematurely with the break statement.
every To repeat a code block at regular intervals, the every statement is used. This parameter is a time string that specifies the interval, such as “1:00” for one minute. every interval { ...statement(s)... }
The code block executes, then the script sleeps until the next execution interval. The sleep time subtracts the time it took the code block to execute from the specified interval, so that the code block’s repetition is precise and predictable.
63
71328_Pman_CH04I
64
12/13/01 5:08 PM
Page 64
Network Query Language
The following code sample uses an every loop to check for new mail. every "15:00" { if firstunreadmessage() { ...alert user about new mail... } }
Every loops never exit of their own accord, repeating endlessly. You can break out of an every block with the break statement.
goto The goto statement transfers control to another point in the program. The parameter is a label name. goto label
The following code uses goto to jump when a Web page cannot be accessed. get URL else { goto CommFailure } ... end CommFailure: show "Error: unable to access web site" end
loop The loop statement decrements a variable and jumps to a label if the variable is greater than 0. It is very much like a decrement-and-branch-greater-than-zero machine instruction. The parameters are a variable and a label. loop variable, label
The variable is decremented by one and, if still positive, execution jumps to the specified label. The following code shows the use of loop. items = 5 ... ListProduct:
71328_Pman_CH04I
12/13/01 5:08 PM
Page 65
Flow of Control ... loop items, ListProduct
You can achieve the same functionality as loop with the more conventional for statement.
Functions Network Query Language supports user-defined functions as well as simple callreturn subroutines. There is also a special kind of function known as a condition function that is used in fuzzy logic, described in Chapter 23, “Fuzzy Logic.”
User-defined Functions Functions perform a task, like statements, but they also return a result value, allowing them to be used in expressions. There are two kinds of functions in NQL: Built-in functions and user-defined functions. The built-in functions are described in Chapter 5, “Expressions, Operators, and Functions.” User-defined functions are expressed with a function declaration, which takes the following form: result-type function-name(parameter-list) { ...function-body... }
The result-type is any NQL variable type (binary, boolean, currency, datetime, float, fuzzy, html, int, object, string, unicode, or xml), or the keyword void which indicates that the function does not return a result at all. The parameter-list is zero, one, or more parameters that the function uses. Each parameter specifies a type and a name, such as int x. If there are multiple parameters, they are separated by commas. The following function has three parameters. float Total(float SubTotal, float TaxRate, float Shipping) { Total = Subtotal + (SubTotal*TaxRate)+Shipping }
The function result is indicated by setting the function name to a result value (Total in the preceding code). User-defined functions can be invoked by treating them as statements or by using them in expressions. To invoke a function as a statement, use the function name as if it were a statement keyword, following it with any parameters. The following statement invokes the function BackupDatabases by treating it as a statement. BackupDatabases BackupDate, BackupMedia
65
71328_Pman_CH04I
66
12/13/01 5:08 PM
Page 66
Network Query Language
The same function could be used in an expression, but would require specification of parentheses around the parameters: if BackupDatabases(BackupDate, BackupMedia)
To invoke user-defined functions in expressions, specify the function name and any parameters enclosed in parentheses (the parentheses must be present, even if there are no parameters). The function may be specified adjacent to operators, just as variables and constants are. The following assignment statement invokes two functions, CustomerName and CustomerAddress, using them within an expression. ShipLabelText = CustomerName(CustNo) & "\n" & CustomerAddress(CustNo)
User-defined functions of type void cannot be used in expressions, because they do not return a result.
Subroutines NQL has a simple subroutine capability similar to the call-return or gosub-return feature found in may versions of Basic. The call statement invokes a subroutine, specifying a label. call label
The current location is remembered, and execution switches to the specified label. The code at the label executes a return statement to return control to the original point in the script. return
The following code shows the use of call and return, and contains two subroutines. call GetName call MakeCustID show "{First}, your customer ID number is: {CustID}" end GetName: first = prompt("First Name", "Please enter your first name") last = prompt("Last Name", "Please enter your last name") return MakeCustID: CustID = left(upper(last), 4) & left(upper(first),1) return
For more sophisticated procedures, consider the use of user-defined functions rather than subroutines.
71328_Pman_CH04I
12/13/01 5:08 PM
Page 67
Flow of Control
switch-case Like C, C++, and Java, NQL contains a switch statement whose purpose is to branch to one of several code handlers based on a value. The switch statement has one parameter, a value to branch on, and is followed by a code block. switch value { ...sections... }
Within the switch block, one or more sections must exist to handle different cases of the value. The sections begin with the word case or the word default. The case keyword is followed by a numeric constant or a string constant and a colon. The default keyword has no parameters and is followed by a colon. case value1: ... break case value2: ... break ... case valueN: ... break default: ... break
After a case line, specify statements to handle the value. End with a break statement, which is necessary to prevent falling through to the next case handler. The default line is just like case, but is a catch-all for values not already handled by an earlier case statement. The following code uses a switch statement to implement a simple power function. switch power { case 1: n = x break case 2: n = x*x break case 3: n = x*x*x break case 4:
67
71328_Pman_CH04I
68
12/13/01 5:08 PM
Page 68
Network Query Language n = x*x*x*x break case 5: n = x*x*x*x*x break default: show "unsupported power" n = x break }
The values specified in case statements may be numeric constants or string literals, but they cannot be variables or complex expressions. However, the value specified to switch itself may be any kind of expression.
break The break statement exits a code block. Execution continues after the end of the next code block. You can specify an optional parameter to break, the number of levels of code block to break through. break [levels]
The following code uses break to break out of two loops. for i = 5000 { while i < j { ... break 2 } }
Parallel Processing Many supposedly easy languages eventually let people down because they cannot perform operations in parallel. NQL includes full capabilities for performing tasks in multiple threads of execution. Modern connected applications, which are often distributed in nature, frequently require software to perform multiple tasks concurrently.
Spawning Processes NQL scripts can spawn other NQL scripts to run as separate processes. The run statement spawns a script process and requires a script name as its first parameter. An input stream value and an output stream variable are optional.
71328_Pman_CH04I
12/13/01 5:08 PM
Page 69
Flow of Control run script-file [, input-stream [, output-stream]]
The input-stream parameter, if specified, is a string value that becomes the input stream for the spawned script. If the script you are spawning expects input, provide this parameter. The output-stream parameter, if specified, is a variable that receives the output stream from the spawned script. If you want to capture the output of the spawned script, specify this parameter. The following code sets up an input stream, runs another script, and captures its output stream. string sInput = "Barbecues" string sOutput run "script2.nql", sInput, sOutput show sOutput
The run statement waits for the spawned process to complete before your script continues with execution.
Multi-threading NQL scripts can execute more than one code stream in parallel. This feature is known as multi-threading. Multi-threading can make a startling improvement in execution time. To appreciate the benefits of multi-threading, look at the following code that accesses a Web site five times in a row. The Web site will be accessed, then accessed again, and again, until it has been visited five times in all, sequentially. for n = 5 { get URL }
Figure 4.1 shows the possible timing of this script when accessing a Web site that generally responds in about 1 second. The total time to execute is the sum of each individual access, 4.6 seconds in all. Now contrast the previous code with the version below. Each Web access is a thread block, which allows them to run in parallel without waiting for each other. for n = 5 { thread
1.1 seconds
0.8 seconds
Figure 4.1 Single-thread execution.
1.0 seconds
0.9 seconds
0.8 seconds
69
71328_Pman_CH04I
70
12/13/01 5:08 PM
Page 70
Network Query Language { get URL } }
In the multi-threaded version, the five Web sites are accessed in parallel. Figure 4.2 shows the possible timing of this script. The total time to execute is 1.1 seconds—less than one-fourth the time of the original version. As useful as threads are, you need to be careful not to overdo it. Your operating system, system speed, and available memory place practical limits on the number of threads you can reasonably expect to use at one time.
Spawning Threads A thread block is the language structure for indicating that code is to run in a separate thread from the main program. The format of a thread block is shown below. thread [run-ID] { ...statements... }
A numeric run ID may be specified after the keyword thread, which can be used as an identifier later on to check or act on the thread. If the run ID is omitted, NQL will compute its own run ID for the thread. A thread can determine its run ID with the runid statement or function. The runid statement pushes the thread ID on the stack. The function version of runid returns the thread ID as an integer. runid int runid()
The following statement retrieves and displays the current thread’s run ID. show "This thread's Run ID is " & runid()
1.1 seconds 0.8 seconds 1.0 seconds 0.9 seconds 0.8 seconds Figure 4.2 Multi-threaded execution.
71328_Pman_CH04I
12/13/01 5:08 PM
Page 71
Flow of Control
You can generally expect run IDs to begin with 1 and increment by 1. The primary thread of a script usually has run ID -1. Note that this may not be true for all operating systems.
Terminating Threads Left on their own, threads run to completion and are destroyed when they reach the end of their thread block. If the main thread of a program terminates, it will wait until all spawned threads have also completed before halting script execution. NQL does not provide statements for terminating threads. Threads must complete of their own accord.
Sharing Variables Threads normally run in a separate environment with their own variables and stack, but a parent thread may explicitly share some of its variables with a child thread. The share statement designates one or more variables to be shared between threads. share var-list
The effect of share is that any future spawned threads receive copies of those variables from the parent thread. This sharing is in only one direction, however: The threads cannot alter the values seen by the parent. The following code sets variables, shares them, and then spawns a thread that makes use of them. URL = "www.my-book-site.com" FormData = "type=book&author=King" share URL, FormData thread { post URL, FormData save "response.htm" }
If the share statement had not been specified in this example, the thread block would not have worked correctly. It would have had its own variables URL and FormData, which would have been empty.
Merged Output The output stream of threads are merged into the main script’s output stream. This is the only direct mechanism whereby the main thread of a script can get results from a thread. The following code generates an output stream of Alabama Arkansas Alaska California. output "Alabama " thread {
71
71328_Pman_CH04I
72
12/13/01 5:08 PM
Page 72
Network Query Language sleep 2 output "Alaska " } thread { output "Arkansas " } waitallthreads output "California "
Managing Threads Code can check whether or not it is in a spawned thread using the isthread statement or function. isthread boolean isthread()
The statement form of isthread sets the success condition if a spawned thread is executing. The isthread function returns a Boolean value, true if a spawned thread is executing. Isthread is useful in user-defined functions, where you might want to include or skip certain actions depending on whether or not it was called by the main thread or a spawned thread. The following code calls the same function twice, once from the main thread and once from a spawned thread. The function uses isthread to display a message only if called from the main thread. GetWebPage URL thread { GetWebPage URL } end void GetWebPage(string URL) { get URL else { if !isthread() { show "Unable to access web page" } } }
Monitoring Threads NQL provides five statements for monitoring threads or waiting for them to complete: isthreadrunning, threadstatus, threaderrors, waitthread, and waitallthreads.
71328_Pman_CH04I
12/13/01 5:08 PM
Page 73
Flow of Control
isthreadrunning You can check that a thread is running with the isthreadrunning statement or function, which takes a thread run ID as a parameter. If no run ID is specified, the last thread referenced is used. isthreadrunning [ID] boolean isthreadrunning([ID])
The statement form of isthreadrunning sets success if the thread is still active, or failure if it has completed and no longer exists. The function form of isthreadrunning returns a Boolean result, true if the thread is still active. The following code prints a report if a previously spawned thread has completed. thread 5 { .... } .... if !isthreadrunning(5) { printfile "report.lst" } ....
threadstatus An alternate way to check a thread’s status is with the threadstatus statement or function, which returns the status string “running” or “completed.” threadstatus [run-ID] string threadstatus([run-ID])
The statement form pushes the status string on the stack, while the function returns the status string as a value for use in expressions. Like isrunning, a thread run ID may be specified to threadstatus, but if omitted the last thread referenced is in view. The following statement obtains the status of thread 1 into a string variable. CurrentStatus = threadstatus(1)
threaderrors Another measure of thread status that may be checked is the number of errors that have occurred. The threaderrors statement or function returns this information as an integer. threaderrors [run-ID] int threaderrors([run-ID])
The statement form pushes the error count onto the stack. The function form returns it as an integer for use in expressions. A thread run ID may be specified to threaderrors,
73
71328_Pman_CH04I
74
12/13/01 5:08 PM
Page 74
Network Query Language
but if omitted the last thread referenced is in view. The following statement obtains the error count of the last thread spawned. ThreadErrorCount = threaderrors()
waitthread The waitthread statement waits for a thread to complete. Waitthread takes the following form: waitthread [ID]
If no thread ID is specified, the last thread referenced in code is the thread in view. The following code spawns a child thread, then waits for it to complete before the main thread displays a message. thread 11 { ftpexec "files1.ftp" ftpexec "files2.ftp" ftpexec "files3.ftp" } waitthread 11 show "The thread has completed"
waitallthreads The waitallthreads statement waits for all spawned threads to complete. waitallthreads [ID]
The following code spawns three threads, then uses waitallthreads to wait for all of them to complete. thread { ftpexec "files1.ftp" } thread { ftpexec "files2.ftp" } thread { ftpexec "files3.ftp" } waitallthreads show "All file transfers have finished"
71328_Pman_CH04I
12/13/01 5:08 PM
Page 75
Flow of Control
There is an implicit waitallthreads when a script ends: The primary thread of a script lingers until any and all spawned threads have also completed.
Timing Execution The elapsedtime statement or function returns the elapsed time since the script started running. elapsedtime datetime elapsedtime()
If used in a thread block, the value is the time since the thread began executing, The function edition of elapsedtime returns a datetime value where the date portion is empty and the time portion contains the execution time in hours, minutes, and seconds. The statement version pushes the value onto the stack. The following code displays its elapsed time. get URL1 get URL2 get URL3 show elapsedtime()
Terminating Execution The end statement terminates script execution, after any still-running spawned threads have completed. Open files and sessions are closed automatically and their memory is released. An implied end statement is at the end of every NQL script regardless of whether one is explicitly in the code. end
Execution can be terminated after a specified interval of time. The timeout statement establishes a time limit for the script. The parameter to timeout is a time value or string, such as “1:30:00” for one hour and 30 seconds. timeout time
Once that time is exceeded, the script will end at the next opportunity. The following script crawls a Web site and collects files, but shuts down if more than 30 minutes have elapsed. timeout "30:00" download "www.my-tech-site1.com", 4, "pdf", "c:\\downloads" download "www.my-tech-site2.com", 4, "pdf", "c:\\downloads"
75
71328_Pman_CH04I
76
12/13/01 5:08 PM
Page 76
Network Query Language download "www.my-tech-site3.com", 4, "pdf", "c:\\downloads" download "www.my-tech-site4.com", 4, "pdf", "c:\\downloads"
When a script ends, anything open is closed and released. That includes files, databases, mail sessions, FTP sessions, Telnet sessions, and Web sessions.
Tutorial: FastSearch Now it is time to put the preceding information to work in an actual NQL program. In this tutorial, you will create a program that visits several search engine Web sites in parallel, to see which one responds the fastest. The script will then open up a browser window to the winning site for the user. The script will illustrate the use of multithreading to perform multiple tasks in parallel. There are 4 steps in this tutorial: 1. Launch the NQL development environment. 2. Enter the FastSearch script. 3. Run the FastSearch script. 4. Understand the FastSearch script. When you are finished with this tutorial, you will have seen how to do the following in NQL: ■■
Use thread blocks to perform multiple tasks in parallel.
■■
Parse the merged output of threads.
Let’s begin!
Step 1: Launch the NQL Development Environment On a Windows system, launching the NQL development environment can be accomplished by clicking on the NQL Client desktop icon, or by selecting Program Files, Network Query Language, NQL Client from the Start Menu. On other platforms, you should have a desktop icon and/or a command-line method of launching the NQL Client. At this point, you should have the NQL development environment active on your desktop, with an empty code window. Now you’re ready to enter a script.
Step 2: Enter the FastSearch Script In the NQL development environment, enter the script shown in Listing 4.1 and save it under the name time.nql. Enter the script, then save it by clicking the Save toolbar button (which has a disk icon). If you prefer, you may copy fastsearch.nql from the companion CD. If you have installed the companion CD on your system, you will have all of the book’s tutorial
71328_Pman_CH04I
12/13/01 5:08 PM
Page 77
Flow of Control
//fastsearch - find the fastest search engine thread { url = "http://www.altavista.com" if get(url) { speed = elapsedtime() output url, speed } } thread { url = "http://www.excite.com" if get(url) { speed = elapsedtime() output url, speed } } thread { url = "http://www.google.com" if get(url) { speed = elapsedtime() output url, speed } } thread { url = "http://www.lycos.com” if get(url) { speed = elapsedtime() output url, speed } } thread { url = "http://www.yahoo.com" continues
Listing 4.1 FastSearch script.
77
71328_Pman_CH04I
78
12/13/01 5:08 PM
Page 78
Network Query Language
if get(url) { speed = elapsedtime() output url, speed } } waitallthreads getoutput setinput input url opendoc url
Listing 4.1 FastSearch script (continued).
materials in a \Tutorials directory on your hard drive. Click the Open toolbar button (folder icon), and select time.nql from the Tutorials\ch04 folder. At this point, the script in Listing 4.1 should be in your code window, either because you entered it by hand or because you opened the script from the companion CD. You are now ready to run the script.
Step 3: Run the FastSearch Script Now run the script. You can do this by selecting Build, Run from the menu, clicking the Run toolbar button, or pressing F5. If all goes well, a few seconds will pass and a browser window will open up on your desktop, navigated to the search engine that happens to have responded soonest. If this does not happen, check the following: ■■
Make sure you have entered the script correctly.
■■
Make sure you have a working Internet connection.
■■
Make sure the sites listed in the script are online and available.
■■
Check the NQL client’s Errors tab for error messages.
At this point you should have seen the FastSearch script run, accessing search engine sites in parallel to find the fastest one. In the next step, we’ll dissect the script and explain exactly how it works.
Step 4: Understand the FastSearch Script We now want to make sure we understand every part of the FastSearch script. The first line is a comment line. //fastsearch - find the fastest search engine
71328_Pman_CH04I
12/13/01 5:08 PM
Page 79
Flow of Control
Next, we have a thread block, the first of five. Each thread block is identical except for the Web address to be accessed. Because thread blocks are in use, five worker threads are spawned in addition to the primary thread that has been executing. Each spawned thread goes to work right away, so all five are working in parallel. thread { url = "http://www.altavista.com" if get(url) { speed = elapsedtime() output url, speed } }
In each of the thread blocks, the Web address to access is assigned to a variable, url. The get function is invoked to access the page. url = "http://www.altavista.com" if get(url) { speed = elapsedtime() output url, speed }
If the Web retrieval is successful, the code block after the if statement is executed. The speed of response is set to the thread’s elapsed time. The Web address and the elapsed time are added to the output stream. After all of the thread blocks have been started, our script needs to wait for them to complete. The waitallthreads statement does exactly that. waitallthreads
Now we can choose the winner. Each of the thread blocks has output the URL and response time of their Web site if they were able to access it, in XML format. Since thread blocks share the same output stream as the main thread of the script, all of the URLs and response times have been written to the same output stream. If we can recapture that output stream, the first URL listed will be from the thread that finished first. To get the first URL, we recapture the output stream (using getoutput) and set it to be the script’s input stream (using setinput). That allows us to extract the url variable (using input). getoutput setinput input url
All that remains is to open the URL on the desktop. The opendoc function does this, opening the URL in the default browser on the desktop.
79
71328_Pman_CH04I
80
12/13/01 5:08 PM
Page 80
Network Query Language opendoc url
At this point, you’ve witnessed parallel processing through the use of thread blocks, without which the script would have taken much longer to execute.
Further Exercises You could amend this example in a number of ways. Here are some interesting modifications that can be made: ■■
Find a way to avoid long waits for Web sites that are particularly slow to respond or are down (Hint: You might look into the timeout statement).
■■
Reduce the amount of redundant code in the example by adding a user-defined function that each of the thread blocks call. See if you can get the code in each thread block down to a single statement that calls the user-defined function.
■■
Hit each site more than once and tally the results, to make the response speed conclusions more definite.
Chapter Summary Network Query Language has the usual collection of looping constructs, plus some unique ones. ■■
The if, then, else, and elseif statements behave like the statements of the same name in other languages. However, they are driven by the success/failure condition and can be coupled to the side effects of other NQL statements.
■■
The while statement implements looping on a condition. It can also loop on a success condition.
■■
The for statement provides iterative looping, incrementing a control variable.
■■
The every statement loops at regular intervals.
■■
The goto statement jumps to a label.
■■
The loop statement decrements a variable and jumps to a label if its value is greater than zero.
■■
The switch statement branches to a case handler based on the evaluation of an expression.
User-defined functions implement procedures and can return any of the twelve data types, or can return void (nothing). Functions may be used in expressions if they return a value, and can also be invoked as statements. Functions can take parameters, which are enclosed in parentheses and are separated by commas. ■■
Function declarations take the form result-type function-name (parameter-list).
■■
Function invocations at statement level take the form function-name parameter-list.
71328_Pman_CH04I
12/13/01 5:08 PM
Page 81
Flow of Control ■■
Function invocations within expressions take the form function-name (parameter-list).
■■
In the code of a function, return values are specified by assigning a value to the function name.
Parallel processing can be achieved through the use of thread blocks. Thread blocks share a common output stream with the script’s main thread. ■■
The thread statement declares a thread block.
■■
The isthread, isthreadrunning, runid, threadstatus, and threaderrors functions monitor thread activity or return information about threads.
■■
The waitthread and waitallthreads statements wait for one or all threads to complete executing.
■■
The share statement makes variables from the main script visible to thread blocks.
A script’s execution time can be retrieved or controlled. ■■
The elapsedtime function returns the elapsed time of the script or thread block.
■■
The end statement ends a script.
■■
The timeout statement enforces a limit on the execution time of a script or thread block.
81
71328_Pman_CH04I
12/13/01 5:08 PM
Page 82
71328_Pman_CH05I
12/13/01 5:05 PM
Page 83
CHAPTER
5 Expressions, Operators, and Functions
Expressions allow variables, constants, and the results of functions to be combined in endless ways using arithmetic, string, and logical operators. This chapter describes the general rules for working with expressions, operators, and functions in Network Query Language. The casting, string, date/time, stack system, and URL functions are also described in this chapter. The tutorial at the end of the chapter uses expressions, operators, and functions to come up with alphabetic variations of a phone number.
Expressions Like most programming languages, NQL allows you to combine variables and constants with operators. An expression consists of one or more terms, where a term is any of the following: ■■
A constant, such as 5, ⫺16.42, or “Once upon a time”
■■
A variable, such as x, FirstName, or TaxRate[State]
■■
A function, such as Left(SSN, 3) or Time( )
If there is more than one term in an expression, they must be combined with operators. Operators are represented by symbols like + or words like AND.
83
71328_Pman_CH05I
84
12/13/01 5:05 PM
Page 84
Network Query Language
Some valid terms are shown here: x 3.1416 subtotal * tax_rate LastName & ", " & FirstName Trim(InputLine) Date()+90
Expressions may appear as follows: ■■
In an assignment statement, to the right of the equals sign: f = ((9./5.)*c) + 32
■■
As a parameter for a statement: show subtotal+tax+shipping
■■
As a parameter for a function: FullSymbol = trim(Exchange & ":" & TickerSymbol)
Note that an array variable’s subscript number and the parameters to a function are also expressions in their own right.
Operators All operators modify terms: Binary operators combine two terms and unary operators modify a single term.
Binary Operators The operators that work on two surrounding terms are called binary operators. If two adjacent terms occur in an expression without an operator between them, NQL assumes you want to concatenate them. Thus, the following two expressions are considered identical by NQL. FirstName LastName FirstName & LastName
The binary operators are listed in Table 5.1.
Unary Operators Unary operators modify only the term that follows, as shown here: -13 NOT Flag
71328_Pman_CH05I
12/13/01 5:05 PM
Page 85
Expressions, Operators, and Functions Table 5.1 Binary Operators OPERATOR
TYPE
DESCRIPTION
=
Assignment
Assigns the value of the term on the right to the term on the left, which must be a variable.
+
Arithmetic
The two terms are added.
-
Arithmetic
The term on the right is subtracted from the term on the left.
*
Arithmetic
The two terms are multiplied.
/
Arithmetic
The term on the left is divided by the term on the right.
==
Comparison
True results if the term on the left is equal to the term on the right.
!=
Comparison
True results if the term on the left is not equal to the term on the right.
Comparison
True results if the term on the left is not equal to the term on the right.
=
Comparison
True results if the term on the left is greater than or equal to the term on the right.
&
String
The two terms are concatenated together.
|
String
The two terms are concatenated together.
LIKE
String
The term on the left is matched against the wildcard pattern on the right.
PAD
String
The term on the left is padded to the length of the term on the right.
AND
Boolean
The two terms are logically ANDed.
&&
Boolean
The two terms are logically ANDed.
OR
Boolean
The two terms are logically ORed.
||
Boolean
The two terms are logically ORed.
XOR
Boolean
The two terms are logically XORed.* continues
85
71328_Pman_CH05I
86
12/13/01 5:05 PM
Page 86
Network Query Language Table 5.1 Continued OPERATOR
TYPE
DESCRIPTION
^
Boolean
The two terms are logically XORed.*
FUZZYAND
Fuzzy
The two terms are fuzzy-ANDed.
^&
Boolean
The two terms are fuzzy-ANDed.
FUZZYOR
Fuzzy
The two terms are fuzzy-ORed.
^|
Boolean
The two terms are fuzzy-ORed.
Table 5.2 Unary Operators OPERATOR
TYPE
DESCRIPTION
-
Arithmetic
Negates the number that follows
!
Logical
Negates the Boolean value that follows
NOT
Logical
Negates the Boolean value that follows
The unary operators are listed in Table 5.2. The following code shows the use of the ! unary operator to negate a logical value. if !get(url) { show "communication failed" }
Operator Precedence There is a built-in hierarchy of operator precedence in NQL, as with most languages. Multiplication and division are evaluated before addition and subtraction, for instance. The complete operator hierarchy is listed in Table 5.3. The following assignment statement evaluates to 1.25 due to operator precedence. x = 3. / 4. + 2. / 4.
The operator hierarchy may be circumvented through the use of parentheses. Parentheses control the order of term evaluation to your liking. The following statement evaluates to 0.6666, due to the use of parentheses. x = 3. / (4. + 2. / 4.)
Operators at the same level are evaluated left to right. The following statement evaluates to 7.5 because of the left-to-right evaluation order.
71328_Pman_CH05I
12/13/01 5:05 PM
Page 87
Expressions, Operators, and Functions Table 5.3 Operator Hierarchy LEVEL
OPERATORS
1
not, !
2
*, /
3
+, -, and, &, or, |, xor, ^, pad, _
4
=
5
= =, ! =, < >
6
&&, ||, ^&, ^|, like, ~
7
= (assignment)
3. * 25 / 10
Let’s take a detailed look at the operators.
The Arithmetic Operators The arithmetic operators perform basic addition, subtraction, multiplication, and division operations.
+ The + operator adds two numbers together. The following code shows the use of + to produce a sum. height = base_height + obelisk_height
If the arguments are non-numeric, they are converted to numeric form if possible, or are otherwise interpreted as 0.
The - operator subtracts the right term from the left term. The following code shows the use of - to produce a difference. base_height = height - obelisk_height
If the arguments are non-numeric, they are converted to numeric form if possible, or are otherwise interpreted as 0.
87
71328_Pman_CH05I
88
12/13/01 5:05 PM
Page 88
Network Query Language
* The * operator multiplies two numbers together. The following code shows the use of * to produce a product. area = depth * width * length
If the arguments are non-numeric, they are converted to numeric form if possible, or are otherwise interpreted as 0.
/ The / operator divides the term on the right into the term on the left. There is the possibility of a runtime error if the divisor is 0. The following code shows the use of / to produce a quotient. height = base_height / obelisk_height
If the arguments are non-numeric, they are converted to numeric form if possible, or are otherwise interpreted as 0. The specific action and result type of the arithmetic operators depend on the type of terms. Addition, subtraction, multiplication, or division of two integers produces an integer result. When some or all of the terms are floating-point in an operation, the result is floating-point. When string terms are used in arithmetic operations, the strings are interpreted as floating-point or integer values.
The Comparison Operators The comparison operators return a Boolean result based on comparisons of two terms. The specific action and result type depend on the type of terms.
== The == operator tests for equality, returning true if the terms are identical. The data types of the terms determine whether the equality test is numeric or string in nature. The following code shows the use of == to test for equality. if x==13 { ... }
The == operator will be familiar to C, C++, and Java developers, but if you’re used to a language like Visual Basic you’ll be tempted to use a single equals sign (=). The compiler will allow the use of = in if and while statements.
71328_Pman_CH05I
12/13/01 5:05 PM
Page 89
Expressions, Operators, and Functions
! =, < > The != or operator tests for inequality. The data types of the terms determine whether the comparison is numeric or string in nature. The following code shows the use of != to test for inequality. if k != 3 { ... }
< The < operator tests for a less-than condition, returning true if the term on the left is less than the term on the right. The data types of the terms determine whether the comparison is numeric or string in nature. The following code shows the use of < to test for a less-than condition. if SortName1 < SortName2 { ... }
SortName2 { ... }
89
71328_Pman_CH05I
90
12/13/01 5:05 PM
Page 90
Network Query Language
>= The >= operator tests for a greater-than-or-equal-to condition, returning true if the term on the left is greater than or equal to the term on the right. The data types of the terms determine whether the comparison is numeric or string in nature. The following code shows the use of >= to test for a greater-than-or-equal-to condition. if SortName1 >= SortName2 { ... }
If the comparison operators are applied to strings, they will be sensitive to differences in case if the case matters directive is in effect. The comparison operators will ignore differences in case if the case ignore directive is in effect (the default condition).
The Logical Operators The logical operators perform Boolean logic operations. The logical operators accept terms of any data type, but the result is always of type boolean. When string terms are used in logical operations, the strings are interpreted as numeric values, where 0 means false and any other value means true. Some of the logical operators have more than one representation in order to make programmers from varying backgrounds feel at home. For example, the logical and function can be written as && or AND, allowing for the conventions of both C and Basic. Likewise, the or function can be written as || or OR.
and, && The and operation performs a logical AND function, yielding a true result only if both terms are true; otherwise the result is false. The following code shows the use of and. if bHaveURL and get(sURL) { bHaveWebPage = true }
An alias for and is &&. The preceding code can also be written this way: if bHaveURL && get(sURL) { bHaveWebPage = true }
71328_Pman_CH05I
12/13/01 5:05 PM
Page 91
Expressions, Operators, and Functions
The and operator has a different action if one or both terms are of type fuzzy: It behaves like the fuzzyand operator. For all other data types, the traditional Boolean logic applies.
or, || The or operation performs a logical OR function, yielding a true result if either term is true, or if both are true. Only if both terms are false is a false result returned. The following code shows the use of or. if bFailed or bCanceled { show "Cannot continue" end }
An alias for or is ||. The preceding code can also be written like this: if bFailed || bCanceled { show "Cannot continue" end }
The or operator has a different action if one or both terms are of type fuzzy: It behaves like the FUZZYOR operator. For all other data types, the traditional Boolean logic applies.
xor, ^ An xor operation yields a true result if either term is true, but not both. If both terms are true or both terms are false, a false result is returned. The following code shows the use of xor. if bMale xor bFemale { bGenderSupplied = true }
An alias for xor is ^. The preceding code can also be written this way: if bMale ^ bFemale { bGenderSupplied = true }
91
71328_Pman_CH05I
92
12/13/01 5:05 PM
Page 92
Network Query Language
The Fuzzy Operators The fuzzy operators perform logical operations on fuzzy values.
fuzzyand, ^& The fuzzyand operator returns the minimum of the two terms. An alternative notation for fuzzyand is ^&. The following code shows the use of fuzzyand. Corpulence = Tallness FUZZYAND Girth
fuzzyor, ^| The fuzzyor operator returns the maximum of the two terms. An alternative notation for fuzzyor is ^|. The following code shows the use of fuzzyor. InsuranceRate = Age FUZZYOR Class
You can read more about fuzzy logic in Chapter 23, “Fuzzy Logic.”
The String Operators The primary string operator is concatenation. Most other string actions are performed by the string functions described later in this chapter. The concatenation operator is designated by & or |. The following two statements are identical in behavior: fullName = firstName & middleName fullName = firstName | middleName
When non-string terms are supplied to the concatenation operator, the terms are converted to string representations first. Thus, the expression in the following code is valid and evaluates to “abc3”. show "abc" & 3
In addition, there is implied concatenation: Two adjacent terms without an operator are automatically concatenated. The following code shows the use of implied concatenation. fullName = firstName middleName show "Your total bill comes to " amount ", which includes a gratuity."
Another string operator is like, which is similar to checking for string equality, but it allows asterisk wildcards to appear at the beginning and/or end of the second term. The following code shows the use of like. if sName like "*Corp." { bCorporateName = true } if sName like "*Inc." { bCorporateName = true } if sName like "*Ltd." { bCorporateName = true }
71328_Pman_CH05I
12/13/01 5:05 PM
Page 93
Expressions, Operators, and Functions
One other string operator is pad, which pads the term on the left to the length specified by the right term. By default, the padding is with null characters (bytes containing 0), but this can be changed using the padvalue statement. The following code pads a name to a length of 30 characters, padding with spaces. padvalue " " string Name = "Debra" PaddedName = Name pad 30
Functions Network Query Language includes over 80 built-in functions that may be used in expressions. In addition, your own functions may be used in expressions. All functions are called by specifying a function name keyword and a pair of parentheses, as in Trim(x) or Date(). Some functions accept no parameters, others accept one parameter, and others accept multiple parameters. The parameters are specified within the pair of parentheses and are separated by commas, as in Right(Name, 1). Function parameters are expressions themselves, as in Right(Left(Text, 4), 1).
Built-in Functions The NQL built-in functions cover a wide range of subjects, many of which are covered in other chapters of this book. The remainder of this section describes the casting functions, string functions, date/time functions, stack functions, and URL functions.
Casting Functions The casting functions convert a value into a specific data type. The casting functions have the same names as variable types: int, float, string, and so on. Table 5.4 enumerates the casting functions.
String Functions The string functions perform actions on string values and/or return string results. Most of the string functions parallel the common string functions found in languages like Basic, C++, and Java. Table 5.5 enumerates the string functions. Each of the string functions is individually described in the following sections. clip The clip function returns a subsection of a main string by locating starting and ending text within the string. The parameters to clip are a main string, a starting substring, and an ending substring. string clip(main-string, start-substring, end-substring)
93
71328_Pman_CH05I
94
12/13/01 5:05 PM
Page 94
Network Query Language Table 5.4 The Casting Functions FUNCTION
DESCRIPTION
binary binary(value)
Converts a value to type binary
boolean bool(value)
Converts a value to type boolean
boolean boolean(value)
Converts a value to type boolean
currency currency(value)
Converts a value to type currency
datetime datetime(value)
Converts a value to type date/time
float float(value)
Converts a value to type float
fuzzy fuzzy(value)
Converts a value to type fuzzy
html html(value)
Converts a value to type html
int int(value)
Converts a value to type int
int integer(value)
Converts a value to type int
object object(value)
Converts a value to type object
string string(value)
Converts a value to type string
unicode unicode(value)
Converts a value to type unicode
xml xml(value)
Converts a value to type xml
Table 5.5 The String Functions FUNCTION
DESCRIPTION
string clip(value, start, end)
Returns a substring of a string based on a starting and ending substring
boolean contains(string, substring)
Checks for the existence of a substring within a string
string convertnumber(source, format)
Converts between U.S. and European number formats
int count(string, substring)
Counts the occurrences of a substring in string
string eval(value)
Substitutes embedded variable names in a string with their current values
int find(string, substring [, position])
Locates the position of a substring in a string
string format(specifier, value-list)
Creates a formatted string
string insert(string, position, substring)
Inserts a substring with a string
71328_Pman_CH05I
12/13/01 5:05 PM
Page 95
Expressions, Operators, and Functions Table 5.5 Continued FUNCTION
DESCRIPTION
boolean isalpha(string)
Checks to see if a string is alphabetic
boolean isalphanumeric(string)
Checks to see if a string is alphanumeric
boolean isnumeric(string)
Checks to see if a string is numeric
string left(string, length)
Returns the left-most portion of a string
int length(string)
Returns the length of a string
string lower(string)
Returns the lower-case version of a string
string mid(string, position [, length])
Returns the middle section of a string
string normalize(string)
Normalizes a string
string remove(string, substring)
Removes all occurrences of a substring from a string
string removetags(string)
Removes all tags from a string
string replace(string, oldstring, newstring)
Replaces substrings within a string
string reverse(string)
Reverses a string
string right(string, length)
Returns the right-most portion of a string
int similarity(string1, string2)
Computes the similarity between two strings
int stringcompare(string1, string2 [,case-sensitive])
Compares two strings
string substring(string, start-pos, end-pos)
Returns a portion of a string
string trim(string)
Removes leading and trailing white space from a string
string upper(string)
Returns the upper-case version of a string
int val(string)
Converts a string to a number
The string returned is the section of the main string between the substrings, not including the substrings themselves. If either the starting or ending substrings are not found in the main string, an empty string is returned. The following code shows the use of clip for extracting the header and body sections of a Web page. string sPage, sHeader, sBody sPage = getpage(sURL)
95
71328_Pman_CH05I
96
12/13/01 5:05 PM
Page 96
Network Query Language sHeader = clip(sPage, "", "") sBody = clip(sPage, "", "")
The clip function is useful for extracting a subset of a string. contains The contains function checks to see if a main string contains a substring or not. The parameters to contains are a main string and a substring. boolean contains(string, substring)
The result is true if the substring occurs at least once within the main string. A false result indicates that the substring does not occur within the string. The following code shows the use of contains to determine whether a Web page contains any tables. string sPage sPage = getpage(sURL) if contains(sPage, "367 Wildwood Road Ronkonkoma <state>NY 11779 2 <part-number>40331 <description>envelopes, business size, white <price>$14.50 100 <ext-price>$1450.00 <part-number>19244 <description>envelopes, legal size, white <price>$19.50 10 <ext-price>$195.00 <subtotal>$1645.00
Listing 9.1 XML purchase order.
template. To make the job easier, various large players in the computer industry make available XML parsing engines, free of charge.
XPath XPath is a way of navigating through an XML document through the use of queries. There isn’t room in this book to explain the XPath specification, but for a quick orientation, be aware that an XPath query takes this form: axis-name::node-test[predicates]
To appreciate the use of XPath, imagine you were dealing with a large XML document that contained numerous entries like the following: Walters
193
71328_Pman_CH09I
194
12/14/01 3:02 PM
Page 194
Network Query Language 714-555-1698 714-555-1700 714-555-1191
Now, let’s say you are looking for all of Walter’s phone numbers. With XPath, you could find this information with a query like the following: /descendant::contact[fullname="Walters"]/child::numbers/child::*
You can find the XPath specification online at www.w3.org/TR/xpath.
XML Operations NQL provides several ways of working with XML. The XML operations can be grouped into two main areas: Simple XML operations and formal XML parsing.
Simple XML Operations Simple XML operations treat XML as single-byte character strings and don’t use an official parsing engine. When working with small or simple XML documents and fragments, the simple XML operations are easy and convenient. The NQL statements for simple XML operations are listed in Table 9.1. The function forms of some of the simple XML statements are shown in Table 9.2. The simple XML statements and functions are described individually in the following sections.
Working with the Input Stream Depending on how it is called, your scripts may be provided with an input stream. Although the input stream may be in any format, XML is the most common format, and NQL has features to specifically take advantage of XML-formatted input. There are a number of ways in which an NQL script can inherit an input stream. If you run an NQL script interactively out of the NQL development environment, you may specify an input stream in advance by selecting View, Inputs from the menu or by entering the keyboard shortcut Ctrl+I. If an NQL script is being run as a Web application, URL parameters are converted to an XML input stream automatically. If NQL is being called as a component from another language, an input stream may be specified as a property prior to running a script. In addition to these methods, any NQL script is free to create its own input stream. Retrieving Values from an XML Input Stream If the input stream is in XML format, values can be extracted from it using the input statement. The parameters are one or more variable names.
71328_Pman_CH09I
12/14/01 3:02 PM
Page 195
Working with XML Table 9.1 Simple XML Statements STATEMENT
PARAMETERS
DESCRIPTION
getinput
Retrieves the current input stream and places it on the stack
getoutput
Retrieves the current output stream and places it on the stack
input
var-list
Extracts XML-encoded values from the input stream
inputrecord
tag
Advances to the next instance of the specified tag in the input stream
notify
[value]
Passes output stream immediate notification
output
var-list
Adds values to the output stream encoded as XML
output
expr
Adds to the output stream
outputformat
type
Controls the behavior of the output statement
outputrecord
tag
Begins another instance of the specified tag in the output stream
setinput
Sets the input stream to the value on the stack
setoutput
Sets the output stream to the value on the stack
unwrap
Converts XML values to variables
wrap
Converts variables to XML values
var-list
Table 9.2 Simple XML Functions FUNCTION
DESCRIPTION
string getinput( )
Retrieves the current input stream and places it on the stack
string getoutput( )
Retrieves the current output stream and places it on the stack
boolean input(var-list)
Extracts XML-encoded values from the input stream
boolean inputrecord(tag)
Advances to the next instance of the specified tag in the input stream
string unwrap(value)
Converts XML values to variables
string wrap(var-list)
Converts variables to XML values
195
71328_Pman_CH09I
196
12/14/01 3:02 PM
Page 196
Network Query Language input var-list
For each variable specified, the XML input stream is searched for tags of the same name. If a tag set is found, the data is stored in a variable. Thus, consider the statement below. If the input stream contained widget$50.00, then the variable item would be set to widget and amount to $50.00. input item, amount
When input finds a tag set, the tag set is removed from the input. That way, if there are more sets of data in the input stream with the same tag values, they can be retrieved as well. If the requested information is not found in the input stream, a failure condition results. Suppose the following XML code represents an input stream: Apple fruit Banana Fruit Potato Vegetable
To easily retrieve the values from this input stream, one could use the following NQL script: while input(name, category) { ...do something with name and category... }
Retrieving Records from an XML Input Stream When working with more complex XML, the input statement may not be sufficient on its own. What if there are varying amounts of elements within other elements? For example, consider the XML document shown in Listing 9.2 which contains multiple recipes, where each recipe might contain a varying number of ingredients. There will be difficulty in extracting the ingredients from this document if we only have the input statement to work with, since we want to be aware of which recipe each ingredient pertains to. For this reason, NQL provides the inputrecord statement, which permits two levels of hierarchy. The parameter to inputrecord is a string expression that contains a tag name. inputrecord tag
71328_Pman_CH09I
12/14/01 3:02 PM
Page 197
Working with XML
Baked Potato Supreme Potatoes4 Parsleypinch Sour Cream1 cup Onion Flakes1 oz Bacon Bits2 oz Tomato Consumme Tomatoes28 oz Milk2 cups Basil1 oz California Omelette Eggs3 Avocado1 Bacon3 strips Peppers1 oz Black Olives1/2 cup Tomatoes1/2 cup Cheddar Cheese1 cup
Listing 9.2 XML recipes document.
By combining inputrecord with input, we can now write a script to locate the ingredients for each recipe of the XML input stream shown in Listing 9.2. Here’s the code: while inputrecord("recipe") { input recipename while input name, qty {
197
71328_Pman_CH09I
198
12/14/01 3:02 PM
Page 198
Network Query Language ...do something with name and qty... } }
The use of inputrecord and input will not help you when you have more than two levels of hierarchy in the input stream. In such cases, it is necessary to use formal XML parsing operations to extract data meaningfully. Copying the Input Stream It is possible to copy the input stream. You might want to do this for secondary analysis of the input data, or perhaps to store the information in a file or some other medium for record-keeping purposes. The getinput statement copies the input stream into a new value pushed onto the stack. getinput
Let’s consider an example of getinput. The following code saves a copy of the input stream to a disk file. getinput save "input.xml"
Setting the Input Stream It is possible to set the input stream from within a script. You might want to do this after retrieving XML data from someplace, such as a Web site or a database, so that you can use the input and inputrecord statements. The setinput statement sets the input stream to the top value on the stack. setinput
Let’s consider an example of setinput. The following code retrieves XML data from a Web site, sets the script’s input stream to be that data, and then extracts information from the input stream. get "http://www.my-web-site.com/orders/new_orders.xml" setinput while inputrecord("order") { input CustNo, Customer, Phone ...process order... }
Working with the Output Stream Your scripts can generate an output stream. Although the output stream can be in any format, XML is one of the more common formats, and NQL has features to specifically help generate XML-formatted output.
71328_Pman_CH09I
12/14/01 3:02 PM
Page 199
Working with XML
There are a number of ways in which an NQL script’s output can be used. If you run an NQL script interactively out of the NQL development environment, any output generated will appear in an Output tab window after the script finishes executing. If an NQL script is being run as a Web application, the output stream is the response sent to a browser. If NQL is being called as a component from another language, the output stream may be retrieved as a property after running a script. Writing Values to an XML Output Stream If the output stream is in XML format, values can be added to it using the output statement. The parameters are one or more variable names. output var-list
For each variable specified, a value is added to the XML output stream reflecting the name and contents of the variable. Thus, consider the statement below. If the variables item and amount contained widget and $50.00, respectively, the data widget $50.00 would be added to the output stream. output item, amount
There’s another way to use the output statement that gives you direct control over the output: When the argument to output is a string expression rather than a variable list, the data is written to the output stream exactly as specified. output value
This second form of output is useful for several reasons. First of all, it can be used to generate more elaborate sections of XML beyond the simple variable-at-a-time methodology just discussed. Secondly, it allows output to generate non-XML forms of output, such as HTML. The following code shows the use of the second form of output to generate HTML. output "" price[orders] " | " tax[orders] | "
Both forms of output are cumulative, meaning you call them repeatedly as you build your output stream. Writing Records to an XML Output Stream When working with more complex XML, it is sometimes desirable to nest one set of XML tags within an outer set of tags to form records. For this reason, NQL includes the outputrecord statement, which permits two levels of hierarchy. The parameter to outputrecord is a string expression that contains a tag name. outputrecord tag
By combining outputrecord with output, we can now write a script to generate records of XML tags. The following code shows the use of outputrecord.
199
71328_Pman_CH09I
200
12/14/01 3:02 PM
Page 200
Network Query Language outputrecord "store" location = "Montauk, NY" phone = "631-555-7566" output location, phone outputrecord "store" location = "Riverhead, NY" phone = "631-555-7187" output location, phone outputrecord "store" location = "Sag Harbor, NY" phone = "631-555-3300" output location, phone
The above script will generate the XML shown below. Notice that outputrecord knows to put the starting and ending tags in the right places in the XML output stream, even though you only place a single outputrecord before your output statements. It’s also perfectly legal to have multiple output statements between the outputrecord statements. <store> Montauk, NY 631-555-7566 <store> Riverhead, NY Sag Harbor, NY 631-555-3300
The use of outputrecord and output will not help you when you have more than two levels of hierarchy in the output stream. In such cases, it is necessary to do more of the work directly in your program. Copying the Output Stream It is possible to copy the output stream. You might want to do this for secondary analysis of the output data, or perhaps to store the information in a file or some other medium for record-keeping purposes. The getoutput statement copies the output stream into a new value pushed onto the stack. getoutput
Let’s consider an example of getoutput. The following code saves a copy of the output stream to a disk file.
71328_Pman_CH09I
12/14/01 3:02 PM
Page 201
Working with XML ... getoutput save "output.xml"
Setting the Output Stream It is possible to set the output stream from within a script. You might want to do this after retrieving XML data from someplace, such as a Web site or a database. The setoutput statement sets the output stream to the top value on the stack. setoutput
Let’s consider an example of setoutput. The following code retrieves XML data from a Web site and sets the script’s output stream to be that data. get "http://www.my-web.site.com/orders/new_orders.xml" setoutput
Notification and Real-time Output When your scripts create output streams, the output stream is normally generated piecemeal fashion as your script executes output and outputrecord statements. When the script finishes execution, the output stream is complete and can then be accessed by some other application. For real-time applications, this batch behavior of the output stream is unsatisfactory. NQL provides an alternative method of generating output streams in real-time with the notify statement. The purpose of notify is to notify an external process and send it some data. For an example of where you might do this, imagine you are creating a shopping bot in which a master program calls one or more NQL scripts to search for specific items, such as books from an online book site. One way to implement such a solution would be to have the NQL script find all of the matching books and then pass its output stream to the master program when finished. However, this might prove unsatisfactory to the user because no results would be seen until all of the books had been found. With the use of notify, each book result could be passed to the master program as soon as it was found. This would allow results to be shown to the user without delay. The notify statement takes one parameter, which is optional: Data to include with the notification. If no parameter is specified, the current output stream is passed as the notification data. notify [data]
How does notify interact with another application? The application must respond to an event or set up what is known as a callback function. If you are calling NQL as an ActiveX component, from a language like Visual Basic, there is a Notify event that is fired whenever the running NQL script executes a notify statement. If you are calling NQL as a DLL from a lower-level language such as C++, you can specify the address of a callback function as a property prior to executing a script.
201
71328_Pman_CH09I
202
12/14/01 3:02 PM
Page 202
Network Query Language
Wrapping and Unwrapping Values So far, most of the simple XML statements and functions have related to input and output streams. Network Query Language also contains two simple XML statements that convert between variables and XML. The conversion of variables to XML is known as wrapping in NQL parlance, and the conversion of XML to variables is known as unwrapping. To convert one or more variables to XML, the wrap statement is used. The parameters are a list of variables. wrap var-list
The result of wrap is that an XML string is pushed onto the stack which contains the specified variable values, formatted as tags. Like the output statement, wrap creates tag names based on the variable name and data based on the variable’s contents. Thus, the statement wrap x would generate <x>5 if the variable x happened to contain 5. The following code shows the use of wrap. typeface = "Times Roman" typesize = "10" leading = "12" kerning = "track" wrap typeface, typesize, leading, kerning pop XML
wrap’s alter-ego is unwrap, which takes an XML value off of the stack and creates variables from it. Each tag in the XML code becomes a variable of that name. The following code shows the use of unwrap. push "800-555-4141<email>[email protected]" unwrap show phone, email
XML Parsing Operations For formal work with XML documents, NQL provides powerful statements for parsing, validating, and querying XML. NQL uses the Microsoft XML parser to perform this work in the Windows edition of NQL, and uses the Sun or Apache XML parser to perform this work in the Java edition of NQL. Table 9.3 shows the XML parsing statements. There are function versions of the XML parsing statements. The XML parsing functions are shown in Table 9.4. The XML parsing statements and functions are described individually in the following tables.
XML Sessions The NQL XML parsing operations are modeled on the idea of a session, where the statements and functions must be used in a certain order.
71328_Pman_CH09I
12/14/01 3:02 PM
Page 203
Working with XML Table 9.3 XML Parsing Statements STATEMENT
PARAMETERS
DESCRIPTION
closenode
[#ID]
Releases a level of focus in the XML document
closexml
[#ID]
Terminates an XML parser session
firstnode
[#ID,] node-name
Accesses an XML node by name
getnode
[#ID,] var-list
Retrieves element data from a node using dotted notation
getnodexpath
[#ID,] xpath, var-list
Retrieves element data that matches an XPath query
nextnode
[#ID,] node-name
Adds values to the output stream encoded as XML
openxml
[[#ID,] url]
Opens an XML parser session
Table 9.4 XML Parsing Functions FUNCTION
DESCRIPTION
bool closenode([#ID])
Releases a level of focus in the XML document
bool closexml([#ID])
Terminates an XML parser session
bool firstnode([#ID,] node-name)
Accesses an XML node by name
bool getnode([#ID,] var-list)
Retrieves element data from a node using dotted notation
bool getnodexpath([#ID,] xpath, var-list)
Retrieves element data that matches an XPath query
bool nextnode([#ID,] node-name)
Adds values to the output stream encoded as XML
bool openxml([[#ID,] url])
Opens an XML parser session
1. An XML parsing session is opened with openxml. 2. The XML may be traversed, searched, and extracted using any combinations desired of firstnode, getnode, getnodexpath, nextnode, and closenode. 3. The XML parsing session is closed with closexml.
Multiple XML Parser Sessions NQL uses a very simple syntax for XML parsing operations, such as the following line: openxml URL
203
71328_Pman_CH09I
204
12/14/01 3:02 PM
Page 204
Network Query Language
When it is necessary to open multiple XML documents simultaneously, identifiers are needed to distinguish one XML document from another. In NQL, these identifiers are known as XML session IDs. An XML session ID is a name preceded by a pound sign, such as #invoice or #Product. When a session ID is specified, it is the first parameter of a statement or function. For example: openxml #doc1, URL
Opening an XML Parser Session An XML parser session is initiated with the openxml statement. The parameter is the URL of an XML document. If this parameter is omitted, the XML document is taken from the top value on the stack. openxml [url]
NQL launches the NQL parser for your operating system, retrieves the specified document, and opens it in the parser. If the XML document makes reference to a Data Type Document (DTD) template, it is also validated. If all of this occurs successfully, a success condition results. The following code opens an XML parsing session and checks for error. openxml "http://www.my-docs.com/manifest.xml" else { show "Unable to open and validate XML document" end }
When working with multiple XML documents, specify an XML session ID as the first parameter. openxml #manifest, "http://www.my-docs.com/manifest.xml"
Closing an XML Parser Session An XML parser session is terminated with the closexml statement. Any resources consumed by the parser session are freed. closexml
If a parser session was opened with an XML session ID, specify that ID when closing it. closexml #manifest
If you forget to close a parser session, NQL will close all open parser sessions when a script ends.
71328_Pman_CH09I
12/14/01 3:02 PM
Page 205
Working with XML
Finding a Node The elements in an XML document are known as nodes. When an XML document is opened, the focus is the entire document. The firstnode statement locates a node and restricts the focus to that node. The parameter to firstnode is a value that specifies one or more element names, separated by dots, such as price or purchase-order.items.item.qty. firstnode node-name
If the specified node is located, the focus in the XML document is set to that node and a success condition results. You can then use getnode or getnodexpath to retrieve element values from the node with focus. If the node can’t be located, a failure condition results. The following code shows the use of firstnode to access an item in a purchase order document. openxml URL firstnode "item" getnode description, price ... closexml
If a parser session was opened with an XML session ID, specify the same ID when using firstnode. firstnode #po, "item"
Finding the Next Node To advance to the next node in a document, nextnode is used. It works like firstnode, but advances to the next matching node rather than starting at the beginning of the document. The parameter to nextnode is a value that specifies one or more element names, separated by dots, such as price or purchase-order.items.item.qty. nextnode node-name
If the specified node is located, the focus in the XML document is set to that node and a success condition results. You can then use getnode or getnodexpath to retrieve element values from the node with focus. If the node can’t be located, a failure condition results. The following code shows the use of nextnode to access each item in a purchase order document. openxml URL firstnode "item" while { getnode description, price ...do something with description and price.... nextnode "item"
205
71328_Pman_CH09I
206
12/14/01 3:02 PM
Page 206
Network Query Language } closexml
If a parser session was opened with an XML session ID, specify the same ID when using nextnode. nextnode #po, "item"
Closing a Node When you set a restricted focus in an XML document (with firstnode or nextnode), you may want to eventually release that focus. The closenode statement releases the current focus in an XML document and reverts to the previous focus. closenode
The XML parsing operations allow you to have nested levels of focus, which means you can combine firstnode, nextnode, and closenode to work with various parts of an XML document in a hierarchy. For example, the following code shows the use of these statements to walk through all item nodes within all purchase-order.item nodes. Note the use of closenode to move from the inner level of focus to the outer level of focus. openxml "http://www.my-comp.com/biz/neworders.xml" firstnode "purchase-order.items" while { firstnode "item" while { getnode qty, partnum, unitprice, extprice nextnode "item" } closenode nextnode "purchase-order.items" } closenode closexml
If a parser session was opened with an XML session ID, specify the same ID when using closenode. closenode #po
71328_Pman_CH09I
12/14/01 3:02 PM
Page 207
Working with XML
Retrieving Node Data To retrieve data from an XML document, the getnode statement is used. The parameters are one or more variable names. getnode var-list
For each variable specified, the current focus of the XML document searches for tags of the same name. If found, the variable is set to the data value. If any of the values are not found in the XML, a failure condition results. The following code shows the use of getnode to retrieve description and price values from the item node of an XML document. openxml URL firstnode "item" getnode description, price ... closexml
If a parser session was opened with an XML session ID, specify that ID when using getnode. getnode #po, description, price
Retrieving Node Data Using an XPath Query Another way to retrieve data from an XML document is through an XPath query, for which the getnodexpath statement is used. The parameters are an XPath query and one or more variable names. getnode xpath [, var-list]
If no variable list is specified, the data extracted from the query is pushed onto the stack as a single string. If a variable list is specified, the data resulting from the query are stored in the specified variables. A success condition results if the query is successful. The following code shows the use of getnodexpath to retrieve description and price values from the item node of an XML document. openxml URL getnodexpath '/descendant::name/child::*', sLast, sFirst ... closexml
207
71328_Pman_CH09I
208
12/14/01 3:02 PM
Page 208
Network Query Language
Figure 9.1 Real Estate Web Page.
If a parser session was opened with an XML session ID, specify that ID when using getnode. getnodexpath #license, '/descendant::name/child::*', sLast, sFirst
Tutorial: RealEstate Now that you know how to work with XML, let’s create an XML-aware NQL script. In this tutorial, you will create a script that reads an XML file of real estate listings. A real estate Web page will be created from the XML data, shown in Figure 9.1. There are five steps in this tutorial:
71328_Pman_CH09I
12/14/01 3:02 PM
Page 209
Working with XML
1. Launch the NQL development environment. 2. Enter the RealEstate script. 3. Set up the XML data. 4. Run the RealEstate script. 5. Understand the RealEstate script. When you are finished with this tutorial, you will have seen how to do the following in NQL: ■■
Open, parse, and close an XML document.
■■
Locate and extract specific objects in an XML document.
■■
Generate a Web page.
Let’s begin!
Step 1: Launch the NQL Development Environment On a Windows system, launching the NQL development environment can be accomplished by clicking on the NQL Client desktop icon, or by selecting Program Files, Network Query Language, NQL Client from the Start Menu. On other platforms, you should have a desktop icon and/or a command-line method of launching the NQL Client. At this point, you should have the NQL development environment active on your desktop, with an empty code window. Now you’re ready to enter the tutorial script.
Step 2: Enter the RealEstate Script In the NQL development environment, enter the script shown in Listing 9.3 and save it under the name RealEstate.nql. Enter the script, then save it by clicking the Save toolbar button (which has a disk icon). If you prefer, you may copy RealEstate.nql from the companion CD. If you have installed the companion CD on your system, you will have all of the book’s tutorial materials in a \Tutorials directory on your hard drive. Click the Open toolbar button (folder icon), and select RealEstate.nql from the Tutorials\ch09 folder. At this point, the script in Listing 9.3 should be in your code window, either because you entered it by hand, or because you opened the script from the companion CD.
Step 3: Set Up the XML Data The companion CD includes an XML document for this tutorial, named realestate.xml. If you have installed the companion CD on your system, you will have all of the book’s tutorial materials in a \Tutorials directory on your hard drive. Using Windows Explorer, ensure that realestate.xml is in the Tutorials\ch09 folder.
209
71328_Pman_CH09I
210
12/14/01 3:02 PM
Page 210
Network Query Language
//realestate - reads real estate listings from an XML document // and generates a web page string StateCode = "CA" int no = 0 if !openxml("realestate.xml") { show "Could not open XML document" end } create "realestate.htm" write "<TITLE>Real Estate Listings" write "\r\n" write "\r\n" write "\r\n” write "{StateCode} Real Estate Listings\r\n" boolean bHaveProperty = firstnode("property") while bHaveProperty { getnode listing, desc, area, year, bedrooms, view, pool, airconditioning, fireplace, city, state, zip, price if state==StateCode { no += 1 write "{no}. {desc}\r\n" write "\r\n" write "
\r\n" write "| Listing no: | {listing} | " write "Area: | {area} |
\r\n" write "| Year built: | {year} | " write "Bedrooms: | {bedrooms} |
\r\n" write "| View: | {view} | " write "Pool: | {pool} |
\r\n" write "| Air conditioning: | {airconditioning} | " write "Fireplace: | {fireplace} |
\r\n" write "| Location: | {city}, {state}
{zip} | " write "Asking price: | {price} |
\r\n" write "\r\n" write "
\r\n"
Listing 9.3 RealEstate script.
71328_Pman_CH09I
12/14/01 3:02 PM
Page 211
Working with XML
} bHaveProperty = nextnode("property") } closexml write "\r\n" write "\r\n" write "\r\n" close opendoc "realestate.htm" end
Listing 9.3 RealEstate script (continued).
The XML document is shown in Listing 9.4. Feel free to view the XML document in a browser, or open it in WordPad to change it around. This particular XML document is in Unicode and was created with WordPad. In order for the tutorial to be a success, your script and the realestate.xml file need to be in the same disk directory. At this point, you should have a script entered and an XML document to go with it.
Step 4: Run the RealEstate Script You are now ready to run the script. You can do this by selecting Build, Run from the menu, clicking the Run toolbar button, or pressing F5. A Web page should open up on your desktop that resembles Figure 9.1. If this does not happen, check the following: ■■
Check your script for typographical errors.
■■
Make sure you have the script and the realestate.xml file in the same directory.
■■
Check the NQL client’s Errors tab for error messages.
At this point you should have seen the RealEstate script run, reading information from an XML document and generating a Web page from it. Although we haven’t discussed how it works yet, you’ve witnessed XML being read and transformed into another format by NQL. In the next step, we’ll dissect the script and explain exactly how it works.
Step 5: Understand the RealEstate Script We now want to make sure we understand every part of the RealEstate script. The first two lines are comment lines. //realestate - reads real estate listings from an XML document // and generates a web page
211
71328_Pman_CH09I
212
12/14/01 3:02 PM
Page 212
Network Query Language
<property> <listing>104535 <desc>Charming two-story Bel Air <area>2000 sq ft 1994 4 no <pool>no yes yes Mission Viejo <state>CA 92692 <price>$379,000 <property> <listing>104537 <desc>Fixer-upper, great opportunity <area>1860 sq ft 1955 4 no <pool>no yes yes Fullerton <state>CA 92833 <price>$225,000 <property> <listing>104538 <desc>Gorgeous view and all the amenities <area>2600 sq ft 1998 3 yes <pool>yes yes yes Irvine <state>CA 92720 <price>$450,000
Listing 9.4 Real Estate XML document.
71328_Pman_CH09I
12/14/01 3:02 PM
Page 213
Working with XML
<property> <listing>104539 <desc>Near-lakeside property <area>2200 sq ft 1965 4 no <pool>no no yes Ronkonkoma <state>NY 11779 <price>$325,000 <property> <listing>104541 <desc>Country surroundings <area>1900 sq ft 1992 3 no <pool>no yes yes Patchogue <state>NY 11772 <price>$340,000 <property> <listing>104544 <desc>A bargain home conveniently located <area>1700 sq ft 1975 3 no <pool>no no no Farmingdale <state>NY 11735 <price>$220,000
Listing 9.4 Real Estate XML document (continued).
213
71328_Pman_CH09I
214
12/14/01 3:02 PM
Page 214
Network Query Language
A string variable, StateCode, is declared and assigned to a two-letter state code (CA shown here). The script will show only listings from the specified state. You can change the state code to NY or any other state in the data and a different set of properties will be listed in the resulting Web page. string StateCode = "CA"
A second variable, no, is initialized to zero. The no variable will be used to count the properties as we list them so that we can number the results. int no = 0
The XML document is now opened with openxml, which begins an XML parsing session. If the document is not found or does not contain valid XML, an error message is displayed and the script ends. if !openxml("realestate.xml") { show "Could not open XML document" end }
With the XML document open successfully, we can begin building the Web page. The create statement creates a new HTML file. The write statements write initial HTML to the file. create "realestate.htm" write "<TITLE>Real Estate Listings" write "\r\n" write "\r\n" write "\r\n" write "{StateCode} Real Estate Listings\r\n"
The script seeks to find property records in the XML. A firstnode function locates the first instance of <property> and tags, returning true if an instance was found. The true or false result is stored in a Boolean variable named bHaveProperty. boolean bHaveProperty = firstnode("property")
A while loop iterates through each property record. bHaveProperty is set anew at the bottom of the while loop via a nextnode function. The loop will expire when there are no more property records. while bHaveProperty { ... bHaveProperty = nextnode("property") }
71328_Pman_CH09I
12/14/01 3:02 PM
Page 215
Working with XML
Within the while loop, a getnode statement extracts elements from within the current focus (a property record). The listing, desc, area, year, bedrooms, view, pool, airconditioning, fireplace, city, state, zip, and price items are all subordinate parts of property. Variables with the same names are set with values from the current property item. getnode listing, desc, area, year, bedrooms, view, pool, airconditioning, fireplace, city, state, zip, price
Next, the extracted state code (in the variable state) is compared to the target state (in the variable StateCode). If they are identical, an if block executes. In the if block, the listing number is incremented by one, and write statements generate a table of data in the HTML output file. if state==StateCode { no += 1 write "{no}. {desc}\r\n" write "\r\n" write "
\r\n" write "| Listing no: | {listing} | " write "Area: | {area} |
\r\n" write "| Year built: | {year} | " write "Bedrooms: | {bedrooms} |
\r\n" write "| View: | {view} | " write "Pool: | {pool} |
\r\n" write "| Air conditioning: | {airconditioning} | " write "Fireplace: | {fireplace} |
\r\n" write "| Location: | {city}, {state}
{zip} | " write "Asking price: | {price} |
\r\n" write "\r\n" write "
\r\n"
At the bottom of the while loop, the next property is accessed. The nextnode function will return false if there are no more property items in the XML. bHaveProperty = nextnode("property") }
Since we are finished reading through the XML, the XML parsing session can be terminated with closexml. closexml
The closing HTML tags are now written to the output file, and the file is closed. write "\r\n" write "\r\n"
215
71328_Pman_CH09I
216
12/14/01 3:02 PM
Page 216
Network Query Language write "\r\n" close
The final task is to open the results page on the desktop, which is accomplished with opendoc. opendoc "realestate.htm" end
At this point, you’ve seen an NQL script parse XML using a parser session.
Further Exercises You could amend this example in a number of ways. Here are some interesting modifications that can be made: ■■
Add additional parameters besides state for the script to use in deciding which properties to list.
■■
Use an XPath query instead of direct program logic to find the properties matching the desired conditions.
Chapter Summary Network Query Language has the capability to parse, validate, and generate XML. ■■
The wrap statement converts variables to XML.
■■
The unwrap statement converts XML to variables.
XML is similar to HTML but allows custom tags to be defined: Documents can reference DTD templates, which software can use to ensure that documents are properly structured. XML documents are officially Unicode, consisting of wide two-byte characters; but a single-character format, UTF-8, allows ANSI text files to serve as XML documents. Because XML is meant to be used internationally, XML documents are expressed in Unicode, a two-byte character set capable of encoding all the world’s written symbols. However, XML documents that use American and Western European character sets can be expressed in single-byte characters, through an allowed subset of Unicode known as UTF-8. An NQL script has an input stream, which is usually in XML format. Operations for working with the input stream include the following: ■■
The input stream can be entered interactively from the NQL development environment.
■■
The input statement retrieves XML values from the input stream and assigns them to variables.
■■
The inputrecord statement focuses on a section of an XML stream.
71328_Pman_CH09I
12/14/01 3:02 PM
Page 217
Working with XML ■■
The getinput statement copies the input stream and pushes it onto the stack.
■■
The setinput statement sets a new input stream from the top value on the stack.
An NQL script also has an output stream. Operations for working with the output stream include the following: ■■
The output statement adds data to the output stream in XML format.
■■
The outputrecord statement creates section tags around XML data in the output stream.
■■
The getoutput statement makes a copy of the output stream on the stack.
■■
The setoutput statement sets a new output stream from the top value on the stack.
■■
The notify statement performs real-time output and notification.
In addition to primitive XML operations, NQL also supports XML parsing sessions, powered by an XML engine. ■■
The openxml statement opens a parsing session.
■■
The firstnode statement locates the first section of XML by name and sets it as the focus. You can nest the use of firstnode.
■■
The getnode statement extracts values from within the current section of focus.
■■
The getnodexpath statement retrieves element data that matches an XPath query.
■■
The nextnode statement advances to the next section of XML by name and sets it as the focus.
■■
The closenode statement closes the current nested area of focus in the XML.
■■
The closexml statement closes a parsing session.
XML is a universal way of representing content. You now know how to work with XML in Network Query Language. Combined with the other capabilities described in the rest of this book, you can easily create scripts that convert to and from XML and other data formats.
217
71328_Pman_CH09I
12/14/01 3:02 PM
Page 218
71328_Pman_CH10I
12/14/01 3:00 PM
Page 219
CHAPTER
10 Accessing Web Sites
The World Wide Web plays a prominent role in today’s era of connected applications. Network Query Language provides facilities for accessing Web pages, crawling entire Web sites, and downloading files. This chapter begins with some background on how the Web works, then describes NQL’s two methods for accessing Web pages, Web primitives and the controlled browser. Finally, site crawling and file downloading are covered. The tutorial at the end of the chapter submits a search to a book retail Web site and captures the results.
The World Wide Web The World Wide Web is a network of networks, in which millions of computers participate at any given moment. A number of protocols can be used on the Web, but the primary one is HyperText Transfer Protocol (HTTP). The Web works on a simple client/server principal, illustrated by Figure 10.1. Typically, HTTP clients are Web browsers controlled by interactive users, but other kinds of programs such as intelligent agents can also be clients. Clients issue a Web address, also known as a Uniform Resource Locator (URL). A URL includes enough information to locate a Web server as well as an indication of the specific resource (information) desired. For example, the URL www.my-university.com/assignments/cs101
219
71328_Pman_CH10I
220
12/14/01 3:00 PM
Page 220
Network Query Language
HTTP Request
HTTP Client
Resource
HTTP Server
Figure 10.1 HTTP Client/Server Model.
.htm specifies both a Web server (www.my-university.com) as well as the location of a file to be retrieved (/assignments/cs101.htm). Web servers respond to client requests by returning the requested resource or an error. A resource can be nearly any kind of information, from a Web page to an image to a video clip. The most common type of information returned, however, is a Web page. Web pages are documents composed in HyperText Markup Language (HTML). Web pages may contain references to other resources, such as images and other Web pages. These references are known as hyperlinks or links. When you enter a Web address in a browser and hit Enter, it may seem like a single communication occurs: You enter a URL, and back comes a page. In fact, there is usually more to it than that. When a Web address is entered in a browser, it causes a request to be made from the specified Web server. The response back from the server is typically an HTML document, which the browser displays. The Web page may contain references to images, sound files, and other resources. For example, an HTML page may contain one or more image tags, such as . In order for the image to be displayed, the browser must issue a separate request to the Web server to retrieve the actual picture. Most browsers retrieve images and other data automatically when they see the appropriate tags in the HTML. Thus, accessing a graphics-rich Web page may result in dozens of individual requests to a Web server.
Web Primitives The most elementary operations for accessing Web sites are known as Web primitives. In the HTTP protocol, these are called GET, HEAD, POST, and PUT commands. Weboriented languages usually support some or all of these operations. Table 10.1 summarizes the NQL Web primitive statements. All of the NQL Web primitive statements are also available in function form. Table 10.2 lists the Web primitive functions. Most of them return a Boolean result indicating success or failure. The Web statements and functions are described individually in the following sections.
71328_Pman_CH10I
12/14/01 3:00 PM
Page 221
Accessing Web Sites Table 10.1 Web Primitive Statements STATEMENT
PARAMETERS
DESCRIPTION
get
url
Retrieves a Web page or other resource from a Web server
getfile
url, filespec
Retrieves a Web page or other resource from a Web server and saves it as a file
getpage
url
Retrieves a Web page or other resource from a Web server (same as get)
head
url
Retrieves the header for a resource from a Web server
post
url, data
Submits a form to a Web server
putfile
url, filespec
Sends a file to a Web server
submit
[base-url]
Sets input fields and submits a form
Table 10.2 Web Primitive Functions FUNCTION
DESCRIPTION
boolean get(url)
Retrieves a Web page or other resource from a Web server
boolean getfile(url, filespec)
Retrieves a Web page or other resource from a Web server and saves it as a file
string getpage(url)
Retrieves a Web page or other resource from a Web server
boolean head(url)
Retrieves the header for a resource from a Web server
boolean post(url, data)
Submits a form to a Web server
boolean putfile(url, filespec)
Sends a file to a Web server
boolean submit(url)
Sets input fields and submits a form
Retrieving a Web Page (HTTP GET) The HTTP GET operation retrieves a Web page. In NQL, the get statement (or function) retrieves a Web page using this method. The parameter is a Web address (URL). get url boolean get(url)
221
71328_Pman_CH10I
222
12/14/01 3:00 PM
Page 222
Network Query Language
The resource indicated by the URL is retrieved and pushed onto the stack. A failure condition results if the page could not be retrieved (the function returns false). Note that while a retrieved resource could be an HTML document (Web page), it could just as easily be something else, such as an image, an XML document, or a download file. For this reason, the information is pushed onto the stack in binary form. The following code retrieves a Web page, then extracts information from it using pattern matching. get "http://www.my-news-site.com" match '{headline}' while { output link, headline nextmatch }
An alias for get is getpage. The getpage statement is identical to the get statement, but the getpage function is different from the get function. Whereas get() returns a Boolean result to indicate success or failure, getpage() returns the Web page itself (and does not push it onto the stack). getpage url string getpage(url)
To retrieve a Web resource and store it as a disk file rather than on the stack, the getfile statement (or function) is used. The parameters are a URL and a file specification. The Web page (or other resource) is retrieved and stored on disk under the specified filename. The following code retrieves an image from a Web site and stores it as a disk file. getfile "http://www.my-web-site.com/images/pic1.gif", "pic1.gif"
Retrieving a Web Page Header (HTTP HEAD) The HTTP HEAD operation retrieves a Web page header. In NQL, the head statement (or function) retrieves a Web page’s header information using this method. The parameter is a Web address (URL). head url boolean head(url)
The headers for the resource (not the resource itself) indicated by the URL are retrieved and pushed onto the stack. The following code retrieves the headers for a Web address. head "http://www.my-site.com" pop sHeaders
71328_Pman_CH10I
12/14/01 3:00 PM
Page 223
Accessing Web Sites
Posting a Form (HTTP POST) The HTTP POST operation submits a Web form and retrieves a resulting Web page. In NQL, the post statement (or function) submits a form using this method. The parameter is a Web address (URL). For the post statement, the form data for the post must be pushed on the stack in advance. For the post function, the form data is a second parameter. post url boolean post(url, data)
The resource indicated by the URL is retrieved and pushed onto the stack. A failure condition results if the page could not be retrieved. Note that while a retrieved resource could be an HTML document (Web page), it could just as easily be something else, such as an image, an XML document, or a download file. For this reason, the information is pushed onto the stack in binary form. The following code posts to a Web server, then extracts information from the results using pattern matching. push "query=watergate&page=1" post "http://www.my-news-site.com/search", match '{title}' while { output link, title nextmatch }
Submitting a Form Although the post statement can be used to submit a form, it requires the developer to know the exact form of the URL for submitting the form. Sometimes it is simpler to mimic the operation a user would follow: Accessing a form page, filling in form fields, and then clicking a Submit button. The NQL submit statement (or function) works in this manner. Submit takes one optional parameter, which is the full URL of the form page. This URL is needed to convert a relative URL in the form tags into a complete one. submit [base-url] boolean submit([base-url])
Form submittal follows these steps: After retrieving a Web page that contains a form, variables are set that correspond to form fields. Then, a submit statement submits the form. The response page is retrieved and pushed onto the stack. A failure condition results if the page could not be retrieved The following code visits the main page of a commercial Web site, fills in a form field, and submits a search. get "http://www.my-estore.com" query = "jackets"
223
71328_Pman_CH10I
224
12/14/01 3:00 PM
Page 224
Network Query Language submit "http://www.my-estore.com" pop ResponsePage
Compare the preceding code to the following code, which accomplishes the same thing but uses post rather than submit. post "http://www.my-estore.com/scripts/search.dll" pop ResponsePage
There are some trade-offs between submit and post. The work done by submit can be accomplished by post, but submit avoids having to compute form submittal URLs yourself; you can simply visit the main page and submit forms just as an interactive user would. When you use post, you have to do some research to figure out the target URL. On the other hand, retrieving a form page then submitting it adds an extra Web access that would be avoided with a direct post: Visiting a page with get followed by a submit is two Web accesses, whereas a post is just one Web access.
Sending a File A file can be transmitted to a Web file through an HTTP PUT operation, if the server grants you permission to do so. The putfile statement or function puts a file to a Web server. The parameters are the Web server URL and a local file specification. putfile url, filespec boolean putfile(url, filespec)
If the file is transmitted without error, a success condition results (the function returns true). The following code uses putfile to send a file. putfile "www.my-site.com/uploads", "new-orders.xml"
Controlled Browser The Web primitives described above aren’t satisfactory for navigation and data capture from dynamic, sophisticated Web sites. For example, some Web sites depend on client-side JavaScript code to execute in a real browser in order for the site to work. Web primitives are ineffective against these kinds of sites. NQL includes an alternative form of Web access called a controlled browser. When using a controlled browser, an instance of Internet Explorer is launched and put under remote control by your script. Because a real browser is accessing Web sites, it can successfully access most Web sites with ease. Table 10.3 shows the NQL controlled browser statements.
71328_Pman_CH10I
12/14/01 3:00 PM
Page 225
Accessing Web Sites Table 10.3 Controlled Browser Statements STATEMENT
PARAMETERS
DESCRIPTION
browse
[#ID,] url, postdata, targetframe, headers, flags
Navigates to a Web page
browseraction
[#ID,] action, ItemType, ItemLocator, ItemData, WaitText
Performs a browser action, such as clicking a link or button
closebrowser
[#ID]
Closes the controlled browser session
getbrowserdata
[#ID,] [var]
Retrieves the current document HTML
getbrowserframe
[#ID,] FrameNoVar, FrameNameVar
Returns the number and name of the current frame
getbrowserurl
[#ID] [, var]
Returns the current page’s URL
gettotalforms
[#ID] [, var]
Returns a count of form sections on the current page
gettotalframes
[#ID] [, var]
Returns a count of frames on the current page
openbrowser
[#ID,] url, postdata, targetframe, headers, flags
Opens a controlled browser session and navigates to a starting page
setformfield
[#ID,] text, value
Sets the input field of a form
setbrowserform
[#ID,] number
Selects a form section of the current page
setbrowserframe
[#ID,] number
Selects a frame of the current page
submitform
[#ID,] [number]
Submits a form
All of the NQL controlled browser statements are also available in function form. Table 10.4 lists the controlled browser functions. Most of them return a Boolean result that indicates success or failure. The controlled browser statements are described individually in the following sections.
The Browser Recorder The NQL development environment (in the Windows edition) contains a unique browser session record-playback facility called the browser recorder. This feature is similar to the macro recorder in Microsoft Word, recording actions that can be repeated later.
225
71328_Pman_CH10I
226
12/14/01 3:00 PM
Page 226
Network Query Language Table 10.4 Controlled Browser Functions FUNCTION
DESCRIPTION
boolean browse([#ID,] url, postdata, targetframe, headers, flags)
Navigates to a Web page
boolean browseraction([#ID,] action, ItemType, ItemLocator, ItemData, WaitText)
Performs a browser action, such as clicking a link or button
boolean closebrowser([#ID])
Closes the controlled browser session
boolean getbrowserdata([#ID,] [var])
Retrieves the current document HTML
boolean getbrowserframe([#ID,] FrameNoVar, FrameNameVar)
Returns the number and name of the current frame
boolean getbrowserurl([#ID] [, var])
Returns the current page’s URL
boolean gettotalforms([#ID] [, var])
Returns a count of form sections on the current page
boolean gettotalframes([#ID] [, var])
Returns a count of frames on the current page
boolean openbrowser([#ID] url, postdata, targetframe, headers, flags)
Opens a controlled browser session and navigates to a starting page
boolean setformfield([#ID,] text, value)
Sets the input field of a form
boolean setbrowserform([#ID,] number)
Selects a form section of the current page
boolean setbrowserframe([#ID,] number)
Selects a frame of the current page
boolean submitform([#ID,] [number])
Submits a form
Clicking the browser recorder toolbar button launches an instance of Internet Explorer. As you visit a Web site and interact with it—entering text fields and clicking on links and buttons—each of your actions generates a controlled browser statement in the code editor.
Controlled Browser Sessions The NQL controlled browser operations are modeled on the idea of a session, where the statements and functions must be used in a certain order. 1. A browser session is opened with openbrowser. 2. One or more browser actions may be commanded in any order desired, using browse, browseraction, getbrowserdata, getbrowserframe, getbrowserurl, gettotalforms, gettotalframes, setformfield, setbrowserform, setbrowserframe, and submitform. 3. The transaction session is closed with closebrowser.
71328_Pman_CH10I
12/14/01 3:00 PM
Page 227
Accessing Web Sites
Multiple Controlled Browser Sessions NQL uses a very simple syntax for controlled browser operations, such as the following line: openbrowser sURL
When there is a need to open multiple controlled browsers simultaneously, identifiers are needed to distinguish one browser session from another. In NQL, these identifiers are known as browser session IDs. A browser session ID is a name preceded by a pound sign, such as #news or #SearchEngine1. When a session ID is specified, it is the first parameter of a statement or function. For example, openbrowser #doc1, URL
Opening a Controlled Browser Session The openbrowser statement (or function) opens a Web session and launches an instance of Internet Explorer. There are six parameters, any of which may be blank or omitted: A starting URL, form data, a target frame, custom HTTP headers, flags, and a visibility flag. For simple access to a Web page only the URL needs to be specified. openbrowser [url[,postdata[,targetframe[,headers[,flags[,visible]]]]]]
The URL parameter is the Web address to navigate to initially. If URL is not specified, the browser session does not navigate to a page; however, you can perform navigation in a separate browse statement. The postdata parameter is the data required when submitting a form. If the URL parameter references a page that is normally a form submission, form data may be specified here. The targetframe parameter is the name or number of a frame. This parameter is only needed when navigating to a page that contains multiple frames. It sets focus to the specified frame after navigating to the page. The headers parameter allows you to specify additional HTTP headers to issue with when navigating to the starting page. Some Web sites require custom headers in order to respond correctly. Most of the time this parameter can be omitted. The flags parameter customizes the browser session’s behavior. For example, you might want to turn off display of images in order to retrieve Web pages faster. The flags value is a string created by combining any number of the following flag key words. The flags parameter defaults to empty when omitted. ■■
navOpenInNewWindow
■■
navNoHistory
■■
navNoReadFromCache
227
71328_Pman_CH10I
228
12/14/01 3:00 PM
Page 228
Network Query Language ■■
navNoWriteToCache
■■
navAllowAutoSearch
■■
navBrowserBar
■■
NoImages
■■
NoVideos
■■
NoBgSounds
■■
NoScripts
■■
NoJavaApp
■■
NoRunActiveX
■■
NoDownloadActiveX
■■
AutomateIE
The visible parameter determines whether or not the launched instance of Internet Explorer is visible. Making the browser visible is useful during script creation and debugging, but visibility is typically turned off in production code. The visible parameter defaults to false if omitted. The following code opens a controlled browser session and navigates to a Web page. openbrowser "http://www.nqli.com"
When working with multiple browser sessions, specify a session ID as the first parameter. openbrowser #yahoo, "http://www.yahoo.com" openbrowser #lycos, "http://www.lycos.com"
Closing a Browser Session The closebrowser statement ends a controlled browser session. closebrowser
If a browser session was opened with a browser session ID, specify that ID when closing it. closebrowser #ID
If you forget to close a browser session, NQL will close all open sessions when a script ends.
Navigating The browse statement navigates to a Web address. The parameter is the URL you wish to navigate to.
71328_Pman_CH10I
12/14/01 3:00 PM
Page 229
Accessing Web Sites browse url, postdata, targetframe, headers, flags
The parameters are identical to the openbrowser statement. Only the URL parameter is required. The URL parameter is the Web address to navigate to initially. The postdata parameter is the data required when submitting a form. If the URL parameter references a page that is normally a form submission, form data may be specified here. The targetframe parameter is the name or number of a frame. This parameter is only needed when navigating to a page that contains multiple frames. It sets focus to the specified frame after navigating to the page. The headers parameter allows you to specify additional HTTP headers to issue with when navigating to the starting page. Some Web sites require custom headers in order to respond correctly. Most of the time this parameter can be omitted. The flags parameter customizes the browser session’s behavior. For example, you might want to turn off display of images in order to retrieve Web pages faster. The flags value is a string created by combining any number of flag key words (listed in the description of openbrowser). The flags parameter defaults to empty if omitted. The following code opens a browser session, then uses the browser to visit several Web sites. openbrowser browse "http://www.my-news-site-1.com" getbrowserdata news1 browse "http://www.my-news-site-2.com" getbrowserdata news2 browse "http://www.my-news-site-3.com" getbrowserdata news3 closebrowser
If a browser session was opened with a browser session ID, specify that ID when issuing a browse statement. browse #ID, URL
Performing Browser Actions The browseraction statement allows you to apply actions to the current Web page the browser is viewing, such as clicking on a link or button. The browseraction statement takes up to five parameters. browseraction action, ItemType, ItemLocator, ItemData, WaitText
The action parameter indicates the type of action desired. The meaning and necessity of the other parameters depends on which action is being performed. Table 10.5 lists the browser actions and the meaning of parameters. If the browser action is successful, a success condition results.
229
230 ITEMTYPE map link height left statustext top visible width back forward
ACTION
click
click
click
get
get
get
get
get
get
go
go
Table 10.5 Browser Actions
-
-
-
-
-
-
-
-
-
-
Variable name
Variable name
Variable name
Variable name
Variable name
Variable name
-
-
-
ITEMDATA
-
-
-
-
-
-
-
-
Text on the next page to wait for
Text on the next page to wait for
Text on the next page to wait for
WAITTEXT
Navigates to the next page
Navigates to the previous page
Returns browser window width
Returns browser visibility (true/false)
Returns browser window top position
Returns browser status bar text
Returns browser window left position
Returns browser window height
Clicks an anchor link
Clicks an area of an image map
Clicks an anchor link
DESCRIPTION
12/14/01 3:00 PM
Text in the anchor
Text in the map area
Item descriptor
ITEMLOCATOR
71328_Pman_CH10I Page 230
ITEMTYPE home multi-option option cookie debug formfield height left pausebeforeclicks pausebeforeall
ACTION
go
refresh
select
select
set
set
set
set
set
set
set
-
-
-
-
Text in the field
-
-
Text in the item
Number of seconds
Number of seconds
Integer
Integer
Text data
0 or 1
Text data
-
-
-
-
ITEMDATA
-
-
-
-
-
-
-
-
-
-
-
WAITTEXT
continues
Pauses n seconds before each action
Pauses n seconds before each click action
Sets the browser window left position
Sets the browser window height
Sets the value of a form field
Turns debug messages on or off
Sets a cookie for the current page
Selects an option from a select list
Selects multiple options from a select list
Refreshes the browser window
Navigates to the home page
DESCRIPTION
12/14/01 3:00 PM
Text in the item
-
-
ITEMLOCATOR
Table 10.5 Browser Actions (continued).
71328_Pman_CH10I Page 231
231
232 ITEMTYPE timeout top Use NewBrowser Windows visible width window
windows
ACTION
set
set
set
set
set
stop
submit
wait
wait
waitinthread
Keys to send to the window
-
-
Text in the form
-
-
Class of the window to locate
-
Seconds
-
-
Integer
0 or 1
0 or 1
Integer
Seconds
ITEMDATA
Caption of the window to locate
Window caption
-
-
-
Waits in a thread for a specified window and optionally sends keystrokes to it when found
Waits for a window with the specified caption to be displayed
Pauses for n seconds
Submits a form
Stops the current navigation
Sets the browser window width
Sets the visibility of the browser window
⫺ -
Sets whether or not new browser windows will be followed
Sets the browser window top position
Changes the page wait timeout
DESCRIPTION
-
-
-
WAITTEXT
12/14/01 3:00 PM
-
-
-
-
ITEMLOCATOR
Table 10.5 Browser Actions (continued).
71328_Pman_CH10I Page 232
71328_Pman_CH10I
12/14/01 3:00 PM
Page 233
Accessing Web Sites
If a browser session was opened with a browser session ID, specify that ID when issuing a browseraction statement. browseraction #ID, action, ItemType, ItemLocator, ItemData, WaitText
Retrieving Web Page Data Once a browser session visits a Web page (via openbrowser or browse), the Web page may be retrieved using the getbrowserdata statement. The parameter is a variable to receive the data. getbrowserdata var
The Web page data, typically an HTML document, is copied into the variable. The following code navigates to a Web page, then retrieves the Web page with getbrowserdata. openbrowser url getbrowserdata page closebrowser
If a browser session was opened with a browser session ID, specify that ID when issuing a getbrowserdata statement. getbrowserdata #ID, var
Retrieving the Current Frame The getbrowserframe statement returns the number and name of the current frame. The parameters are a variable to receive the frame number and a variable to receive the frame name. getbrowserframe FrameNumberVar, FrameNameVar
The frame number variable receives the logical number of the frame, which will be a value greater than or equal to 1. The frame name is the name of the frame in the HTML page, if any. If a browser session was opened with a browser session ID, specify that ID when issuing a getbrowserframe statement. getbrowserframe #ID, FrameNumberVar, FrameNameVar
Retrieving the Current URL The getbrowserurl statement returns the URL of the current frame. The parameter is a variable to receive the URL. getbrowserurl var
233
71328_Pman_CH10I
234
12/14/01 3:00 PM
Page 234
Network Query Language
The Web address of the current page is returned in the specified variable. If the browser is viewing a frame-based page, the Web address of the frame with current focus is returned. The following code visits a Web page, submits a form, then retrieves the URL of the results page. openbrowser url1 submitform getbrowserurl url2 closebrowser
If a browser session was opened with a browser session ID, specify that ID when issuing a getbrowserurl statement. getbrowserurl #ID, var
Submitting a Form To submit a form, the submitform statement is used. The parameter is an optional form number that defaults to 1. There is no need to specify a form number if a page contains only one form section. submitform [number]
The following code submits a form using the second form section of a page. submitform 2
If a browser session was opened with a browser session ID, specify that ID when issuing a submitform statement. submitform #ID, [number]
Counting the Forms on a Page The gettotalforms statement returns the number of forms on the current Web page. The parameter is a variable to receive the count. gettotalforms var
If a browser session was opened with a browser session ID, specify that ID when issuing a gettotalforms statement. gettotalforms #ID, var
71328_Pman_CH10I
12/14/01 3:00 PM
Page 235
Accessing Web Sites
Counting the Frames on a Page The gettotalframes statement returns the number of frames on the current Web page. The parameter is a variable to receive the count. gettotalframes var
If a browser session was opened with a browser session ID, specify that ID when issuing a gettotalframes statement. gettotalframes #ID, var
Setting Form Fields When preparing to submit a form, it is necessary to fill in form fields. The setformfield statement sets a form field value. The parameters are the name of the form field and a value. setformfield fieldname, fieldvalue
The following code visits a Web page and sets two form fields in anticipation of submitting a form. openbrowser browse sURL setbrowserform 1 setformfield 1, sQuery setformfield "max", 10
If a browser session was opened with a browser session ID, specify that ID when issuing a setformfield statement. setformfield #ID, fieldname, fieldvalue
Selecting a Form On Web pages with multiple forms, it is necessary to select a specific form before setting form fields. The setbrowserform statement selects a form. The parameter is a form number greater than or equal to 1. setbrowserform form-number
The following code selects the second form on a page. setbrowserform 2
235
71328_Pman_CH10I
236
12/14/01 3:00 PM
Page 236
Network Query Language
If a browser session was opened with a browser session ID, specify that ID when issuing a setbrowserform statement. setbrowserform #ID, form-number
Selecting a Frame When working with frame-based Web pages, it is necessary to select a specific frame before performing actions on the page. The setbrowserframe statement selects a frame. The parameter is a frame number greater than or equal to 1. setbrowserframe frame-number
The following code selects the third frame on a page. setbrowserframe 3
If a browser session was opened with a browser session ID, specify that ID when issuing a setbrowserframe statement. setbrowserframe #ID, frame-number
Site Crawling and File Downloading NQL provides statements for crawling Web sites and downloading files. Table 10.6 summarizes the NQL site crawling statements. Many of the NQL site crawling statements are also available in function form. Table 10.7 lists the site crawling functions. Most of them return a Boolean result that indicates success or failure. The site crawling statements and functions are described individually in the following sections.
Converting a URL to an Absolute URL The absurl statement or function turns a relative (partial) Web address into an absolute one. The statement form assumes a relative URL is on the stack. The parameter is the base URL to be used to make the URL on the stack complete. absurl base-url
The function form of absurl takes two parameters: A relative URL and a base URL. The string result is an absolute URL. string absurl(url, base-url)
71328_Pman_CH10I
12/14/01 3:00 PM
Page 237
Accessing Web Sites Table 10.6 Site Crawling Statements STATEMENT
PARAMETERS
DESCRIPTION
absurl
url
Retrieves a Web page or other resource from a Web server
crawl
url, depth [, text[, type]]
Crawls a site and places URLs and HTML on the stack
crawl
[base-url]
Computes links for the HTML page on the stack
crawl
url, depth
Crawls a site and executes a code block for each page encountered*
download
url, depth, file-type [, path [, overwrite [, text [, notify [, link-type]]]]]
Crawls a site and downloads files
fetch
base-url, pattern [, text]
Crawls the HTML on the stack to one level and pushes the pages matching a pattern onto the stack
Table 10.7 Site Crawling Functions FUNCTION
DESCRIPTION
string absurl(url, base-url)
Retrieves a Web page or other resource from a Web server
boolean crawl(url, depth [, text[, type]])
Crawls a site and places URLs and HTML on the stack
boolean crawl([base-url])
Computes links for the HTML page on the stack
boolean download(url, depth, file-type [, path [, overwrite [, text [, notify [, link-type]]]]])
Crawls a site and downloads files
boolean fetch(base-url, pattern [, text])
Crawls the HTML on the stack to one level and finds pages matching a pattern
If the URL is already absolute, it is not modified. The following code uses absurl to ensure that Web addresses are complete before outputting them. BaseURL = "http://www.my-news-site.com" get BaseURL match '{headline}' while {
237
71328_Pman_CH10I
238
12/14/01 3:00 PM
Page 238
Network Query Language output absurl(link, BaesURL), headline nextmatch }
The absurl statement or function is useful for making retained Web addresses meaningful, where loss of the original context of the URL would cause problems in understanding relative links.
Crawling Web Sites NQL provides three forms of crawl statements for crawling Web sites, each with different parameters and different behaviors.
Crawling to the Stack The first form of crawl takes a given URL, retrieves the page, and crawls its links to other pages, up to the specified number of levels. The retrieved pages are pushed onto the stack. The parameters are a URL, a crawl depth, continuation page text, and a link type (“domain”, “server”, or “all”). The last two parameters are optional. crawl url, depth [, continuation-text [, link-type]] boolean crawl(url, depth [,continuation-text[, link-type]])
The Web address is retrieved, the URL and HTML are pushed onto the stack, and links within it are recognized. Those links in turn are retrieved, repeating until the desired site depth has been satisfied. The number of pages is set into a variable named CrawlCount. A log of the site crawl is set into a variable named CrawlLog. There is one stack entry for each page: The first line is the URL, and the remainder is the page’s HTML content. The nextline statement is useful for separating the URL from the HTML in the stack items. If continuation page text is specified, only links containing that text are visited. This is handy when you know something about the format of desired links as compared to other links. For example, when processing search results from a retail site, following all links containing “results” might avoid unnecessary crawling of pages not related to your interests. If a link type is specified, the extent of the site crawl is affected. ■■
A link type of “domain” restricts the crawl to links that are part of the same domain as the original URL (that is, the domain.type part of a system.domain.type URL is the same as the original). For example, if you were crawling www.my-site.com, search.my-site.com and store.my-site.com are considered part of the same domain and would be included in the crawl.
■■
A link type of “server” restricts the crawl to links that are on the same server as the original URL. For example, if you were crawling www.my-site.com, links to www.my-site.com would be followed while links to support.my-site.com would not.
■■
A link type of “all” follows all links, regardless of domain.
71328_Pman_CH10I
12/14/01 3:00 PM
Page 239
Accessing Web Sites
The following code uses crawl to crawl a Web site to three levels, then retrieves and displays the URL and HTML of each page. string URL, HTML crawl "http://www.my-site.com", 3 for pages = CrawlCount { nextline URL pop HTML show URL, HTML }
Crawling a Single Page The second form of crawl examines the HTML page on the stack and identifies its links, but does not visit them. The optional parameter is a base URL for turning relative URLs into absolute ones. crawl [base-url] boolean crawl([base-url])
The Web page is analyzed. Just one stack item is created containing the URLs of all links in the page, each separated by a newline. The nextline function is handy for iterating through the links. The following code uses crawl to find the links in a page. get "http://www.my-site.com" crawl "http://www.my-site.com" while nextline(sCurrLink) { ...do something with sCurrLink... }
Crawling Using Code Blocks P L AN N E D F E AT U R E The third form of crawl crawls a Web site to the specified number of levels, executing a code block for each page that is found. The parameters are a URL and a crawl depth. crawl url, depth { ...process page... }
As pages are found, the crawl block executes. The top stack value is the current page, and stack clean-up is automatic. The variable CrawlURL contains the URL of the current page, CrawlParentURL contains the parent page’s URL, and CrawlLevel contains the crawl level at which the page was found.
239
71328_Pman_CH10I
240
12/14/01 3:00 PM
Page 240
Network Query Language
Web Services The growing need for automation between organizations, their networks, and the Internet has led to the idea of Web services. Web services are the automated counterpart to the World Wide Web as we know it today. Web services will permit two organizations’ computer systems to exchange information or perform transactions automatically, in contrast to the norm today where a human being performs these tasks interactively with a Web browser. To make Web services attractive and easy to implement, they are based on two winning technologies that have already been embraced in the computer industry: HTTP (the protocol of the Web) and XML. Web services work by submitting XML requests to a Web address and receiving XML responses. You can think of a Web service as a function or component you call, with the interesting quality that the software doing the responding may be halfway around the world. If you’re familiar with the concept of a remote procedure call, you’ll be right at home with Web services. The primary protocol for Web services is Simple Object Access Protocol (SOAP). There are also related specifications for describing Web services and for discovering the available Web services on a Web server. Network Query Language has the ability to act as a SOAP client, making requests of Web services and retrieving the results for use in your programs.
Accessing a Web Service The getobject statement or function accesses a Web service, acting as a SOAP client. The parameters are a Web service URL, the name of the method (Web service) to access, and an optional interface. If you omit the interface, the default interface for the Web service is used. Before invoking getobject, an XML payload must be pushed onto the stack. getobject url, method [, interface] boolean getobject(url, method [, interface])
The XML payload is popped off of the stack, and the Web service is accessed. If the Web service responds, a success condition results (the function returns true). If the Web service returned a value, it is stored in a variable named MethodNameReturn. The following code shows a Web service named reverse_string being accessed to reverse a character string. push '<SerializedStream SerializationPattern="urn:schemasmicrosoft-com:soap:v1" headers="#ref-0" main="#ref-1"> soap:cdl:com.develop.demos.string_test !dlrow olleH' if getobject("http://soap.develop.com/sd2/vbasperl.soap ", "reverse_string", "soap:cdl:com.develop.demos.string_test") {
71328_Pman_CH10I
12/14/01 3:00 PM
Page 241
Accessing Web Sites show [reverse_stringReturn] } end
Tutorial: BookSearch Now that the basics of NQL Web interaction have been covered, let’s write a Weboriented script. In this tutorial, you will create a script that submits a search to a book retail Web site and captures the results. The script will need to visit the site’s page, select books as a category, enter a subject, and submit the search. Book titles and prices will need to be located and captured from the response page. The captured books will output as XML. There are four steps in this tutorial: 1. Launch the NQL development environment. 2. Enter the BookSearch script. 3. Run the BookSearch script. 4. Understand the BookSearch script. When you are finished with this tutorial, you will have seen how to do the following in NQL: ■■
Retrieve a Web page with Web primitives.
■■
Set input fields and submit a form.
■■
Capture data from a Web page.
Let’s begin!
Step 1: Launch the NQL Development Environment On a Windows system, launching the NQL development environment can be accomplished by clicking on the NQL Client desktop icon, or by selecting Program Files, Network Query Language, NQL Client from the Start Menu. On other platforms, you should have a desktop icon and/or a command-line method of launching the NQL Client. At this point, you should have the NQL development environment active on your desktop, with an empty code window. Now you’re ready to enter the tutorial script.
Step 2: Enter the BookSearch Script In the NQL development environment, enter the script shown in Listing 10.1 and save it under the name BookSearch.nql. Enter the script, then save it by clicking the Save toolbar button (which has a disk icon). If you prefer, you may copy BookSearch.nql from the companion CD. If you have installed the companion CD on your system, you will have all of the book’s tutorial
241
71328_Pman_CH10I
242
12/14/01 3:00 PM
Page 242
Network Query Language
//booksearch - submits a search to Amazon.com, collects results from first response page, and outputs as XML. get "http://www.amazon.com" index = "Books" [field-keywords] = "artificial intelligence" submit "http://www.amazon.com" match '{title}*
by {Author}*Our Price: ${price}
' while { outputrecord "result" output title, author, price nextmatch }
Listing 10.1 BookSearch script.
materials in a \Tutorials directory on your hard drive. Click the Open toolbar button (folder icon), and select BookSearch.nql from the Tutorials\ch10 folder. At this point, the script in Listing 10.1 should be in your code window, either because you entered it by hand or because you opened the script from the companion CD.
Step 3: Run the BookSearch Script You are now ready to run the script. You can do this by selecting Build, Run from the menu, clicking the Run toolbar button, or pressing F5. Once the script ends, the Output tab of the development environment should contain an XML stream of book results. If this does not happen, check the following: ■■
Check your script for typographical errors.
■■
Check the NQL client’s Errors tab for error messages.
At this point you should have seen the BookSearch script run, submitting a form to a Web site and capturing data from the response. Although we haven’t discussed how it works yet, you’ve witnessed NQL interacting with a Web site. In the next step, we’ll dissect the script and explain exactly how it works.
Step 4: Understand the BookSearch Script We now want to make sure we understand every part of the BookSearch script. The first line is a comment line.
71328_Pman_CH10I
12/14/01 3:00 PM
Page 243
Accessing Web Sites //booksearch - submits a search to Amazon.com, collects results from first response page, and outputs as XML.
The script retrieves the Amazon.com home page with a get statement. If successful, the HTML page is pushed onto the stack. get "http://www.amazon.com"
The Amazon.com home page contains a search form with two input fields. One is named index, and is a selection of product types (books, music, electronics, and so on). The other is named field-keywords, and is a place to enter search keywords. Before submitting the search form, the input fields will need to be set. To set the input fields, variables are assigned with the same names as the form fields. In the case of field-keywords, we need to put square brackets around the variable name because it is not a legal NQL variable name. The brackets tell the compiler to accept the variable name anyway. index = "Books" [field-keywords] = "artificial intelligence"
With the input fields set, we can now submit the form with a submit statement. The HTML page on the stack is examined, the form section is found, and the input fields are set from the variables we just assigned. The page on the stack is replaced by the response to the form. submit "http://www.amazon.com"
Now that the response page is on the stack, we can extract data from it. A match statement searches for the first occurrence of a book title, author, and price in the format we expect. (If the Web site changes significantly, this pattern won’t work and will need to be revised). match '{title}*
by {Author}*Our Price: ${price}
'
If the match is successful, a while loop executes where the title, author, and price are output in XML. The values are output by an output statement, but this is preceded by an outputrecord statement to frame the fields in tags. A nextmatch statement finds the next match, so that the while loop will continue as long as there are more matches on the page. while { outputrecord "result" output title, author, price
243
71328_Pman_CH10I
244
12/14/01 3:00 PM
Page 244
Network Query Language nextmatch }
At this point, you’ve seen an NQL script interact with a Web site and capture results.
Further Exercises You could amend this example in a number of ways. Here are some interesting modifications that can be made: ■■
Make the interaction with the Web site more aggressive, and/or find a different Web site to interact with. If necessary, use the controlled browser instead of Web primitives for sophisticated navigation.
■■
Add error checking, so that a get or submit failure is detected and reported.
Chapter Summary Network Query Language includes several methods for accessing Web sites, including basic Web primitives. ■■
The get, getpage, and getfile statements retrieve Web pages (an HTTP GET operation).
■■
The head statement retrieves a Web page header (an HTTP HEAD operation).
■■
The post and submit statements submit forms (an HTTP POST operation).
■■
The putfile statement transmits a file to a Web server (an HTTP PUT operation).
For deluxe interaction with dynamic Web sites, NQL can launch a browser under remote control. Controlled browser capabilities include the following: ■■
The NQL development environment offers a browser recorder for training Web scripts.
■■
The openbrowser statement begins a browser session.
■■
The browse statement navigates to a Web address.
■■
The closebrowser statement ends a browser session.
■■
The getbrowserdata statement retrieves the current HTML document from the browser.
■■
The getbrowserurl statement retrieves the current URL from the browser.
■■
The getbrowserframe and getbrowserform statements retrieve the current frame and form selection from the browser.
■■
The gettotalframes and gettotalforms statements retrieve the current frame and form count from the browser.
■■
The setbrowserframe and setbrowserform statements select a frame and form.
71328_Pman_CH10I
12/14/01 3:00 PM
Page 245
Accessing Web Sites ■■
The setformfield statement sets a form field.
■■
The submitform statement submits a form.
NQL offers facilities for crawling Web sites and downloading files. ■■
The absurl statement converts a relative Web address into an absolute one.
■■
The crawl statement crawls a Web site, with three possible behaviors.
■■
The download statement crawls a Web site and downloads files.
Retrieving data from Web sites is one of the most frequent uses for NQL. With the communications and conversion facilities described in other chapters, you can create scripts that transport (and transform) information between your local network and the World Wide Web.
245
71328_Pman_CH10I
12/14/01 3:00 PM
Page 246
71328_Pman_CH11I
12/14/01 2:57 PM
Page 247
CHAPTER
11 Processing HTML
Extracting information from Web pages can be a tricky business. Web pages are visual entities designed to be read by people, not processed by programs. Although XML promises to simplify the job of extracting data from Web pages, HTML is still the code primarily found on Web sites today. Network Query Language provides patternmatching capabilities for locating objects on Web pages. For example, pattern matching can be used to locate part numbers, descriptions, and prices from an online catalog. This chapter begins with an overview of the five types of pattern matching available in NQL, then goes into detail about each one. A tutorial is supplied for each type of pattern matching. The chapter also covers HTML operations.
Types of Pattern Matching The millions of Web pages on the Internet vary greatly in their organization. Some Web pages are simple, while others are amazingly complex. Some sites serve up static Web pages while others are dynamic, creating pages on the fly in response to input fields and user actions. Pattern matching comes to the rescue, making it possible to express rules for locating wanted data. With properly expressed rules, the HTML falls through a sieve, where desired information is captured and undesired information is discarded. Nearly all forms of pattern matching are based on either of two suppositions: The desired data has identifiable landmarks surrounding it or the data itself contains unique characteristics.
247
71328_Pman_CH11I
248
12/14/01 2:57 PM
Page 248
Network Query Language
Due to the variety of data on the Web, no one method of pattern matching meets all needs. For that reason, NQL contains a variety of pattern-matching methods: HTML pattern matching, data pattern matching, HTML table processing, regular expressions, and Web queries. Table 11.1 lists some of the attributes of the different types of pattern matching.
HTML Pattern Matching Pattern matching in HTML is based on patterns of tags and text sequences. Specifically, a pattern match contains tags, text, and wildcards. Wildcards are used for capturing information, and are notated by placing a variable name in curly braces. Consider the pattern below, which has two wildcards, one named link and one named headline. {headine}
This pattern can be used to capture news headlines from some news Web sites. The following fragment of an HTML document contains three matches to this pattern. Future of F16 in doubt
Filibuster Stalls Education Bill
Senator Considers Changing Parties
The HTML pattern-matching statements are listed in Table 11.2. The HTML pattern matching statements are also available as functions. Table 11.3 lists the HTML pattern matching functions. Pattern matching with HTML is one of the easier forms of pattern matching to use, because you can create patterns by copying and pasting HTML from the source to any Web page. However, this form of pattern matching is very sensitive to changes in the HTML. An innocent or minor revision to a Web page, such as a cosmetic change, can render an HTML pattern useless.
Finding a Match The match statement finds a pattern match against the HTML on the stack. The parameter is an HTML pattern. match pattern
If an occurrence of the pattern is located, a success condition results and variables are created containing the captured data. The HTML on the stack is shortened; all that remains is the portion after the pattern match. If the pattern cannot be located, a failure
HTML PATTERN Tags and text High High Tags and text
ATTRIBUTE
Patterns
Sensitivity to Web page layout changes
Sensitivity to changes in the order of data
What can be captured
Text
High
Low
Sequences of objects
DATA PATTERN
Tags and text within tables
High
High
Sequences of statements
HTML TABLE
Tags and text
High
High
Character patterns
REGULAR EXPRESSIONS
Tags and text
Low
Low
SQL-like queries
WEB QUERIES
12/14/01 2:57 PM
Table 11.1 Comparison of Pattern-Matching Methods
71328_Pman_CH11I Page 249
249
71328_Pman_CH11I
250
12/14/01 2:57 PM
Page 250
Network Query Language Table 11.2 HTML Pattern-Matching Statements STATEMENT
PARAMETERS
DESCRIPTION
match
pattern
Matches the specified pattern against the HTML on the stack
matchall
pattern
Matches the specified pattern against the HTML on the stack repeatedly
nextmatch
Repeats the last pattern match against the HTML on the stack
Table 11.3 HTML Pattern-Matching Functions FUNCTION
DESCRIPTION
boolean match(pattern)
Matches the specified pattern against the HTML on the stack
boolean matchall(pattern)
Matches the specified pattern against the HTML on the stack repeatedly
boolean nextmatch( )
Repeats the last pattern match against the HTML on the stack
condition results and the HTML is removed from the stack. The following code retrieves a Web page, then uses HTML pattern matching to locate all table cells on the page. get URL while match("{data} | ") { ...do something with data... }
Patterns may contain optional sections. Optional sections are useful when dealing with irregularities in HTML such as the following HTML code, where some items have additional parts not common to all items. $15.00 $17.00 (floor model)
$8.00
$12.00 (sale price this weekend only)
Optional sections are enclosed in square brackets. Thus, the pattern below is a valid one for dealing with this wayward HTML. {price} [({note})]
71328_Pman_CH11I
12/14/01 2:57 PM
Page 251
Processing HTML
An optional section may contain {variable} sections, but not at the very end of the pattern. Thus,
[| {value}] |
is not a valid pattern while [| {value} | ]
is.
Finding the Next Match The nextmatch statement or function repeats the last pattern match. No parameters are required. nextmatch
Strictly speaking, you could just issue another match statement rather than using nextmatch, but nextmatch is handy in that you don’t have to specify the pattern all over again—it’s remembered from the initial match. The following code uses nextmatch to iterate through all occurrences of a pattern on a page. get url match pattern while { ...do something with data from the match... nextmatch }
Finding All Matches The matchall statement is like match, but performs multiple pattern matches against the HTML on the stack until there are no more. Like match, the parameter is a pattern. matchall pattern
Unlike match, matchall does not return its data in variables. Instead, the matching values are added to the script’s output stream in XML format. To see this in action, try entering the following script in the NQL development environment and running it, supplying a URL to get that contains tables. push "Brown, Molly | Black, Burton | White, Willie | " matchall "{last}, {first} | "
The XML output contains all of the table cells.
Tutorial: Quote1 Let’s see HTML pattern matching work in the real world. The script will request a page of multiple stock quotes from a financial Web site, locate the quote information using HTML pattern matching, and output the captured data as XML. All five of the
251
71328_Pman_CH11I
252
12/14/01 2:57 PM
Page 252
Network Query Language
tutorials in this chapter access the same quote data from the same source, but apply a different type of pattern matching in each case. There are four steps in this tutorial: 1. Launch the NQL development environment. 2. Enter the Quote1 script. 3. Run the Quote1 script. 4. Understand the Quote1 script. When you are finished with this tutorial, you will have seen how to do the following in NQL: ■■
Retrieve a Web page with Web primitives.
■■
Match Web page data using HTML pattern matching.
■■
Output data as XML.
Let’s begin!
Step 1: Launch the NQL Development Environment Launch the NQL development environment. On a Windows system, this can be accomplished by clicking on the NQL Client desktop icon, or by selecting Program Files, Network Query Language, NQL Client from the Start Menu. On other platforms, you should have a desktop icon and/or a command-line method of launching the NQL Client. At this point, you should have the NQL development environment active on your desktop, with an empty code window. Now you’re ready to enter the tutorial script.
Step 2: Enter the Quote1 Script In the NQL development environment, enter the script shown in Listing 11.1 and save it under the name Quote1.nql. Enter the script, then save it by clicking the Save toolbar button (which has a disk icon). If you prefer, you may copy Quote1.nql from the companion CD. If you have installed the companion CD on your system, you will have all of the book’s tutorial materials in a \Tutorials directory on your hard drive. Click the Open toolbar button (folder icon), and select Quote1.nql from the Tutorials\ch11 folder. At this point, the script in Listing 11.1 should be in your code window, either because you entered it by hand or because you opened the script from the companion CD. Since the quote site for this script is imaginary (a real quote site would have changed layout by the time you read this book), a local copy of the expected HTML is
71328_Pman_CH11I
12/14/01 2:57 PM
Page 253
Processing HTML
//Quote1 - get a stock quote and extract data, // using HTML pattern matching. //get the stock quote //get "quote.my-site.com/quote/stocks/quotes.asp?symbols=msxx" load "quote.htm" //perform a pattern match to locate the quote fields in the HTML. match " | Micro Semantic Extensions, Inc. (MSXX) |
|---|
| Last Sale | | {LastSale} |
| Open | {Open} |
| Change | {Change} |
| Change % | {Percent}% |
| Volume | {Volume} |
| High | {High} |
| Low | {Low} |
" //output the results as XML output LastSale, Open, Change, Percent, Volume, High, Low
Listing 11.1 Quote1 script.
included in the \Tutorial\ch11 directory. The script will load this page rather than perform an actual Internet access. The HTML we will be scanning is shown in Listing 11.2. Each of the other examples in this chapter will be against this same HTML page, but using a different form of pattern matching each time.
Step 3: Run the Quote1 Script You are now ready to run the script. You can do this by selecting Build, Run from the menu, clicking the Run toolbar button, or pressing F5. Once the script ends, the Output tab of the development environment should contain an XML stream of stock quotes. 65.8065.650.330.5021,098,40066.8865.5 4
If this does not happen, check the following:
253
71328_Pman_CH11I
254
12/14/01 2:57 PM
Page 254
Network Query Language
<TITLE>Stock Quote | Micro Semantic Extensions, Inc. (MSXX) |
|---|
| Last Sale | | 65.80 |
| Open | 65.65 |
| Change | 0.33 |
| Change % | 0.50% |
| Volume | 21,098,400 |
| High | 66.88 |
| Low | 65.54 |
Listing 11.2 Stock Quote HTML. ■■
Check your script for typographical errors.
■■
Check that your script and quote.htm are in the same directory.
■■
Check the NQL client’s Errors tab for error messages.
At this point you should have seen the Quote1 script run, retrieving a Web page and locating stock quote data. Although we haven’t discussed how it works yet, you’ve witnessed NQL putting HTML pattern matching to use. In the next step, we’ll dissect the script and explain exactly how it works.
Step 4: Understand the Quote1 Script We now want to make sure we understand every part of the Quote1 script. The first two lines are comment lines. //Quote1 - get a stock quote and extract data, // using HTML pattern matching.
The stock quote is retrieved. In a real script, a get statement would be used to access an Internet quote page. Here, we comment out the get statement and use load to load the stock quote HTML page provided with the tutorial. The net effect is the same: An HTML page is on the stack. //get the stock quote //get "quote.my-site.com/quote/stocks/quotes.asp?symbols=msxx" load "quote.htm"
Now for the pattern match. In HTML pattern matching, the match statement is used along with a pattern of HTML tags and text. As expected, the pattern is very similar to
71328_Pman_CH11I
12/14/01 2:57 PM
Page 255
Processing HTML
the actual page listed earlier in Listing 11.2. Areas to be captured are represented as variable names in curly braces. //perform a pattern match to locate the quote fields in the HTML. match " | Micro Semantic Extensions, Inc. (MSXX) |
|---|
| Last Sale | | {LastSale} |
| Open | {Open} |
| Change | {Change} |
| Change % | {Percent}% |
| Volume | {Volume} |
| High | {High} |
| Low | {Low} |
"
If the pattern match is successful, the quote fields have been stored in variables. They can now be output in XML format with the output statement. //output the results as XML output LastSale, Open, Change, Percent, Volume, High, Low
At this point, you’ve seen an NQL script interact with a Web site and capture results using HTML pattern matching.
Further Exercises You could amend this example in a number of ways. Here are some interesting modifications that can be made: ■■
Amend the script to work with a real quote site.
■■
Add error checking, so that a get failure is detected and reported.
Data Pattern Matching Data pattern matching finds objects on Web pages without regard to HTML tags. Patterns are series of data types, such as names, dates, or amounts. Unlike HTML pattern matching, data patterns can be created without having to look at the HTML source to a Web page. Often, you can determine a data pattern just by viewing a page in your browser. Patterns may contain wildcards that are used for capturing information and are notated by placing a variable name in curly braces. Consider the following pattern, which has two wildcards, one named company and one named industry. name{company}+text:industry+name{industry}
255
71328_Pman_CH11I
256
12/14/01 2:57 PM
Page 256
Network Query Language
Data patterns consist of one or more terms. Terms may contain data types, text, and wildcards. The data type is required; the text and wildcard portions are optional. data-type [:text] [{variable}]
The first part of a term, which is required, is a data type such as name or amount. Table 11.4 lists the available data types. Any term may be followed by a colon and some text that must appear within the term. The term below matches text that contains the word name. text:name
If you want to capture a term as data, it is followed by a variable name in curly braces. The pattern below has three terms, two of which store results in variables. name+name{city}+state{state}
Table 11.4 Data Pattern Matching Data Types DATA TYPE
DESCRIPTION
amount
Matches a U.S. dollar amount (with a dollar sign)
date
Matches a date
datetime
Matches a date followed by a time
float
Matches a floating point number (with a decimal point)
fraction
Matches a fraction or an integer followed by a fraction
integer
Matches an integer (whole number)
name
Matches a sequence of capitalized words
number
Matches an integer, an integer with commas, a float, or an amount
phone
Matches a phone number
ssn
Matches a U.S. social security number
state
Matches a two-letter U.S. or Canadian postal abbreviation
text
Matches any text
time
Matches a time
word
Matches a single word
words
Matches one or more words terminated by two spaces, a tab, or a newline
zipcode
Matches a U.S. five-digit or nine-digit zip code
71328_Pman_CH11I
12/14/01 2:57 PM
Page 257
Processing HTML
If there are multiple terms in a pattern, each term is separated by a plus sign or a comma. A plus sign means the data types must be immediately adjacent to each other on the page. A comma means other data may occur between the fields. The pattern below requires date and time to be adjacent, but phone can be elsewhere on the page. date+time,phone
There is just one NQL statement for data pattern matching, matchdata.
Finding a Match The matchdata statement (or function) finds a pattern match against the HTML on the stack. The parameter is a data pattern. matchdata pattern
If an occurrence of the pattern is located, a success condition results and variables are created reflecting the data. The HTML on the stack is shortened; all that remains is the portion after the pattern match. If the pattern cannot be located, a failure condition results and the HTML is removed from the stack. The following code retrieves a Web page, then uses data pattern matching to locate all addresses on the page. get URL while matchdata("name{city}+state{state}+zipcode{zip}") { ...do something with city, state, and zip... }
Patterns may contain optional sections. Optional sections are useful when dealing with irregularities in HTML such as the following HTML code. Some items have additional parts not common to all items. $15.00 $17.00 (floor model)
$8.00
$12.00 (sale price this weekend only)
Optional sections are enclosed in square brackets. Thus, the following pattern is valid for dealing with this HTML. amount{price}+[text:(+words{note}+text:)]
Tutorial: Quote2 Let’s see data pattern matching work in the real world. The script will request a page of multiple stock quotes from a financial Web site, locate the quote information using data pattern matching, and output the captured data as XML. All five of the tutorials
257
71328_Pman_CH11I
258
12/14/01 2:57 PM
Page 258
Network Query Language
in this chapter access the same quote data from the same source, but apply a different type of pattern matching in each case. There are four steps in this tutorial: 1. Launch the NQL development environment. 2. Enter the Quote2 script. 3. Run the Quote2 script. 4. Understand the Quote2 script. When you are finished with this tutorial, you will have seen how to do the following in NQL: ■■
Retrieve a Web page with Web primitives.
■■
Match Web page data using data pattern matching.
■■
Output data as XML.
Let’s begin!
Step 1: Launch the NQL Development Environment Launch the NQL development environment. On a Windows system, this can be accomplished by clicking on the NQL Client desktop icon, or by selecting Program Files, Network Query Language, NQL Client from the Start Menu. On other platforms, you should have a desktop icon and/or a command-line method of launching the NQL Client. At this point, you should have the NQL development environment active on your desktop, with an empty code window. Now you’re ready to enter the tutorial script.
Step 2: Enter the Quote2 Script In the NQL development environment, enter the script shown in Listing 11.3 and save it under the name Quote2.nql. Enter the script, then save it by clicking the Save toolbar button (which has a disk icon). If you prefer, you may copy Quote2.nql from the companion CD. If you have installed the companion CD on your system, you will have all of the book’s tutorial materials in a \Tutorials directory on your hard drive. Click the Open toolbar button (folder icon), and select Quote2.nql from the Tutorials\ch11 folder. At this point, the script in Listing 11.3 should be in your code window, either because you entered it by hand or because you opened the script from the companion CD. Since the quote site for this script is imaginary (a real quote site would have changed layout by the time you read this book), a local copy of the expected HTML is included in the \Tutorial\ch11 directory. The script will load this page rather than perform an actual Internet access. The HTML we will be scanning is shown previously in Listing 11.2.
71328_Pman_CH11I
12/14/01 2:57 PM
Page 259
Processing HTML
//Quote2 - get a stock quote and extract data, // using data pattern matching. //get the stock quote //get "quote.my-site.com/quote/stocks/quotes.asp?symbols=msxx" load "quote.htm" //perform a data pattern match to locate the quote fields in the page matchdata "text:Last Sale+number{LastSale}, text:Open+number{Open}, text:Change+number{Change}, text:Change %+number{Percent}, text:Volume+number{Volume}, text:High+number{High}, text:Low+number{Low}" //output the results as XML output LastSale, Open, Change, Percent, Volume, High, Low
Listing 11.3 Quote2 script.
Step 3: Run the Quote2 Script You are now ready to run the script. You can do this by selecting Build, Run from the menu, clicking the Run toolbar button, or pressing F5. Once the script ends, the Output tab of the development environment should contain an XML stream of stock quotes. 65.8065.650.330.5021,098,40066.8865.5 4
If this does not happen, check the following: ■■
Check your script for typographical errors.
■■
Check that your script and quote.htm are in the same directory.
■■
Check the NQL client’s Errors tab for error messages.
At this point you should have seen the Quote2 script run, retrieving a Web page and locating stock quote data. Although we haven’t discussed how it works yet, you’ve witnessed NQL putting data pattern matching to use. In the next step, we’ll dissect the script and explain exactly how it works.
259
71328_Pman_CH11I
260
12/14/01 2:57 PM
Page 260
Network Query Language
Step 4: Understand the Quote2 Script We now want to make sure we understand every part of the Quote2 script. The first two lines are comment lines. //Quote2 - get a stock quote and extract data, // using data pattern matching.
The stock quote is retrieved. In a real script, a get statement would be used to access an Internet quote page. Here, we comment out the get statement and use load to load the stock quote HTML page provided with the tutorial. The net effect is the same: An HTML page is on the stack. //get the stock quote //get "quote.my-site.com/quote/stocks/quotes.asp?symbols=msxx" load "quote.htm"
Now for the pattern match. In data pattern matching, the matchdata statement is used along with a pattern of logical data types and hints. Areas to be captured are represented as variable names in curly braces. Since each value we want to gather is to the right of its label, we use a text:label+number{variable} construct; that is, a text label containing certain text is found, and the next value after it that is a number is the field we want to capture. //perform a data pattern match to locate the quote fields in the page matchdata "text:Last Sale+number{LastSale}, text:Open+number{Open}, text:Change+number{Change}, text:Change %+number{Percent}, text:Volume+number{Volume}, text:High+number{High}, text:Low+number{Low}"
If the pattern match is successful, the quote fields have been stored in variables. They can now be output in XML format with the output statement. //output the results as XML output LastSale, Open, Change, Percent, Volume, High, Low
At this point, you’ve seen an NQL script interact with a Web site and capture results using data pattern matching.
Further Exercises You could amend this example in a number of ways. Here are some interesting modifications that can be made:
71328_Pman_CH11I
12/14/01 2:57 PM
Page 261
Processing HTML ■■
Amend the script to work with a real quote site.
■■
Add error checking, so that a get failure is detected and reported.
HTML Table Processing Table processing in HTML parses an HTML page, then allows you to access the table data using a series of NQL statements. Rather than specifying a pattern, discrete statements are used in combination to navigate through the cells (rows and columns) of tables. The HTML table processing statements are listed in Table 11.5.
Table 11.5 HTML Table Processing Statements STATEMENT
PARAMETERS
DESCRIPTION
changetablepos
table, row, value
Changes relative table, row, and column position
closehtml
Closes an HTML table processing session
findcell
text
Finds the first cell that contains the specified text
findnextcell
text
Finds the next cell that contains the specified text
firstcell
Finds the first table cell on the page
firstcol
Moves to the first column of the current row in the current table
firstrow
Moves to the first cell of the first row of the current table
firsttable
Moves to the first cell of the first row of the first table on the page
getcell
var
Retrieves the cell contents of the current table cell location
getcelltext
var
Retrieves the cell contents of the current table cell location, text-only
getcol
var
Retrieves multiple cells from a table column
getrow
var
Retrieves multiple cells from a table row
gettablecount
var
Returns the number of tables on the Web page continues
261
71328_Pman_CH11I
262
12/14/01 2:57 PM
Page 262
Network Query Language Table 11.5 HTML Table Processing Statements (continued) STATEMENT
PARAMETERS
DESCRIPTION
gettabledata
Retrieves an entire table as delimited data pushed onto the stack
nextcell
Advances to the next cell of the current table
nextcol
Advances to the next column of the current row of the current table
nextrow
Advances to the next row of the current table
nexttable
Advances to the next table on the page
openhtml
[url]
Begins an HTML table processing session
setcol
n
Sets the current table column location
setrow
n
Sets the current table row location
settable
n
Sets the current table number
settablepos
table, row, value
Sets absolute table, row, and column positions
The HTML table processing statements are also available as functions. Table 11.6 lists the HTML table processing functions. Table processing is most useful with HTML if table records are in a uniform and consistent format, or if you have a definite idea of the location of the data you want.
Opening a Table Processing Session The openhtml statement (or function) retrieves a Web page and opens a table processing session. To retrieve the page from a Web site, specify a URL as a parameter. If no URL parameter is specified, the HTML is presumed to be the top value on the stack. openhtml [url]
A success condition results if the page is acquired and parsed without error. The following code retrieves a Web page and opens it for table processing. openhtml "http://www.my-site.com"
Once an HTML page is open for table processing, the other statements may be used to navigate through the table and extract data from cells.
71328_Pman_CH11I
12/14/01 2:57 PM
Page 263
Processing HTML Table 11.6 HTML Table Processing Functions FUNCTION
DESCRIPTION
boolean changetablepos(table, row, value)
Changes relative table, row, and column position
boolean closehtml( )
Closes an HTML table processing session
boolean findcell(text)
Finds the first cell that contains the specified text
boolean findnextcell(text)
Finds the next cell that contains the specified text
boolean firstcell( )
Finds the first table cell on the page
boolean firstcol( )
Moves to the first column of the current row in the current table
boolean firstrow( )
Moves to the first cell of the first row of the current table
boolean firsttable( )
Moves to the first cell of the first row of the first table on the page
boolean getcell(var)
Retrieves the cell contents of the current table cell location
boolean getcelltext(var)
Retrieves the cell contents of the current table cell location, text-only
boolean getcol(var)
Retrieves multiple cells from a table column
boolean getrow(var)
Retrieves multiple cells from a table row
boolean gettablecount(var)
Returns the number of tables on the Web page
boolean gettabledata( )
Retrieves an entire table as delimited data pushed onto the stack
boolean nextcell( )
Advances to the next cell of the current table
boolean nextcol( )
Advances to the next column of the current row of the current table
boolean nextrow( )
Advances to the next row of the current table
boolean nexttable( )
Advances to the next table on the page
boolean openhtml([url])
Begins an HTML table processing session
boolean setcol(n)
Sets the current table column location
boolean setrow(n)
Sets the current table row location
boolean settable(n)
Sets the current table number
boolean settablepos(table, row, value)
Sets absolute table, row, and column positions
263
71328_Pman_CH11I
264
12/14/01 2:57 PM
Page 264
Network Query Language
Closing a Session The closehtml statement (or function) closes a table processing session. closehtml
If you fail to close an HTML table processing session, it is closed automatically when the script ends.
Moving Through Tables To move to the first table on a page, use the firsttable statement or function. firsttable
A failure condition results if there are no tables on the page. To move on to the next table, the nexttable statement may be used. A failure condition results if there are no more tables on the page. nexttable
The following code uses firsttable and nexttable to iterate through all tables on a page. firsttable while { ...process table values... nexttable }
Moving Through Rows To move to the first row in a table, use the firstrow statement or function. firstrow
A failure condition results if there are no tables on the page, or no rows in the current table. To move on to the next row, the nextrow statement may be used. A failure condition results if there are no more rows in the current table. nextrow
The following code uses firstrow and nextrow to iterate through all rows of a table. firstrow while {
71328_Pman_CH11I
12/14/01 2:57 PM
Page 265
Processing HTML ...process row values... nextrow }
Moving Through Columns To move to the first column in a row, use the firstcol statement or function. firstcol
A failure condition results if there are no tables on the page, or no rows in the current table, or no columns in the current row. To move on to the next column, the nextcol statement may be used. A failure condition results if there are no more columns in the current row. nextcol
The following code uses firstcol and nextcol to iterate through all columns of a row. firstcol while { ...process column value... nextcol }
To move through table cells without stopping at row boundaries, use firstcell and nextcell.
Moving Through Cells If you wish, you can deal with table values in terms of cells rather than columns. The difference is that cell statements are happy to advance past a row boundary to a new row, and past a table boundary to a new table. To move to the first cell on a page, use the firstcell statement or function. firstcell
A failure condition results if there are no table cells on the page. To move on to the next cell, the nextcell statement may be used. A failure condition results if there are no more table cells in the page. nextcell
The following code uses firstcell and nextcell to iterate through all cells of all tables in a page.
265
71328_Pman_CH11I
266
12/14/01 2:57 PM
Page 266
Network Query Language firstcell while { ...process cell value... nextcell }
Finding Cells You can locate cells containing certain text with the findcell and findnextcell statements. The findcell statement locates the first table cell on a page that contains the search text, which is specified as a parameter. findcell text
To find the next cell containing specific text, use findnextcell, which starts searching from your current position in the page. findnextcell text
The following code uses findcell and findnextcell to find all table cells in a page that contain a dollar sign. findcell "$" while { ...process cell value... findnextcell "$" }
Retrieving Cell Data Once positioned at a desired table location, the getcell statement may be used to retrieve the data in the cell. The parameter to getcell is a variable to receive the data. getcell var
The entire cell contents are returned, which may include HTML tags as well as text. To retrieve only the text portion of a table cell, use the getcelltext statement. getcelltext var
The following code iterates through all cells of all tables, retrieving each cell. firstcell while { getcell data
71328_Pman_CH11I
12/14/01 2:57 PM
Page 267
Processing HTML ...do something with data... nextcell }
Changing Table Position You can change table position by specifying relative or absolute values for table, row, and column. Three statements allow you to specify table, row, or column positions: settable, setrow, and setcol. settable table setrow row setcol col
Table, row, and column numbers begin with zero. The following code moves to the first table on the page and the fifth row of the table. settable 0 setrow 4
To set the table, row, and column positions in a single statement, the settablepos statement is used. The parameters are the table, row, and column positions to move to. settablepos table, row, col
The following code moves to the second table, first row, third column. settablepos 1, 0, 2
To change table position relative to the current position, the changetablepos statement is used. changetablepos table, row, col
The parameters are relative changes to table, row, and column position. These numbers may be negative, zero, or positive. The following code advances to the next row without changing the table or column numbers. changetablepos 0, 1, 0
Negative numbers move earlier in the page. The following example backs up to the previous table. changetablepos -1, 0, 0
All of the table position statements set a failure condition if they are unable to move to the specified location.
267
71328_Pman_CH11I
268
12/14/01 2:57 PM
Page 268
Network Query Language
Retrieving a Table as HTML The gettablecount statement (or function) counts the number of tables in the Web page and returns the count in the specified variable. gettablecount var
The following code retrieves the count of tables on a page, then processes each table. openhtml url gettablecount nTables for t = nTables { settable t firstrow { ...do something with cell data... nextrow } }
Tutorial: Quote3 Let’s see HTML table processing work in the real world. The script will request a page of multiple stock quotes from a financial Web site, locate the quote information using HTML table processing, and output the captured data as XML. All five of the tutorials in this chapter access the same quote data from the same source, but apply a different type of pattern matching in each case. There are four steps in this tutorial: 1. Launch the NQL development environment. 2. Enter the Quote3 script. 3. Run the Quote3 script. 4. Understand the Quote3 script. When you are finished with this tutorial, you will have seen how to do the following in NQL: ■■
Retrieve a Web page with Web primitives.
■■
Match Web page data using HTML table processing.
■■
Output data as XML.
Let’s begin!
71328_Pman_CH11I
12/14/01 2:57 PM
Page 269
Processing HTML
Step 1: Launch the NQL Development Environment Launch the NQL development environment. On a Windows system, this can be accomplished by clicking on the NQL Client desktop icon, or by selecting Program Files, Network Query Language, NQL Client from the Start Menu. On other platforms, you should have a desktop icon and/or a command-line method of launching the NQL Client. At this point, you should have the NQL development environment active on your desktop, with an empty code window. Now you’re ready to enter the tutorial script.
Step 2: Enter the Quote3 Script In the NQL development environment, enter the script shown in Listing 11.4 below and save it under the name Quote3.nql. Enter the script, then save it by clicking the Save toolbar button (which has a disk icon). If you prefer, you may copy Quote3.nql from the companion CD. If you have installed the companion CD on your system, you will have all of the book’s tutorial materials in a \Tutorials directory on your hard drive. Click the Open toolbar button (folder icon), and select Quote3.nql from the Tutorials\ch11 folder.
//Quote3 - get a stock quote and extract data, // using HTML table processing. //get the stock quote //get "quote.my-site.com/quote/stocks/quotes.asp?symbols=msxx" load "quote.htm" //use HTML table processing to extract the quote data. openhtml findcell "Last Sale" : nextcell : getcell LastSale findcell "Open" : nextcell : getcell Open findcell "Change" : nextcell : getcell Change findcell "Change %" : nextcell : getcell Percent findcell "Volume" : nextcell : getcell Volume findcell "High" : nextcell : getcell High findcell "Low" : nextcell : getcell Low closehtml //output the results as XML output LastSale, Open, Change, Percent, Volume, High, Low
Listing 11.4 Quote3 script.
269
71328_Pman_CH11I
270
12/14/01 2:58 PM
Page 270
Network Query Language
At this point, the script in Listing 11.4 should be in your code window, either because you entered it by hand or because you opened the script from the companion CD. Since the quote site for this script is imaginary (a real quote site would have changed layout by the time you read this book), a local copy of the expected HTML is included in the \Tutorial\ch11 directory. The script will load this page rather than perform an actual Internet access. The HTML we will be scanning is shown earlier in the chapter in Listing 11.2.
Step 3: Run the Quote3 Script You are now ready to run the script. You can do this by selecting Build, Run from the menu, clicking the Run toolbar button, or pressing F5. Once the script ends, the Output tab of the development environment should contain an XML stream of stock quotes. 65.8065.650.330.5021,098,40066.8865.5 4
If this does not happen, check the following: ■■
Check your script for typographical errors.
■■
Check that your script and quote.htm are in the same directory.
■■
Check the NQL client’s Errors tab for error messages.
At this point you should have seen the Quote3 script run, retrieving a Web page and locating stock quote data. Although we haven’t discussed how it works yet, you’ve witnessed NQL putting HTML table processing to use. In the next step, we’ll dissect the script and explain exactly how it works.
Step 4: Understand the Quote3 Script We now want to make sure we understand every part of the Quote3 script. The first two lines are comment lines. //Quote3 - get a stock quote and extract data, // using HTML table processing.
The stock quote is retrieved. In a real script, a get statement would be used to access an Internet quote page. Here, we comment out the get statement and use load to load the stock quote HTML page provided with the tutorial. The net effect is the same: An HTML page is on the stack. //get the stock quote //get "quote.my-site.com/quote/stocks/quotes.asp?symbols=msxx" load "quote.htm"
71328_Pman_CH11I
12/14/01 2:58 PM
Page 271
Processing HTML
Now to extract the data. An openhtml statement analyzes the HTML as table data. For each field, a findcell statement locates the label we are interested in. A nextcell statement advances to the next table cell, which contains the data we are interested in. A getcell statement retrieves the cell contents into a variable. //use HTML table processing to extract the quote data. openhtml findcell "Last Sale" : nextcell : getcell LastSale findcell "Open" : nextcell : getcell Open findcell "Change" : nextcell : getcell Change findcell "Change %" : nextcell : getcell Percent findcell "Volume" : nextcell : getcell Volume findcell "High" : nextcell : getcell High findcell "Low" : nextcell : getcell Low closehtml
If the pattern match is successful, the quote fields have been stored in variables. They can now be output in XML format with the output statement. //output the results as XML output LastSale, Open, Change, Percent, Volume, High, Low
At this point, you’ve seen an NQL script interact with a Web site and capture results using HTML table processing.
Further Exercises You could amend this example in a number of ways. Here are some interesting modifications that can be made: ■■
Amend the script to work with a real quote site.
■■
Add error checking, so that a get failure is detected and reported.
Regular Expressions If you have experience with UNIX systems or languages like Perl, you may be used to the form of pattern matching called regular expressions. Regular expressions are combinations of the elements listed in Table 11.7. Regular expression syntax can take some getting used to, so let’s consider some examples. The following regular expression would match this sentence. The following regular expression would match this sentence.
271
71328_Pman_CH11I
272
12/14/01 2:58 PM
Page 272
Network Query Language Table 11.7 Regular Expression Elements ELEMENT
MEANING
a
Match the given character.
.
Match any single character except a newline.
[a-z]
Match any single character in the range.
[^a-z]
Match any single character not in the range.
\d
Match any single decimal digit; same as [0-9].
\D
Inverse of \d; same as [^0-9].
\s
Match any single white-space character.
\S
Inverse of \s; match any non-white-space character.
\w
Match any character that is part of a word; same as [a-zA-Z0-9_].
\W
Inverse of \w; same as [^a-zA-Z0-9_].
\b
Match a word boundary.
\B
Match a non-word boundary.
^$
Match beginning or end of given input or line, respectively.
\n
Match a newline.
\r
Match a carriage return.
\t
Match a tab.
\f
Match a form feed.
\0
Match a null.
()
Parentheses surround the data to be captured.
char*
Match character zero or more times.
char+
Match character one or more times.
char?
Match character zero or one times.
char{n}
Match character exactly n times.
char{n,}
Match character at least n times.
char{n,m}
Match character at least n and at most m times.
char1|char2
Match char1 or char2.
The following expression would also match, but uses wildcard values for the center of the sentence. The period matches any character, and following it with an asterisk matches any number of characters.
71328_Pman_CH11I
12/14/01 2:58 PM
Page 273
Processing HTML The following regular expression .* this sentence.
Let’s consider a third version of the pattern, in which we want to capture some of the data. In regular expressions, parentheses are used to indicate which parts of the pattern are to be extracted. This form of the pattern would capture the words “would match”. The following regular expression (.*) this sentence.
Finding a Match The matchregexp statement (or function) matches a regular expression against the HTML on the stack. The parameters are a regular expression and a list of variables to receive data values. matchregexp pattern, var-list
If an occurrence of the pattern is located, a success condition results and variables are created reflecting the data. The HTML on the stack is shortened; all that remains is the portion after the pattern match. If the pattern cannot be located, a failure condition results and the HTML is removed from the stack. The following code retrieves a Web page, then uses regular expression pattern matching to locate the three parts of a social security number. Note the use of \d to match a digit, and the use of parentheses to indicate the parts of the pattern that are to be returned in variables. get URL matchregexp "(\d\d\d)-(\d\d)-(\d\d\d\d)", ss1, ss2, ss3
Tutorial: Quote4 Let’s see regular expressions work in the real world. The script will request a page of multiple stock quotes from a financial Web site, locate the quote information using regular expressions, and output the captured data as XML. All five of the tutorials in this chapter access the same quote data from the same source, but apply a different type of pattern matching in each case. There are four steps in this tutorial: 1. Launch the NQL development environment. 2. Enter the Quote4 script. 3. Run the Quote4 script. 4. Understand the Quote4 script. When you are finished with this tutorial, you will have seen how to do the following in NQL:
273
71328_Pman_CH11I
274
12/14/01 2:58 PM
Page 274
Network Query Language ■■
Retrieve a Web page with Web primitives.
■■
Match Web page data using regular expressions.
■■
Output data as XML.
Let’s begin!
Step 1: Launch the NQL Development Environment Launch the NQL development environment. On a Windows system, this can be accomplished by clicking on the NQL Client desktop icon, or by selecting Program Files, Network Query Language, NQL Client from the Start Menu. On other platforms, you should have a desktop icon and/or a command-line method of launching the NQL Client. At this point, you should have the NQL development environment active on your desktop, with an empty code window. Now you’re ready to enter the tutorial script.
Step 2: Enter the Quote4 Script In the NQL development environment, enter the script shown in Listing 11.5 and save it under the name Quote4.nql. Enter the script, then save it by clicking the Save toolbar button (which has a disk icon).
//Quote4 - get a stock quote and extract data, // using regular expression pattern matching. //get the stock quote //get "quote.my-site.com/quote/stocks/quotes.asp?symbols=msxx" load "quote.htm" //perform a regular expression match to get the quote data. matchregexp matchregexp matchregexp matchregexp matchregexp matchregexp
"Last Sale.*
(.*) | ", LastSale "Open.*(.*) | ", Open "Change.*(.*) | ", Change "Volume.*(.*) | ", Volume "High.*(.*) | ", High "Low.*(.*) | ", Low
//output the results as XML output LastSale, Open, Change, Percent, Volume, High, Low
Listing 11.5 Quote4 script.
71328_Pman_CH11I
12/14/01 2:58 PM
Page 275
Processing HTML
If you prefer, you may copy Quote4.nql from the companion CD. If you have installed the companion CD on your system, you will have all of the book’s tutorial materials in a \Tutorials directory on your hard drive. Click the Open toolbar button (folder icon), and select Quote4.nql from the Tutorials\ch11 folder. At this point, the script in Listing 11.5 should be in your code window, either because you entered it by hand or because you opened the script from the companion CD. Since the quote site for this script is imaginary (a real quote site would have changed layout by the time you read this book), a local copy of the expected HTML is included in the \Tutorial\ch11 directory. The script will load this page rather than perform an actual Internet access. The HTML we will be scanning is shown previously in Listing 11.2.
Step 3: Run the Quote4 Script You are now ready to run the script. You can do this by selecting Build, Run from the menu, clicking the Run toolbar button, or pressing F5. Once the script ends, the Output tab of the development environment should contain an XML stream of stock quotes. 65.8065.650.330.5021,098,40066.8865.5 4
If this does not happen, check the following: ■■
Check your script for typographical errors.
■■
Check that your script and quote.htm are in the same directory.
■■
Check the NQL client’s Errors tab for error messages.
At this point you should have seen the Quote4 script run, retrieving a Web page and locating stock quote data. Although we haven’t discussed how it works yet, you’ve witnessed NQL putting regular expressions to use. In the next step, we’ll dissect the script and explain exactly how it works.
Step 4: Understand the Quote4 Script We now want to make sure we understand every part of the Quote4 script. The first two lines are comment lines. //Quote4 - get a stock quote and extract data, // using regular expression pattern matching.
The stock quote is retrieved. In a real script, a get statement would be used to access an Internet quote page. Here, we comment out the get statement and use load to load the stock quote HTML page provided with the tutorial. The net effect is the same: An HTML page is on the stack.
275
71328_Pman_CH11I
276
12/14/01 2:58 PM
Page 276
Network Query Language //get the stock quote //get "quote.my-site.com/quote/stocks/quotes.asp?symbols=msxx" load "quote.htm"
Now for the pattern match. In regular expression pattern matching, the matchregexp statement is used along with a regular expression pattern. Areas to be captured are enclosed in parentheses in the pattern, and variable names are supplied as parameters. The first matchregexp statement searches for “Last Sale”, followed by any number of characters (.*), followed by a start table tag (), followed by any number of characters (captured because of the enclosing parentheses), followed by an ending table tag ( | ). The captured data is stored in the variable LastSale. The remaining fields are captured in the same way. //perform a regular expression match to get the quote data. matchregexp matchregexp matchregexp matchregexp matchregexp matchregexp
"Last Sale.*(.*) | ", LastSale "Open.*(.*) | ", Open "Change.*(.*) | ", Change "Volume.*(.*) | ", Volume "High.*(.*) | ", High "Low.*(.*) | ", Low
If the pattern match is successful, the quote fields have been stored in variables. They can now be output in XML format with the output statement. //output the results as XML output LastSale, Open, Change, Percent, Volume, High, Low
At this point, you’ve seen an NQL script interact with a Web site and capture results using regular expression pattern matching.
Further Exercises You could amend this example in a number of ways. Here are some interesting modifications that can be made: ■■
Amend the script to work with a real quote site.
■■
Add error checking, so that a get failure is detected and reported.
Web Queries Web queries are a form of pattern matching that resembles SQL, the standard language for querying databases. If you’re familiar with SQL database queries, you’ll find Web queries easy to pick up. A Web query contains several clauses that identify the attributes of the data you wish to mine from a Web page. A sample Web query is shown on the following page.
71328_Pman_CH11I
12/14/01 2:58 PM
Page 277
Processing HTML SELECT PartNumber, Desc, RetailPrice, DiscountPrice WHERE PartNumber is text, Desc is text, RetailPrice is amount, DiscountPrice is amount
Web Query Syntax A Web query is similar to an SQL query, as the following example shows. SELECT PartNumber, Desc, RetailPrice, DiscountPrice WHERE PartNumber is text, Desc is text, RetailPrice is amount, DiscountPrice is amount
A Web query contains several clauses that identify the attributes of the data you wish to mine from a Web page. Every Web query potentially contains a SELECT clause, an IN clause, and a WHERE clause.
The SELECT Clause The first part of a Web query is a SELECT clause, which is required. It lists the names of the data to be extracted into NQL variables. SELECT var-list
The IN Clause The next part of a Web query, which is optional, is an IN clause. The keyword IN is followed by a phrase that reflects a relationship between the data items, such as being in the same table row. IN grouping
The valid IN clause phrasings are listed in Table 11.8
P L AN N E D F E AT U R E The IN clauses marked with an asterisk are planned features.
The WHERE Clause The next part of a Web query is its WHERE clause, which is required. It lists criteria for each variable mentioned in the SELECT clause: Every term must have a criterion, and each criterion is separated by a comma.
277
71328_Pman_CH11I
278
12/14/01 2:58 PM
Page 278
Network Query Language Table 11.8 IN Clauses PHRASE
DESCRIPTION
in same table
All elements are within the same table.
in same row
All elements are in the same row of a table.*
in same column
All elements are in the same column of a table.*
in same cell
All elements are in the same table cell.*
in same section
All elements are in the same logical grouping.
in same listitem
All elements are part of the same list item.
WHERE var1 is criterion1, var2 is criterion2, ... varN is criterionN
Each criterion must specify a data type. The Web query data types are listed in Table 11.9. In addition to a data type, each criterion may also specify attributes. Any number of attributes may be specified for a variable. Table 11.10 lists the Web query attributes. In addition to the data type keywords and attribute keywords, the words is, a, and an may be freely used in a query to make it more readable. There are many possible combinations of data type and attributes, so let’s take a look at one. Imagine you wanted to retrieve news headlines from a news site. The phrase data type will match a headline, but it will also match plenty of other things on the page besides headlines. You decide that one distinctive factor of a headline is that it is enclosed within a hyperlink, so you decide to specify the linked attribute. Your query looks like this: SELECT headline WHERE headline is a linked phrase
Querying a Web Page The webquery statement issues a Web query against an HTML Web page. There are two forms of the webquery statement: single-line and multi-line. The single-line form is the keyword webquery which takes one parameter, the query to execute. webquery query
The HTML on the stack is scanned. If a match is found, variables are set based on the query and a success condition results. If no match is found, a failure condition results. Successive matches can be found with the nextquery statement. The following code uses a simple Web query to extract all of the prices from a Web page.
71328_Pman_CH11I
12/14/01 2:58 PM
Page 279
Processing HTML Table 11.9 Web Query Data Types KEYWORD
DESCRIPTION
ad
image tag to an advertising banner
amount
currency amount
company
company name
currency
currency amount
day
day of the month
exchange
stock exchange
float
floating-point number
fraction
fractional number
graphic
image tag
image
image tag
integer
integer (whole number)
link
hyperlink
month
month of the year
name
proper name
number
general number (integer, float, fraction, currency)
paragraph
paragraph of text
percent(age)
percentage
phrase
phrase (one or more words of text)
picture
image tag
price
currency amount
sentence
sentence
shareprice
integer and/or fraction
symbol
ticker symbol
tag
HTML tag
text
text
ticker
ticker symbol
time
time of day
timezone
time zone continues
279
71328_Pman_CH11I
280
12/14/01 2:58 PM
Page 280
Network Query Language Table 11.9 Web Query Data Types (continued) KEYWORD
DESCRIPTION
ticker
ticker symbol
weekday
name of a day of the week
word
single word
year
calendar year
Table 11.10 Web Query Attributes KEYWORD
DESCRIPTION
after term
Variable appears after the specified term.
before term
Variable appears before the specified term.
cell
Variable is in a table cell.
containing text
Variable contains the specified text.
emphasis
Variable is emphasized.
emphasized
Variable is emphasized.
heading
Variable is in a heading.
linked
Variable is within a hyperlink.
listitem
Variable is part of a list item.
lowercase
Variable is made up of lowercase characters.
matching regular-expression
Variable matches the specified regular expression pattern.
named text
Variable has the specified text as a label or table heading.
non
Variable reverses the meaning of the criterion.
not
Variable reverses the meaning of the criterion.
optional
Term does not have to be present for query to match overall.
uppercase
Variable is made up of uppercase characters.
within term
Variable is contained within another term.
71328_Pman_CH11I
12/14/01 2:58 PM
Page 281
Processing HTML get url webquery "SELECT price WHERE price is an amount" while { ...do something with price... nextquery } endquery
The multi-line form of the webquery statement allows the query to be written over multiple lines, without the need for quotation marks. webquery { multi-line query }
There is no functional difference between the single-line and multi-line forms of webquery. The single-line form has the advantage that any expression can be supplied as a Web query, whereas in the multi-line form the query is in-line. The multi-line form is easier to use for lengthy queries that would be awkward to cram into a single line. The following Web query shows the use of the multi-line form of webquery. get url webquery { select Title, Author, Price in same table where Title is phrase, Author is name after Title, Price is amount after Title } while { ...do something with query results... nextquery } endquery
Note that the webquery statement is not destructive, as are all of NQL’s other forms of pattern matching. The HTML on the stack is not reduced in any way.
Finding the Next Query Match The matchquery statement finds only the first match in the HTML. To find successive matches, it is necessary to use the nextquery statement, which repeats a Web query against the HTML on the stack, continuing on from where the last query left off.
281
71328_Pman_CH11I
282
12/14/01 2:58 PM
Page 282
Network Query Language nextquery
If a match is found, a success condition results and variables are set based on the contents of the query. If no more matches are found, a failure condition results. The following code uses webquery and nextquery to find all table cells in a page. get url webquery "SELECT data WHERE data is a cell" while { ...do something with data... nextquery } endquery
Ending a Query A Web query consumes resources. Those resources are released when you perform a new Web query, or when a script ends. To release the resources sooner, the endquery statement may be used. endquery
It is good form to supply endquery after a sequence of using webquery and nextquery. The following code shows the use of endquery. get url webquery { select link, headline where link is a link, headline is a linked phrase within link } while { ...do something with link and headline... nextquery } endquery
Tutorial: Quote5 Let’s see Web queries work in the real world. The script will request a page of multiple stock quotes from a financial Web site, locate the quote information using a Web query, and output the captured data as XML. All five of the tutorials in this chapter access the same quote data from the same source, but apply a different type of pattern matching in each case.
71328_Pman_CH11I
12/14/01 2:58 PM
Page 283
Processing HTML
There are four steps in this tutorial: 1. Launch the NQL development environment. 2. Enter the Quote5 script. 3. Run the Quote5 script. 4. Understand the Quote5 script. When you are finished with this tutorial, you will have seen how to do the following in NQL: ■■
Retrieve a Web page with Web primitives.
■■
Match Web page data using regular expressions.
■■
Output data as XML.
Let’s begin!
Step 1: Launch the NQL Development Environment Launch the NQL development environment. On a Windows system, this can be accomplished by clicking on the NQL Client desktop icon, or by selecting Program Files, Network Query Language, NQL Client from the Start Menu. On other platforms, you should have a desktop icon and/or a command-line method of launching the NQL Client. At this point, you should have the NQL development environment active on your desktop, with an empty code window. Now you’re ready to enter the tutorial script.
Step 2: Enter the Quote5 Script In the NQL development environment, enter the script shown in Listing 11.6 and save it under the name Quote5.nql. Enter the script, then save it by clicking the Save toolbar button (which has a disk icon). If you prefer, you may copy Quote5.nql from the companion CD. If you have installed the companion CD on your system, you will have all of the book’s tutorial materials in a \Tutorials directory on your hard drive. Click the Open toolbar button (folder icon), and select Quote5.nql from the Tutorials\ch11 folder. At this point, the script in Listing 11.6 should be in your code window, either because you entered it by hand or because you opened the script from the companion CD. Since the quote site for this script is imaginary (a real quote site would have changed layout by the time you read this book), a local copy of the expected HTML is included in the \Tutorial\ch11 directory. The script will load this page rather than perform an actual Internet access. The HTML we will be scanning is shown earlier in the chapter in Listing 11.2.
283
71328_Pman_CH11I
284
12/14/01 2:58 PM
Page 284
Network Query Language
//Quote5 - get a stock quote and extract data, // using web queries. //get the stock quote //get "quote.my-site.com/quote/stocks/quotes.asp?symbols=msxx" load "quote.htm" //perform a web query match to get the quote data. webquery { select LastSale, Open, Change, Percent, Volume, High, Low where LastSale is a number named "Last Sale", Open is a number named "Open", Change is a number named "Change", Percent is a number named "Change %", Volume is a number named "Volume", High is a number named "High", Low is a number named "Low" } //output the results as XML output LastSale, Open, Change, Percent, Volume, High, Low
Listing 11.6 Quote5 script.
Step 3: Run the Quote5 Script You are now ready to run the script. You can do this by selecting Build, Run from the menu, clicking the Run toolbar button, or pressing F5. Once the script ends, the Output tab of the development environment should contain an XML stream of stock quotes. 65.8065.650.330.5021,098,40066.8865.5 4
If this does not happen, check the following: ■■
Check your script for typographical errors.
■■
Check that your script and quote.htm are in the same directory.
■■
Check the NQL client’s Errors tab for error messages.
At this point you should have seen the Quote5 script run, retrieving a Web page and locating stock quote data. Although we haven’t discussed how it works yet, you’ve
71328_Pman_CH11I
12/14/01 2:58 PM
Page 285
Processing HTML
witnessed NQL putting Web queries to use. In the next step, we’ll dissect the script and explain exactly how it works.
Step 4: Understand the Quote5 Script We now want to make sure we understand every part of the Quote5 script. The first two lines are comment lines. //Quote5 - get a stock quote and extract data, // using web queries.
The stock quote is retrieved. In a real script, a get statement would be used to access an Internet quote page. Here, we comment out the get statement and use load to load the stock quote HTML page provided with the tutorial. The net effect is the same: An HTML page is on the stack. //get the stock quote //get "quote.my-site.com/quote/stocks/quotes.asp?symbols=msxx" load "quote.htm"
Now for the Web query. A webquery statement issues the query, which is contained on multiple lines in the code block. The select clause of the Web query lists the terms to be extracted. For each term, there is a description of attributes in the where clause of the query. If the query is successful, each term is mapped to a variable of the same name. //perform a web query match to get the quote data. webquery { select LastSale, Open, Change, Percent, Volume, High, Low where LastSale is a number named "Last Sale", Open is a number named "Open", Change is a number named "Change", Percent is a number named "Change %", Volume is a number named "Volume", High is a number named "High", Low is a number named "Low" }
If the pattern match is successful, the quote fields have been stored in variables. They can now be output in XML format with the output statement. //output the results as XML output LastSale, Open, Change, Percent, Volume, High, Low
285
71328_Pman_CH11I
286
12/14/01 2:58 PM
Page 286
Network Query Language
At this point, you’ve seen an NQL script interact with a Web site and capture results using a Web query.
Further Exercises You could amend this example in a number of ways. Here are some interesting modifications that can be made: ■■
Amend the script to work with a real quote site.
■■
Add error checking, so that a get failure is detected and reported.
HTML Operations In addition to the pattern matching operations described earlier in the chapter, NQL can perform other operations on HTML. The HTML-related statements are listed in Table 11.11. The HTML statements are also available as functions. Table 11.12 lists the HTML functions.
Table 11.11 HTML Statements STATEMENT
PARAMETERS
DESCRIPTION
cliptable
[table-number]
Extracts a table from a page by table number
cliptable
text
Extracts a table from a page that contains the specified text
removetags
[var-list]
Removes HTML or XML tags from a string
tablerow
var-list
Locates the next table row in the current table and extracts cells into variables
Table 11.12 HTML Functions FUNCTION
DESCRIPTION
boolean cliptable([table-number])
Extracts a table from a page by table number
boolean cliptable(text)
Extracts a table from a page that contains the specified text
boolean removetags([var-list])
Removes HTML or XML tags from a string
boolean tablerow(var-list)
Locates the next table row in the current table and extracts cells into variables
71328_Pman_CH11I
12/14/01 2:58 PM
Page 287
Processing HTML
Each of the HTML statements and functions are described individually in the following section.
Clipping a Table To extract one table’s HTML out of a page, the cliptable statement may be used. The cliptable statement works directly with HTML on the stack and does not require or use an HTML table processing session. The parameter is a table number or some text that the table must contain. Table numbers start with 1. cliptable [number] cliptable text
If the specified table is located, a success condition results and the full page HTML on the stack is replaced with just the table’s HTML. The following code retrieves the HTML of a table that contains the text price. push Page cliptable "price" pop PriceTable
Extracting Data from a Table Row The tablerow statement extracts data from each column of a table row and returns the data in variables. The tablerow statement works directly with HTML on the stack and does not require or use an HTML table processing session. The parameters are a variable list to receive the table data. tablerow var-list
If a table row is found, a success condition results and each variable specified receives a table cell value. The following code processes each row of a price table. get url while tablerow(PartNo, Desc, Amount) { ...do something with PartNo, Desc, and Amount... }
Removing Tags The removetags statement removes tags from HTML or XML, leaving just text as a remainder. One or more variables may be specified to removetags. Each variable’s contents are detagged. If no parameters are specified, the top value on the stack is detagged.
287
71328_Pman_CH11I
288
12/14/01 2:58 PM
Page 288
Network Query Language removetags [var-list]
The following code retrieves a Web page, removes its tags, and saves the result as a text file. get url removetags save "file.txt"
Chapter Summary Network Query Language supports a rich offering of tools for extracting data from Web pages. There are five types of pattern matching. HTML pattern matching uses patterns of HTML tags and text. An intricate knowledge of a Web page’s HTML is required. ■■
The match statement performs a pattern match, setting variables and shortening the HTML on the stack.
■■
The nextmatch statement repeats the last match.
Data pattern matching looks for sequences of logical data types. Often, a pattern can be deduced just from viewing a Web page in a browser without having to study the underlying HTML. ■■
The matchdata statement performs a pattern match, setting variables and shortening the HTML on the stack.
HTML table processing iterates through tables, rows, columns, and cells. Web data stored in tables can be easily located and extracted with HTML table processing. ■■
The changetablepos statement changes relative table, row, and column position.
■■
The closehtml statement closes an HTML table processing session.
■■
The findcell statement finds the first cell that contains the specified text.
■■
The findnextcell statement finds the next cell that contains the specified text.
■■
The firstcell statement finds the first table cell on the page.
■■
The firstcol statement moves to the first column of the current row in the current table.
■■
The firstrow statement moves to the first cell of the first row of the current table.
■■
The firsttable statement moves to the first cell of the first row of the first table on the page.
■■
The getcell statement retrieves the cell contents of the current table cell location.
■■
The getcelltext statement retrieves the cell contents of the current table cell location, text-only.
■■
The getcol statement retrieves multiple cells from a table column.
71328_Pman_CH11I
12/14/01 2:58 PM
Page 289
Processing HTML ■■
The getrow statement retrieves multiple cells from a table row.
■■
The gettablecount statement returns the number of tables on the Web page.
■■
The gettabledata statement retrieves an entire table as delimited data pushed onto the stack.
■■
The nextcell statement advances to the next cell of the current table.
■■
The nextcol statement advances to the next column of the current row of the current table.
■■
The nextrow statement advances to the next row of the current table.
■■
The nexttable statement advances to the next table on the page.
■■
The openhtml statement begins an HTML table processing session.
■■
The setcol statement sets the current table column location.
■■
The setrow statement sets the current table row location.
■■
The settable statement sets the current table number.
■■
The settablepos statement sets absolute table, row, and column positions.
Regular expressions allow Perl-style/Unix-style regular expressions to be used for expressing patterns. ■■
The matchregexp statement performs a pattern match with regular expressions, setting variables and shortening the HTML on the stack.
Web queries allow Web pages to be queried using SQL-like queries. Data types and attributes are described in the query. ■■
The webquery statement executes a Web query, setting variable values. The HTML on the stack is unchanged.
■■
The nextquery statement repeats the previous query.
■■
The endquery statement ends a query and frees up memory.
Nearly any Web page can be effectively processed with one or more of these five techniques. NQL also contains statements for performing HTML operations. ■■
The cliptable statement clips a table from an HTML page.
■■
The removetags statement detags HTML, leaving text.
■■
The tablerow statement retrieves the contents of a table row into variables.
NQL scripts can make use of a varied collection of statements for navigating through Web pages and extracting data from them.
289
71328_Pman_CH11I
12/14/01 2:58 PM
Page 290
71328_Pman_CH12I
12/14/01 2:56 PM
Page 291
CHAPTER
12 Sending and Receiving Email
Email has become the predominant application for which people use computers. The ability to send or receive email programmatically adds a powerful dimension to your applications. NQL scripts can send mail as a means of notifying users or delivering content. Scripts can also scan incoming mail messages and take action on them, such as generating responses, deleting unwanted mail, or routing messages to the best party to handle them. Network Query Language allows your programs to send and receive messages in a number of formats, including text and HTML, and supports file attachments. Several mail protocols are supported. This chapter describes the various email protocols and then covers how email is sent and received in NQL. In the tutorial at the end of the chapter you will create a program that scans email messages and automatically acts on some of them.
An Overview of NQL’s Email Capabilities NQL allows your scripts to act as a mail client, connecting to a mail server to send or receive mail messages. NQL scripts may perform the following email functions: ■■
Connect to a mail server
■■
Send mail messages
291
71328_Pman_CH12I
292
12/14/01 2:56 PM
Page 292
Network Query Language ■■
Attach files to messages
■■
Receive messages
■■
Save message file attachments
■■
Disconnect from a mail server
Let’s take a quick look at what it’s like to work with email in NQL. The following script is a complete program for sending a mail message. openmail push "Thanks for your order. You'll receive a shipping notice soon." sendmessage "Order confirmation", "[email protected]" closemail
As you can see, email in NQL is easy and straightforward. Let’s study this script line-by-line: ■■
openmail connects to a mail server.
■■
push stores a mail message on the stack.
■■
sendmessage sends the mail message.
■■
closemail disconnects from the mail server.
Email Protocols There are a variety of methods for implementing email. One of the reasons there are so many choices is that email must work with local networks as well as the Internet. Developments in both areas have led to a number of email standards. Many mail servers today support both network and Internet mail standards. NQL allows your script to act as a mail client. You may choose from the following mail protocols: Mail Application Programming Interface (MAPI) Post Office Protocol 3 (POP3) Simple Mail Transfer Protocol (SMTP) The MAPI protocol is specific to mail servers on Microsoft platforms, whereas POP3 and SMTP are standard Internet protocols universally available for all platforms. In all cases, the architecture is client/server based, as shown in Figure 12.1. Mail programs on desktops issue commands to mail servers and receive back responses.
MAPI The MAPI protocol evolved from the idea of harmonizing the many mail clients and mail server products in the Microsoft Windows world. It was theorized that a properly designed interface would allow any mail client to work with any mail server, even if they came from different software vendors. This would, for example, allow Lotus
71328_Pman_CH12I
12/14/01 2:56 PM
Page 293
Sending and Receiving Email
Client Commands
Mail Client
Server Responses
Mail Server
Figure 12.1 Email client/server architecture.
Notes to act as a mail server in an organization yet permit the use of Microsoft Outlook on desktops as a mail client. With MAPI, mail clients make service calls to the Windows operating system, which in turn takes care of communicating with the network mail server.
POP3 The POP3 protocol is the most popular of the Internet standards for reading mail. With POP3, commands and responses are communicated with TCP/IP. The mail client and the mail server do not have to be on the same local network, as the Internet is the transport medium. The POP3 protocol requires authentication: POP3 clients are usually required to specify an account ID and password in order to gain access to mail. Although POP3 is usually paired with SMTP, the two are separate standards.
SMTP The SMTP protocol is the most popular of the Internet standards for sending mail. With SMTP, commands and responses are communicated with TCP/IP. The mail client and the mail server do not have to be on the same local network, as the Internet is the transport medium. Most SMTP servers do not require authentication: It is possible to fib with SMTP. Any email address and logical name can be specified when a message is sent. This characteristic is sometimes useful, such as when sending a mailing where you want any replies routed to a different email address than the sender of the original message. This characteristic can also be abused, as in the case of spamming or Internet fraud. Although SMTP is usually paired with POP3, the two are separate standards. An SMTP server is not necessarily a POP3 server.
Message Formats The original format for email was plain text, and that is still the form that can be read most universally. Other formats allow for sophisticated content, including the use of
293
71328_Pman_CH12I
294
12/14/01 2:56 PM
Page 294
Network Query Language
typefaces, color, images, special characters, and hyperlinks. NQL supports three message formats: Text, Rich Text Format (RTF), and HTML.
Text Messages Text messages are the most universally accepted form of mail message, because all mail systems can handle plain text. Although most modern mail clients are able to accommodate fancier formats such as RTF and HTML, it is a good idea to send a text version of a mail message as well, especially when a message is being sent to a large distribution list.
RTF Messages Rich Text Format allows your messages to have the same basic features as a wordprocessing document. Text may be rendered in varying typefaces and sizes. Text may be emphasized using bold, underline, italics, color, and other means. In order for an RTF format message to be understood, the recipient needs a mail client capable of interpreting RTF and rendering it properly. Otherwise, the mail message will look very confusing to the recipient. Listing 12.1 shows a small RTF mail message. With an RTF-capable mail client, this message is rendered as shown in Figure 12.2.
HTML Messages HTML allows your messages to have the same basic features as a Web page. Message text can be rendered in varying typefaces and sizes. Text may be emphasized using bold, underline, italics, color, and other means. You may also embed images, hyperlinks, and controls (such as buttons) in an HTML message. In order for an HTML format message to be understood, the recipient needs a mail client capable of interpreting HTML and rendering it properly. Otherwise, the mail message will look very confusing to the recipient. Listing 12.2 shows a small HTML mail message. With an HTML-capable mail client, this message is rendered as shown in Figure 12.3.
Combining Multiple Formats Using HTML or RTF for mail presents a problem. In exchange for the sophistication of those formats, there is the risk that some recipients may not have mail clients that can handle them. This situation can be overcome by sending a message in more than one format. For example, a mail message can have an HTML portion and a text portion. The recipient’s mail client will choose the best format of those it supports. Thus, a modern mail client such as Microsoft Outlook would display HTML, whereas a less sophisticated mail client could still display the plain-text version of the message.
71328_Pman_CH12I
12/14/01 2:56 PM
Page 295
Sending and Receiving Email
{\rtf1\ansi\ansicpg1252\uc1 \deff0\deflang1033\deflangfe1033{\fonttbl {\f0\froman\fcharset0\fprq2{\*\panose 02020603050405020304}Times New Roman;}{\f1\fswiss\fcharset0\fprq2{\*\panose 020b0604020202020204} Arial;} {\f5\fswiss\fcharset0\fprq2{\*\panose 020b0604020202020204}Helvetica;} {\f74\froman\fcharset238\fprq2 Times New Roman CE;}{\f75\froman\ fcharset204\fprq2 Times New Roman Cyr;}{\f77\froman\fcharset161\fprq2 Times New Roman Greek;} {\f78\froman\fcharset162\fprq2 Times New Roman Tur;}{\f79\froman\ fcharset177\fprq2 Times New Roman (Hebrew);}{\f80\froman\ fcharset178\fprq2 Times New Roman (Arabic);}{\f81\froman\fcharset186\ fprq2 Times New Roman Baltic;} {\f82\fswiss\fcharset238\fprq2 Arial CE;}{\f83\fswiss\ fcharset204\fprq2 Arial Cyr;}{\f85\fswiss\fcharset161\fprq2 Arial Greek;}{\f86\fswiss\fcharset162\fprq2 Arial Tur;}{\f87\fswiss\ fcharset177\fprq2 Arial (Hebrew);} {\f88\fswiss\fcharset178\fprq2 Arial (Arabic);}{\f89\fswiss\ fcharset186\fprq2 Arial Baltic;}}{\colortbl;\red0\green0\blue0;\ red0\green0\blue255;\red0\green255\blue255;\red0\green255\blue0;\ red255\green0\blue255;\red255\green0\blue0;\red255\green255\blue0; \red255\green255\blue255;\red0\green0\blue128;\red0\green128\blue128;\ red0\green128\blue0;\red128\green0\blue128;\red128\green0\blue0;\ red128\green128\blue0;\red128\green128\blue128;\red192\green192\ blue192;}{\stylesheet{ \ql\li0\ri0\widctlpar\aspalpha\aspnum\faauto\adjustright\rin0\lin0\ itap0 \f1\fs22\lang1033\langfe1033\cgrid\langnp1033\langfenp1033 \ snext0 Normal;}{\s1\ql \li0\ri0\sb240\sa60\keepn\widctlpar\aspalpha\ aspnum\faauto\adjustright\rin0\lin0\itap0 \b\f5\fs36\lang1033\langfe1033\kerning32\cgrid\langnp1033\langfenp1033 \sbasedon0 \snext0 heading 1;}{\s2\ql \li0\ri0\sb240\sa60\keepn\ widctlpar\aspalpha\aspnum\faauto\adjustright\rin0\lin0\itap0 \b\f1\fs32\lang1033\langfe1033\cgrid\langnp1033\langfenp1033 \ sbasedon0 \snext0 heading 2;}{\s3\ql \li0\ri0\sb240\sa60\keepn\ widctlpar\aspalpha\aspnum\faauto\adjustright\rin0\lin0\itap0 \b\f1\ fs28\lang1033\langfe1033\cgrid\langnp1033\langfenp1033 \sbasedon0 \snext0 heading 3;}{\*\cs10 \additive Default Paragraph Font;}}{\info{\title Kevin,}{\author David Pallmann}{\operator David Pallmann}{\creatim\yr2001\mo6\dy3\hr14\min36}{\revtim\yr2001\mo6\dy3\ hr14\min38}{\version1}{\edmins2}{\nofpages1} {\nofwords0}{\nofchars0}{\*\company NQL Inc.}{\nofcharsws0} {\vern8269}}\margl1440\margr1440 \widowctrl\ftnbj\aenddoc\noxlattoyen\ expshrtn\noultrlspc\dntblnsbdb\nospaceforul\formshade\horzdoc\ dgmargin\dghspace180\dgvspace180\dghorigin1440\dgvorigin1440 \dghshow1\dgvshow1\jexpand\viewkind1\viewscale114\viewzk2\pgbrdrhead\ pgbrdrfoot\splytwnine\ftnlytwnine\htmautsp\nolnhtadjtbl\useltbaln\ alntblind\lytcalctblwd\lyttblrtgr\lnbrkrule \fet0\sectd \linex0\ endnhere\sectlinegrid360\sectdefaultcl {\*\pnseclvl1 continues
Listing 12.1 RTF message.
295
71328_Pman_CH12I
296
12/14/01 2:56 PM
Page 296
Network Query Language
\pnucrm\pnstart1\pnindent720\pnhang{\pntxta .}}{\*\pnseclvl2\pnucltr\pnstart1\pnindent720\pnhang{\pntxta .}}{\*\pnseclvl3\pndec\pnstart1\pnindent720\pnhang{\pntxta .}}{\*\pnseclvl4\pnlcltr\pnstart1\pnindent720\pnhang{\pntxta )}}{\*\pnseclvl5 \pndec\pnstart1\pnindent720\pnhang{\pntxtb (}{\pntxta )}} {\*\pnseclvl6\pnlcltr\pnstart1\pnindent720\pnhang{\pntxtb (}{\pntxta )}}{\*\pnseclvl7\pnlcrm\pnstart1\pnindent720\pnhang{\pntxtb (} {\pntxta )}}{\*\pnseclvl8\pnlcltr\pnstart1\pnindent720\pnhang {\pntxtb (}{\pntxta )}}{\*\pnseclvl9\pnlcrm\pnstart1\pnindent720\ pnhang{\pntxtb (}{\pntxta )}}\pard\plain \ql \li0\ri0\widctlpar\ aspalpha\aspnum\faauto\adjustright\rin0\lin0\itap0 \f1\fs22\ lang1033\langfe1033\cgrid\langnp1033\langfenp1033 {Kevin, \par \par Thanks for your feedback. I agree we need more frequent meetings in order to keep }{\i you-know-who}{ on the right track. I\rquote m confident we\rquote ll get past this and have a }{\b great}{ fourth quarter. \par \par John \par \par }}
Listing 12.1 RTF message (continued).
Figure 12.2 RTF message rendered in a mail client.
File Attachments Regardless of the format(s) you use for mail messages, you may also attach files to mail messages. All three of the email formats that NQL supports (MAPI, POP3, and SMTP) allow one or more files to be attached to mail messages. The attachments, of course, can be files of any kind, such as documents, spreadsheets, programs, or multimedia files.
71328_Pman_CH12I
12/14/01 2:56 PM
Page 297
Sending and Receiving Email
<meta http-equiv="Content-Language" content="en-us"> <meta http-equiv="Content-Type" content="text/html; charset=windows1252"> <meta name="GENERATOR" content="Microsoft FrontPage 4.0"> <meta name="ProgId" content="FrontPage.Editor.Document"> New Page 2 Dear subscriber,
We're pleased to report that the latest edition of The Hunter Report is now available.
Click here to read your copy now.
Sincerely,
The Circulation Dept.
Listing 12.2 HTML message.
Figure 12.3 HTML message rendered in a mail client.
297
71328_Pman_CH12I
298
12/14/01 2:56 PM
Page 298
Network Query Language
Email Support in NQL NQL includes 18 statements related to email, but only a handful are needed on a regular basis. The two most common sequences of operations are as follows: 1. Sending email: Connect to a mail server, compose a message, add any attachments, send message, and disconnect from the mail server. 2. Reading email: Connect to a mail server, iterate through new messages (or all messages), save any attachments, and disconnect from the mail server. The first sequence, sending email, typically involves the use of openmail, push, and possibly messageattachment, sendmessage, and closemail statements. For example: openmail ...compose message in some way and push it on the stack... sendmessage "Final notice", "[email protected]" closemail
The second sequence, reading email, typically involves issuing openmail, firstunreadmessage, nextmessage, and possibly saveattachments, and closemail statements. For example: openmail firstunreadmessage while { ...process message in some way... nextmessage } closemail
The NQL Email Statements The NQL email statements are listed in Table 12.1. Of these, the six commonly used statements are openmail, firstmessage, firstunreadmessage, nextmessage, sendmessage, and closemail. The NQL mail statements and functions are described individually in the following sections.
Email Sessions The NQL email operations are modeled on the idea of a session, where the statements and functions must be used in a certain order. 1. Optionally, an email protocol is specified with mailprotocol. 2. An email session is opened with openmail.
71328_Pman_CH12I
12/14/01 2:56 PM
Page 299
Sending and Receiving Email Table 12.1 Email Statements STATEMENT
PARAMETERS
DESCRIPTION
closemail
Closes the mail session
deletemessage
Deletes the current mail message
firstattachment
[path]
Saves the first file attachment for the current message
firstmessage
Reads the first message in the mailbox and sets message variables
firstunreadmessage
Reads the first unread message in the mailbox and sets message variables
forward
address
logoffmail
Forwards the current mail message to the specified recipient(s) Logs off a mail session (MAPI protocol only)
mailidentity
address, name
Sets the From address and name for sending messages (SMTP protocol only)
mailprotocol
protocol
Selects the mail protocol (specify mapi, pop3, smtp, or internet)
markmail
boolean
Determines whether reading mail messages will mark them read or not
messageattachment
filespec
Attaches a file to the current message being prepared for sending
nextattachment
Saves the next file attachment for the current message
nextmessage
Advances to the next message in the mailbox
openmail
Connects to an existing mail session for reading and sending mail (MAPI)
openmail
user, pass
Connects to a new mail session for reading and sending mail (MAPI)
openmail
server
Connects to an Internet mail server for sending mail (SMTP) continues
299
71328_Pman_CH12I
300
12/14/01 2:56 PM
Page 300
Network Query Language Table 12.1 Continued STATEMENT
PARAMETERS
DESCRIPTION
openmail
server, user, pass
Connects to an Internet mail server for reading mail (POP3)
openmail
server, user, pass, server
Connects to Internet mail servers for reading and sending mail (POP3/SMTP)
reply
Sends a reply to the sender of the current mail message
saveattachments
[path]
Saves all file attachments for the current message
sendmessage
subject, address
Sends the value on the stack as a text mail message
sendmessage
subject, address, message
Sends a text mail message
sendmessage
subject, address, [[format, message]]
Sends a mail message in the specified format(s)
totalattachments
[var]
Returns the number of file attachments for the current message
3. Messages are received or sent as desired. For sending messages, the basic sequence is that message text is constructed in text, HTML, and/or RTF formats and the message is sent with sendmessage. For receiving messages, the basic sequence is to begin with firstmessage or firstunreadmessage, followed by multiple nextmessage statements. 4. The email session is closed with closemail.
Selecting a Mail Protocol You may explicitly select a mail protocol in your script; if you fail to do so, NQL will select one automatically. Versions of NQL default to the most natural mail protocol for their target platform. The Windows version of NQL defaults to MAPI. The Java version of NQL defaults to POP3/SMTP. You select a mail protocol with the mailprotocol statement. mailprotocol protocol
The protocol parameter is a string expression that evaluates to MAPI, POP3, SMTP, or Internet (pop3/smtp).
71328_Pman_CH12I
12/14/01 2:56 PM
Page 301
Sending and Receiving Email
If the selected protocol is MAPI, you can connect to an existing MAPI session (such as an instance of Outlook active on your desktop) or log on to a new session, depending on the parameters you give to openmail. If the selected protocol is POP3, you’ll be able to read messages from an Internet mail server but will not be able to send messages. If the selected protocol is SMTP, you’ll be able to send messages to an Internet mail server but will not be able to read messages. If the selected protocol is Internet, you’ll be able to send messages to an Internet mail server as well as receive messages.
Connecting to a Mail Server The openmail statement connects to a mail server. Connecting to a mail server is a necessary first step before mail can be sent or received. Openmail accepts varying numbers of parameters depending on the mail protocol you are using. When using MAPI, you have the option of attaching to an existing mail session or creating a new one. The advantage of using an existing mail session is that you do not have to specify account and password information. However, you must have an actual mail client (such as Outlook) running on your desktop or the mail connection will fail. Openmail requires no arguments when using MAPI with an existing mail session. openmail
If, when using MAPI, you wish to explicitly specify a user name and password for a new mail session, specify the user name and password as parameters to openmail. openmail user, password
When using POP3, the server name, user name, and password must be specified as parameters. openmail server, user, password
When using SMTP, the server name must be specified as a parameter. openmail server
When using the Internet protocol (POP3 and SMTP), the POP3 server name, user name, password, and SMTP server name must be specified as parameters. openmail pop3-server, user, password, smtp-server
Regardless of how you call it, openmail will set a success condition if it is able to successfully make a connection to a mail server. Once you reach this point, you are free to send and receive mail.
301
71328_Pman_CH12I
302
12/14/01 2:56 PM
Page 302
Network Query Language
Sending Email Sending a mail message involves the following steps: 1. Compose the mail message, in one or more formats. 2. Add any file attachments with messageattachment. 3. Send the message using sendmessage. Mail messages may be in text, RTF, or HTML format. For a simple text-only mail message, place the message text on the stack (push or load are good for this). For messages that have multiple formats, put the messages into variables and specify them as parameters in the long form of the sendmessage statement. The following code line pushes a text message onto the stack. push "This is a test message.\nThe end.\n"
The messageattachment statement should be called for each file attachment (if any). The parameter is a file specification of the file to be attached. messageattachment filespec
The sendmessage statement sends the message. There are three forms of the statement, one for sending text messages and one for sending messages in multiple formats. All forms specify a message subject and an address. The address parameter may contain one or more email addresses, separated by commas or semicolons. sendmessage subject, address sendmessage subject, address, text sendmessage subject, address, format/message-list
The first form of sendmessage sends a text email message using the top item on the stack as the message. The following script fragment sends a mail message using this method. push "Please don’t forget to pick up some milk on the way home." sendmessage "Got Milk?", [email protected]
The second form of sendmessage specifies the text message as a third parameter rather than requiring it to be on the stack. The following script fragment sends a mail message using this method. sendmessage "Got Milk?", "[email protected]", "Please don’t forget to pick up some milk on the way home."
The longer third form of sendmessage also specifies subject and recipient, but adds additional parameters that specify the format and content of each message. A format parameter (text, RTF, or HTML) and a message parameter (any variable or expression
71328_Pman_CH12I
12/14/01 2:56 PM
Page 303
Sending and Receiving Email
that holds the message in the specified format) make up a pair of parameters. There may be 1, 2, or 3 pairs of format/message parameters. The following script fragment sends a message in both text and HTML formats. MsgText = "Thanks for meeting with us. We'll be in touch shortly." MsgHTML = "Thanks for meeting with us. We'll be in touch shortly." sendmessage "Meeting follow-up", "[email protected]", "text", MsgText, "html", MsgHTML
Sendmessage sets a success condition if it has successfully passed the message on to a mail server. You can send messages only if the current mail protocol is MAPI, SMTP, or Internet.
Reading Mail Reading mail messages involves the following steps: 1. Read the first mail message with firstmessage or firstunreadmessage. 2. Process the message particulars, which are in variables. 3. Process any file attachments by calling firstattachment and nextattachment, or by calling saveattachments. 4. Call nextmessage to advance to the next mail message. 5. Repeat steps 2 through 4 for the next message. Firstmessage reads the first message in your mailbox. Firstunreadmessage is similar, but reads the first new (unread) message in your mailbox. Both statements automatically create variables named MessageDate, MessageFrom, MessageFromAddress, MessageTo, MessageToAddress, MessageSubject, and MessageText. The following script reads all unread mail messages and outputs them as XML. openmail firstunreadmessage while { output MessageDate, MessageFrom, MessageSubject, MessageText nextmessage } closemail
Nextmessage moves on to the next message, and takes its cue from whether you used firstmessage or firstunreadmessage initially. Firstmessage followed by repeated nextmessage calls will iterate through all messages in your mailbox. Firstunreadmessage followed by repeated nextmessage calls will iterate through all new messages in your
303
71328_Pman_CH12I
304
12/14/01 2:56 PM
Page 304
Network Query Language
mailbox. The following script sequences through all messages in the mailbox and displays them. openmail firstmessage while { show MessageDate " " MessageFrom "\n" MessageSubject "\n" MessageText nextmessage } closemail
While processing a message, you may also access its file attachments, if any. There are two ways to save file attachments: individually, or in bulk. To save file attachments individually, use the firstattachment and nextattachment statements. To save all file attachments in a single operation, use the saveattachments statement. The following script saves all file attachments for all new messages in the directory c:\Attachments. openmail firstunreadmessage while { saveattachments "c:\\Attachments" nextmessage } closemail
You can control whether reading a mail message with firstmessage/firstunreadmessage/nextmessage actually marks the mail message as read. The markmail statement takes one parameter, a Boolean value: True means messages are marked as read. The default when a script initializes is false. markmail boolean
Forwarding Messages The forward statement or function forwards the last mail message read. The parameters are the address to forward the message to and a subject, which is optional. If the subject is omitted, the original subject is used. forward address boolean forward(address [, subject])
The message is sent, and unless an error occurs a success condition results (the function returns true). The following code forwards a mail message with forward.
71328_Pman_CH12I
12/14/01 2:56 PM
Page 305
Sending and Receiving Email openmail firstunreadmessage while { if MessageFrom=="$" { forward "accounting", "FYI" } nextmessage } closemail
You can forward messages only if the current mail protocol is MAPI, SMTP, or Internet.
Replying to Messages The reply statement or function replies to the last mail message read. The parameters are an optional subject and a reply message. If the subject is omitted, the subject of the original message is used. reply [subject, ] message boolean reply([subject,] message)
The message is sent, and unless an error occurs a success condition results (the function returns true). The following code replies to a mail message with reply. openmail firstunreadmessage while { if MessageFrom=="Mom" { reply "Thanks, Mom." } nextmessage } closemail
You can reply to messages only if the current mail protocol is MAPI, SMTP, or Internet.
Disconnecting from a Mail Server To disconnect from a mail server, issue a closemail statement. closemail
When a script ends, any unclosed mail sessions are automatically closed at that time.
305
71328_Pman_CH12I
306
12/14/01 2:56 PM
Page 306
Network Query Language
Tutorial: ScanMail Now that you are familiar with email processing in NQL, let’s put that knowledge to use in a script. In this tutorial, you will create a script that scans new mail messages and automatically acts on some of them. Messages that contain words suggestive of problems will be forwarded to a Technical Support email address. Messages that contain words suggestive of junk mail will be replied to (requesting removal from the mailing list) and deleted. There are five steps in this tutorial: 1. Launch the NQL development environment. 2. Enter the ScanMail script. 3. Customize the ScanMail script. 4. Run the ScanMail script. 5. Understand the ScanMail script. When you are finished with this tutorial, you will have seen how to do the following in NQL: ■■
Connect to a MAPI mail session.
■■
Scan all unread mail messages.
■■
Reply to mail messages.
■■
Forward mail messages.
■■
Delete mail messages.
Let’s begin!
Step 1: Launch the NQL Development Environment Launch the NQL development environment. On a Windows system, this can be accomplished by clicking on the NQL Client desktop icon, or by selecting Program Files, Network Query Language, NQL Client from the Start Menu. On other platforms, you should have a desktop icon and/or a command-line method of launching the NQL Client. At this point, you should have the NQL development environment active on your desktop, with an empty code window. Now you’re ready to enter the tutorial script.
Step 2: Enter the ScanMail Script In the NQL development environment, enter the script shown in Listing 12.3 and save it under the name ScanMail.nql. Enter the script, then save it by clicking the Save toolbar button (which has a disk icon). If you prefer, you may copy ScanMail.nql from the companion CD. If you have installed the companion CD on your system, you will have all of the book’s tutorial
71328_Pman_CH12I
12/14/01 2:56 PM
Page 307
Sending and Receiving Email
//ScanMail - scans new mail messages and responds to some of them automatically mailprotocol "mapi" if openmail() { boolean bHaveMail = firstunreadmessage() while bHaveMail { //Forward messages containing problem reports to //technical support. if contains(MessageText, "problem") or contains(MessageText, "bug") or contains(MessageText, "doesn't work") { forward "[email protected]", "Please look into this." reply "Thank you for your inquiry. Our Tech Support department will get back to you shortly." } //Reply to junk mail with a request for removal, and //delete the message. if contains(MessageText, contains(MessageText, contains(MessageText, { reply "Please remove deletemessage }
"free") or "bargain") or "special offer") me from your mailing list."
bHaveMail = nextmessage() } closemail } else { show "Error: unable to open mailbox" end }
Listing 12.3 ScanMail script.
materials in a \Tutorials directory on your hard drive. Click the Open toolbar button (folder icon), and select ScanMail.nql from the Tutorials\ch12 folder.
307
71328_Pman_CH12I
308
12/14/01 2:56 PM
Page 308
Network Query Language
At this point, the script in Listing 12.3 should be in your code window, either because you entered it by hand or because you opened the script from the companion CD. You are now ready to run the script.
Step 3: Customize the ScanMail Script The script now needs to be customized. Messages containing the text “problem”, “bug”, or “doesn’t work” will be forwarded to a technical support email address. In the script, change the address “[email protected]” to an email address you want the messages forwarded to. At this point, you should have customized the forwarding address to match your environment.
Step 4: Run the ScanMail Script Now, we are ready to begin. Make sure you have Outlook or some other mail client active on your desktop, then run the script. You can do this by selecting Build, Run from the menu, clicking the Run toolbar button, or pressing F5. When the script completes, new messages in your inbox will have been scanned and some of them acted upon. To test the script, you may want to mail yourself some messages with deliberate content first, then run the ScanMail script. If the script does not seem to be working, check the following: ■■
Check for typographical errors in your script.
■■
Make sure you have a mail client active on the desktop.
■■
Check the NQL client’s Errors tab for error messages.
At this point you should have seen the ScanMail script run, connecting to a mail session and acting on some messages.
Step 5: Understand the ScanMail Script We now want to make sure we understand every part of the ScanMail script. The first line is a comment line. //ScanMail - scans new mail messages and responds to some of them automatically
First, the mail protocol is declared with mailprotocol. This script is written for MAPI mail servers. mailprotocol "mapi"
A connection to the current mail session is established with openmail. If successful, the remainder of the script executes in the if block. If it fails, an error message is displayed and the script ends.
71328_Pman_CH12I
12/14/01 2:56 PM
Page 309
Sending and Receiving Email if openmail() { ...process mail... } else { show "Error: unable to open mailbox" end }
The first unread mail message is read with firstunreadmessage. If there is at least one unread message, the variable bHaveMail is set to true, and the while loop that follows executes. The message particulars are automatically stored in message variables (MessageFrom, MessageSubject, MessageText, and so on). boolean bHaveMail = firstunreadmessage() while bHaveMail {
In the while loop, a check is made to see if the message should be forwarded to Technical Support. The contains function is used to check the message body (in MessageText) for certain keywords. If the message text contains one or more of those keywords, the message is forwarded to Tech Support (with forward), and an acknowledgement is also sent to the sender of the message (with reply). //Forward messages containing problem reports to //technical support. if contains(MessageText, "problem") or contains(MessageText, "bug") or contains(MessageText, "doesn't work") { forward "[email protected]", "Please look into this." reply "Thank you for your inquiry. Our Tech Support department will get back to you shortly." }
The message is also checked to see if it might be a junk mail message. The contains function is used again to check the message body (in MessageText) for keywords. If the message text contains one or more of those keywords, a request to be removed from the mailing list is sent to the sender of the message (with reply). The message is also deleted (with deletemessage). //Reply to junk mail with a request for removal, and //delete the message. if contains(MessageText, "free") or contains(MessageText, "bargain") or
309
71328_Pman_CH12I
310
12/14/01 2:56 PM
Page 310
Network Query Language contains(MessageText, "special offer") { reply "Please remove me from your mailing list." deletemessage }
At the bottom of the while loop, the nextmessage function retrieves the next mail message, setting bHaveMail to true if there is another message. The while loop continues until all unread mail messages have been scanned. bHaveMail = nextmessage() }
Once the while loop completes, the mail session is terminated with closemail. closemail
At this point, you’ve seen how to scan and act on email in an NQL script.
Further Exercises You could amend this example in a number of ways. Here are some interesting modifications that can be made: ■■
Scan the sender of each message against a list of recognized addresses, and delete the messages from strangers.
■■
Scan the messages for attachments, and save the attachments in a directory reserved for virus scanning. If one or more attachments are saved, launch an antivirus program (with the opendoc statement).
Chapter Summary Network Query Language can act as a mail client, sending and receiving email. Supported protocols include MAPI, POP3, and SMTP. ■■
Mail protocols are declared with the mailprotocol statement.
■■
Mail identities (for SMTP mail) are specified with the mailidentity statement.
■■
Mail sessions are initiated with the openmail statement.
■■
Mail sessions can be logged off with the logoffmail statement.
■■
Mail sessions are terminated with the closemail statement.
Mail messages are read in a loop using first and next statements. ■■
The firstmessage statement reads the first mail message.
■■
The firstunreadmessage statement reads the first new mail message.
71328_Pman_CH12I
12/14/01 2:56 PM
Page 311
Sending and Receiving Email ■■
The nextmessage statement reads the next mail message.
■■
The markmail statement controls whether or not reading mail messages marks them as read or not.
Once a mail message has been read its fields and message text can be used, and the message can be acted upon. ■■
The message’s data is stored in the variables MessageDate, MessageFrom, MessageFromAddress, MessageTo, MessageToAddress, MessageSubject, and MessageText.
■■
The deletemessage statement deletes the last read mail message.
■■
The forward statement forwards the last read mail message to a new address.
■■
The reply statement sends a reply to the last read mail message.
Once a message has been read, its file attachments can be accessed. ■■
The firstattachment statement saves the first file attachment.
■■
The nextattachment statement saves the next file attachment.
■■
The totalattachments statement returns the number of file attachments.
■■
The saveattachments statement saves all of the file attachments.
Mail messages can be sent in one or more formats (text, RTF, and HTML) and can have file attachments. ■■
The messageattachment statement declares a file attachment for the next message to be sent.
■■
The sendmessage statement sends a mail message.
Connected applications frequently make use of email, either as a direct part of their processing or as a means to report errors.
311
71328_Pman_CH12I
12/14/01 2:56 PM
Page 312
71328_Pman_CH13I
12/14/01 2:55 PM
Page 313
CHAPTER
13 Accessing Newsgroups
Newsgroups, also known as forums or discussion groups, are a huge phenomenon. Millions of people around the world can browse newsgroups and post messages. Newsgroups exist for myriads of dedicated topics, as general as movies or as specific as classic sci-fi movies. Newsgroups are accessed with the Network News Transfer Protocol (NNTP). Network Query Language allows your programs to scan newsgroups, which can be useful for monitoring public opinion, complaints, rumors, and interest levels in products. This chapter describes NQL’s newsgroup support. The tutorial at the end of the chapter scans a list of newsgroups and captures the email addresses of message posters.
An Overview of NQL’s Newsgroup Capabilities NQL allows your scripts to act as newsgroup clients, connecting to a newsgroup server and reading messages. Specifically, your programs can do the following: ■■
Connect to a news server and a newsgroup
■■
List the newsgroups carried by a news server
313
71328_Pman_CH13I
314
12/14/01 2:55 PM
Page 314
Network Query Language ■■
Read messages from a newsgroup
■■
Read message headers from a newsgroup
■■
Disconnect from a news server
Let’s take a quick look at what it is like to work with newsgroups in NQL. The following script is a program for reading all of the postings from a newsgroup dedicated to a discussion of puppies. opennews "news.my-site.com", "alt.pets.puppies" firstarticle while { ...do something with article content... nextarticle } closenews
As you can see, working with newsgroups in NQL is easy and straightforward. Let’s study this script line-by-line. ■■
opennews connects to a news server.
■■
firstarticle reads the first article in the newsgroup and sets values into variables.
■■
nextarticle reads the next article in the newsgroup.
■■
closenews disconnects from the news server.
Newsgroup Support in NQL The NQL newsgroup statements are listed in Table 13.1. There are function editions of the newsgroup statements. The newsgroup functions are listed in Table 13.2. The newsgroup statements and functions are described individually in the following sections.
Newsgroup Sessions The NQL newsgroup operations are modeled on the idea of a session in which the statements and functions must be used in a certain order. 1. A newsgroup session is opened with opennews. 2. Articles are read by issuing a firstarticle statement followed by multiple nextarticle statements. 3. The newsgroup session is closed with closenews.
71328_Pman_CH13I
12/14/01 2:55 PM
Page 315
Accessing Newsgroups Table 13.1 Newsgroup Statements STATEMENT
PARAMETERS
DESCRIPTION
closenews
Closes the news session
firstarticle
Reads the first article in the current newsgroup
firstarticlehdr
Reads the first article’s header in the current newsgroup
listnewsgroups
Lists the newsgroups on the news server
nextarticle
Reads the next article in the current newsgroup
nextarticlehdr
Reads the next article’s header in the current newsgroup
opennews
Connects to a news server and opens a newsgroup
newsserver, newsgroup
Table 13.2 Newsgroup Functions FUNCTION
DESCRIPTION
bool closenews( )
Closes the news session
bool firstarticle( )
Reads the first article in the current newsgroup
bool firstarticlehdr( )
Reads the first article’s header in the current newsgroup
bool listnewsgroups( )
Lists the newsgroups on the news server
bool nextarticle( )
Reads the next article in the current newsgroup
bool nextarticlehdr( )
Reads the next article’s header in the current newsgroup
bool opennews(newsserver, newsgroup)
Connects to a news server and opens a newsgroup
Connecting to a News Server The opennews statement or function connects to a news server. Connecting to a news server is a necessary first step before newsgroup articles can be read. There are two parameters for opennews: a news server address, and the name of a newsgroup to open. opennews newsserver, newsgroup
If the news server is connected to successfully and the specified newsgroup can be opened, a success condition results. Once you reach this point, you can read articles.
315
71328_Pman_CH13I
316
12/14/01 2:55 PM
Page 316
Network Query Language
Reading Articles Reading newsgroup articles involves the following steps: 1. Read the first article with firstarticle or firstarticlehdr. 2. Process the message particulars, which are in variables. 3. Call nextmessage or nextmessagehdr to advance to the next article. 4. Repeat steps 2 and 3 for the next message. The first article is read with firstarticle, which takes no parameters. firstarticle
The success condition is set if an article was found. The variables ArticleDate, ArticleFrom, ArticleID, ArticleSubject, and ArticleText are set with the date, author, article ID, subject, and message text of the article. Subsequent articles are read with nextarticle, which takes no parameters. nextarticle
A success condition results unless there are no more articles in the newsgroup. Like firstarticle, nextarticle sets the ArticleDate, ArticleFrom, ArticleID, ArticleSubject, and ArticleText variables. The following code shows a sequence for reading all of the articles in a newsgroup using firstarticle and nextarticle. opennews server, newsgroup firstarticle while { ...do something with article... nextarticle } closenews
For some applications, you may be more interested in the article header information (date, author, subject, ID) than you are with the message text itself. In these cases, the firstarticlehdr and nextarticlehdr statements may be used. They are identical to firstarticle and nextarticle except that they do not read the message text of articles, saving some time. The following code shows a loop for processing all article headers in a newsgroup. opennews server, newsgroup firstarticle while { ...do something with article... nextarticle
71328_Pman_CH13I
12/14/01 2:55 PM
Page 317
Accessing Newsgroups } closenews
Listing Newsgroups The listnewsgroups statement or function retrieves a list of available newsgroups from the news server. listnewsgroups boolean listnewsgroups()
The newsgroups are pushed as a string onto the stack. Each newsgroup name is separated by a newline. The nextline statement or function is useful for iterating through the newsgroup names.
Disconnecting from a News Server To disconnect from a news server, issue a closenews statement. closenews
If a script ends, any unterminated news sessions are closed automatically.
Tutorial: Prospects Let’s apply the newsgroup statements in a script. In this tutorial, you will create a script that scans a newsgroup and captures email addresses in a text file. This is to illustrate newsgroup scanning capabilities and not to suggest that you perform spamming, which is looked down upon by most people and disallowed by most ISPs. There are some legitimate applications for scanning newsgroups, however: You may be a newsgroup moderator, or some newsgroups may have participants who agree to receive email from you. In any event, this tutorial does not send any email, it only captures email addresses. There are four steps in this tutorial: 1. Launch the NQL development environment. 2. Enter the Prospects script. 3. Run the Prospects script. 4. Understand the Prospects script. When you are finished with this tutorial, you will have seen how to do the following in NQL:
317
71328_Pman_CH13I
318
12/14/01 2:55 PM
Page 318
Network Query Language ■■
Connect to a newsgroup on a news server.
■■
Scan all articles in a newsgroup.
Let’s begin!
Step 1: Launch the NQL Development Environment Launch the NQL development environment. On a Windows system, this can be accomplished by clicking on the NQL Client desktop icon, or by selecting Program Files, Network Query Language, NQL Client from the Start Menu. On other platforms, you should have a desktop icon and/or a command-line method of launching the NQL Client. At this point, you should have the NQL development environment active on your desktop, with an empty code window. Now you’re ready to enter the tutorial script.
Step 2: Enter the Prospects Script In the NQL development environment, enter the script shown in Listing 13.1 and save it under the name prospects.nql. Enter the script, then save it by clicking the Save toolbar button (which has a disk icon). If you prefer, you may copy prospects.nql from the companion CD. If you have installed the companion CD on your system, you will have all of the book’s tutorial materials in a \Tutorials directory on your hard drive. Click the Open toolbar button (folder icon), and select Prospects.nql from the Tutorials\ch13 folder.
//Prospects - scan a newsgroup and capture email addresses if opennews("news.my-site.com", "alt.pets.puppies") { append "email.txt" boolean bHaveArticle = firstarticle() while { write ArticleFrom "\r\n" bHaveArticle = nextarticle() } closenews close opendoc "email.txt" end } show "Error: unable to open newsgroup" end
Listing 13.1 Prospects script.
71328_Pman_CH13I
12/14/01 2:55 PM
Page 319
Accessing Newsgroups
You will need to change the news server name and newsgroup name in the opennews statement to reflect a newsgroup you have access to. The names in the listing are dummy names. At this point, the script in Listing 13.1 should be in your code window, either because you entered it by hand or because you opened the script from the companion CD. You also should have replaced the news server and newsgroup names with real names. You are now ready to run the script.
Step 3: Run the Prospects Script Run the script. You can do this by selecting Build, Run from the menu, clicking the Run toolbar button, or pressing F5. When the script completes, a text file opens on the desktop showing the captured email addresses from the newsgroup. If the script does not seem to be working, check the following: ■■
Check for typographical errors in your script.
■■
Check that the news server name and newsgroup name are correct.
■■
Check the NQL client’s Errors tab for error messages.
At this point you should have seen the Prospects script run, connecting to a news server and capturing information about posted articles.
Step 4: Understand the Prospects Script We now want to make sure we understand every part of the Prospects script. The first line is a comment line. //Prospects - scan a newsgroup and capture email addresses
A connection is made to the news server and newsgroup with the opennews function. If the newsgroup is opened successfully, the if block executes. If not, an error message is displayed and the script ends. if opennews("news.my-site.com", "alt.pets.puppies") { ...process articles... } show "Error: unable to open newsgroup" end
Within the if block, the file email.txt is opened with append. If email.txt already exists, it is opened for appending. append "email.txt"
319
71328_Pman_CH13I
320
12/14/01 2:55 PM
Page 320
Network Query Language
The first article is accessed with the firstarticle function. If successful, variables are set and bHaveArticle is set to true, causing the while loop to be executed. In the while loop, the article poster’s email address (in ArticleFrom) is written to the email.txt file. At the bottom of the while loop, a nextarticle function advances to the next article and sets bHaveArticle. The while loop continues as long as there are articles to process. boolean bHaveArticle = firstarticle() while { write ArticleFrom "\r\n" bHaveArticle = nextarticle() }
Once the while loop exits, the news server connection is terminated with closenews, and the output file is closed with close. closenews close
The output file is opened on the desktop with opendoc, and the script ends. opendoc "email.txt" end
At this point, you’ve seen how to scan and capture information from newsgroup articles in an NQL script.
Further Exercises You could amend this example in a number of ways. Here are some interesting modifications that can be made: ■■
Check the content of each article for keywords of interest to you. Capture only the articles that contain one or more keywords.
■■
If the newsgroup you are accessing is about a product, see if you can write a script that determines the number of positive articles and the number of negative articles. If you can make such measurements at regular intervals, you have a way of tracking the improvement or lack of improvement of public perception over time.
Chapter Summary Network Query Language can access newsgroups using the NNTP protocol. ■■
A connection to a newsgroup on a news server is made with the opennews statement.
■■
The listnewsgroups statement lists the newsgroups available on a news server.
71328_Pman_CH13I
12/14/01 2:55 PM
Page 321
Accessing Newsgroups ■■
The firstarticle and firstarticlehdr statements access the first article in a newsgroup.
■■
The nextarticle and nextarticlehdr statements access the next article in a newsgroup.
■■
The closenews statement terminates a newsgroup connection.
Newsgroup access is a valuable way to track interest levels, rumors, approval levels, and other measures of public perception.
321
71328_Pman_CH13I
12/14/01 2:55 PM
Page 322
71328_Pman_CH14I
12/14/01 2:53 PM
Page 323
CHAPTER
14 Searching Directory Servers
Directory servers provide central address books for people, computers, applications, and other resources. They are becoming more and more essential, especially in environments with many elements to be managed, such as a large organization’s personnel directory. Lightweight Directory Access Protocol (LDAP) is the chief protocol in use for directory servers. Network Query Language allows you to connect to and search LDAP directory servers. This chapter describes NQL’s LDAP support. The tutorial at the end of the chapter searches for people by name against a public LDAP server.
An Overview of NQL’s LDAP Capabilities NQL allows a script to act as an LDAP client, connecting to an LDAP server and performing searches. Specifically, your programs can do the following: ■■
Connect to an LDAP server
■■
Issue a search query
■■
Process results from a search query
■■
Disconnect from an LDAP server
323
71328_Pman_CH14I
324
12/14/01 2:53 PM
Page 324
Network Query Language
Let’s take a quick look at what it is like to work with directory servers in NQL. The following script is a program for searching against an LDAP personnel directory. Criteria = "cn=robert apodaca" opendirectory URL then { search Criteria while { ...do something with search results... nextentry } closedirectory }
As you can see, working with directory servers in NQL is easy and straightforward. Let’s study this script line-by-line. ■■
Opendirectory connects to a directory server.
■■
Search issues a search query, and if successful, loads data from the first result record into variables.
■■
Nextentry advances to the next result record.
■■
Closedirectory disconnects from the directory server.
LDAP Queries LDAP queries are called search filters. A search filter takes the following form: (attribute operator value)
For example, (cn=Alex) means “common name of Alex”. Values may use the asterisk for wildcarding, so a search filter like (cn=Al*) would match common names such as Alice, Alex, and Alvin. The attributes available are specific to the type of directory you are searching. Some commonly used attribute values are listed in Table 14.1. A search filter can also be a combination of multiple filters using this form (operator(filter1)...(filterN))
Thus, a filter to find personnel from two different organizations could be expressed this way: (|(o=acme trucking)(o=pdq shipping))
The operators available for filters are listed in Table 14.2.
71328_Pman_CH14I
12/14/01 2:53 PM
Page 325
Searching Directory Servers Table 14.1 Common LDAP Attributes ATTRIBUTE
DESCRIPTION
c
Country
cn
Common name
dc
Domain component
o
Organization
objectClass
Object class
ou
Organizational unit
sn
Surname
Table 14.2 LDAP Operators OPERATOR
DESCRIPTION
=
equals
~=
approximately equal to
=
greater than or equal to
&
and
|
or
!
not
Some examples of search filters are shown in Table 14.3. In NQL, the outer parentheses are optional when you specify search filters (queries).
LDAP Directory Support in NQL The NQL LDAP statements are listed in Table 14.4. There are function versions of the LDAP statements. Table 14.5 lists the LDAP functions. The NQL LDAP statements and functions are described individually in the following sections.
LDAP Sessions The NQL LDAP operations are modeled on the idea of a session, in which the statements and functions must be used in a certain order.
325
71328_Pman_CH14I
326
12/14/01 2:53 PM
Page 326
Network Query Language Table 14.3 Search Filter Examples FILTER
MEANINGS
(cn=mac*)
All objects with a common name that begins with Mac
(objectCategory=*)
All objects in the directory
(objectCategory=person)
All persons in the directory
(&(objectClass=user)(email=*))
All users who have an email attribute
(&(objectClass=user)(!(cn=jim)))
All users except Jim
(&(objectClass=contact) (|(sn=Smith)(sn=Jones)))
All contacts with a surname of Smith or Jones
Table 14.4 Directory Statements STATEMENT
PARAMETERS
closedirectory search
Closes the directory session [criteria]
Issues a search query to the directory server
nextentry opendirectory
DESCRIPTION
Advances to the next result record from the directory server url [,user, password]
Connects to a directory server
Table 14.5 Directory Statements FUNCTION
DESCRIPTION
boolean search([criteria])
Issues a search query to the directory server
boolean nextentry()
Advances to the next result record from the directory server
boolean opendirectory(url [,user, password])
Connects to a directory server
1. An LDAP session is opened with opendirectory. 2. One or more searches are issued. For each search, the search statement is invoked, which returns the first matching entry. 3. Successive matching entries are found by invoking the nextentry statement repeatedly. 4. The LDAP session is closed with closedirectory.
71328_Pman_CH14I
12/14/01 2:53 PM
Page 327
Searching Directory Servers
Connecting to a Directory Server The opendirectory statement or function connects to a directory server. Connecting to a directory server is a necessary first step before search queries can be issued. There are three parameters for opendirectory: An LDAP URL (directory server address) and a user name and password. The user name and password are optional; they can be omitted if the LDAP server in question does not require authentication. opendirectory ldap-url [,username, password] boolean opendirectory(ldap-url [,username, password])
If opendirectory connects to the directory server, a success condition results (the function returns true). Once you reach this point, you can issue queries. The LDAP URL looks like a typical URL, beginning with an IP address or logical name, but may also specify additional information that is LDAP-specific. For example, the following LDAP URL indicates an organization name (BigFoot) and a country (us). ldap.bigfoot.com/o=bigfoot,c=us
Some additional LDAP URLs are shown here: LDAP://ldapsvr/O=Internet/DC=COM/DC=MSFT/DC=DEV/CN=TopHat LDAP://ldapsvr/CN=TopHat,DC=DEV,DC=MSFT,DC=COM,O=Internet LDAP://MyDomain.microsoft.com/CN=TopH,DC=DEV,DC=MSFT,DC=COM,O=Internet LDAP://CN=TopHat,DC=DEV,DC=MSFT,DC=COM,O=Internet
Issuing Search Queries The search statement issues a query to a directory server. There is one required parameter, the criteria for the query, which may optionally be followed by a variable list. search criteria [, var-list] boolean search(criteria [, var-list])
The LDAP query consists of one or more field specifications. If the query is successful and there is at least one result record, a success condition results (the function returns true) and the first record is loaded. If one or more variables were specified, they are set with the values of fields in the result record. For example, if the results have a cn (common name) field and one of the variables specified is cn, that variable will be set to a value. The following code shows the use of search with a variable list. search "cn=smith", cn, sn, o, c, phone, email
If no variables are specified, then all of the fields in the result record become variables. The following code issues the same query and retrieves all fields.
327
71328_Pman_CH14I
328
12/14/01 2:53 PM
Page 328
Network Query Language search "cn=smith"
Subsequent result records are read with nextentry, which takes an optional variable list just as search does. nextentry [var-list] boolean nextentry([var-list])
A success condition results (the function returns true) unless there are no more result records. Like search, nextentry sets variables to field values in the result record. The following code shows a sequence for reading all of the result records from a query using search and nextentry. opendirectory url search "cn=smith" while { ...do something with result variables... nextentry } closedirectory
Disconnecting from a Directory Server To disconnect from a directory server, issue a closedirectory statement. closedirectory
If a script ends, any open LDAP connections are closed automatically.
Tutorial: NameSearch Let’s apply the LDAP statements in a script. In this tutorial, you will create a script that searches a public LDAP server for contact information about people. This will be a search by name. There are four steps in this tutorial: 1. Launch the NQL development environment. 2. Enter the NameSearch script. 3. Run the NameSearch script. 4. Understand the NameSearch script. When you are finished with this tutorial, you will have seen how to do the following in NQL:
71328_Pman_CH14I
12/14/01 2:53 PM
Page 329
Searching Directory Servers ■■
Connect to an LDAP server.
■■
Issue an LDAP search query.
■■
Iterate through the results of a query.
Let’s begin!
Step 1: Launch the NQL Development Environment Launch the NQL development environment. On a Windows system, this can be accomplished by clicking on the NQL Client desktop icon, or by selecting Program Files, Network Query Language, NQL Client from the Start Menu. On other platforms, you should have a desktop icon and/or a command-line method of launching the NQL Client. At this point, you should have the NQL development environment active on your desktop, with an empty code window. Now you’re ready to enter the tutorial script.
Step 2: Enter the NameSearch Script In the NQL development environment, enter the script shown in Listing 14.1 and save it under the name NameSearch.nql. Enter the script, then save it by clicking the Save toolbar button (which has a disk icon). If you prefer, you may copy NameSearch.nql from the companion CD. If you have installed the companion CD on your system, you will have all of the book’s tutorial materials in a \Tutorials directory on your hard drive. Click the Open toolbar button (folder icon), and select NameSearch.nql from the Tutorials\ch14 folder. At this point, the script in Listing 14.1 should be in your code window, either because you entered it by hand or because you opened the script from the companion CD. You are now ready to run the script.
Step 3: Run the NameSearch Script Run the script. You can do this by selecting Build, Run from the menu, clicking the Run toolbar button, or pressing F5. When the script runs, it prompts you for a person’s name, then searches for entries of that name on the public LDAP server. For each match returned by the server, all of the fields returned are displayed in a message box. If the script does not seem to be working, check the following: ■■
Check for typographical errors in your script.
■■
Check the NQL client’s Errors tab for error messages.
At this point you should have seen the NameSearch script run, connecting to an LDAP server and issuing queries.
329
71328_Pman_CH14I
330
12/14/01 2:53 PM
Page 330
Network Query Language
//NameSearch name.
- connects to an LDAP server and looks up a person by
string Server, Name int Matches Server = "ldap.bigfoot.com/o=bigfoot,c=us" Name = prompt("LDAP Search", "Enter a person’s name to look up", "George Washington") if opendirectory(Server) { search "sn={Name}" while { dumpvars Matches += 1 nextentry } closedirectory if Matches==0 { show "No matching names were found" } } else { show "Error: unable to connect to LDAP server" }
Listing 14.1 NameSearch script.
Step 4: Understand the NameSearch Script We now want to make sure we understand every part of the NameSearch script. The first line is a comment line. //NameSearch
- connects to an LDAP server and looks up a person by name.
Three variables are defined. Server will hold the LDAP URL of the server to connect to; Name will hold a person’s name, entered by the user; Matches will be used to keep track of the number of matches. string Server, Name int Matches
71328_Pman_CH14I
12/14/01 2:53 PM
Page 331
Searching Directory Servers
The Server variable is set to an LDAP URL (BigFoot’s is shown here). Server = "ldap.bigfoot.com/o=bigfoot,c=us"
A prompt function displays a dialog allowing the user to enter a name, which is stored in the Name variable. Name = prompt("LDAP Search", "Enter a person’s name to look up", "George Washington")
We are now ready to attempt a connection to the LDAP server. The server name is specified to opendirectory, and because we are accessing a public LDAP server there is no need to specify a user ID or password. If the connection is successful, the statements in the if block are executed. If the connection is not successful, an error message is displayed and the script ends. if opendirectory(Server) { ... } else { show "Error: unable to connect to LDAP server" }
In the if block, a search is issued with the search statement. In this case, the query is for a name with field name sn (surname) and the value entered by the user, which has been held in Name. search "sn={Name}"
If the search is successful (returning at least one match), a success condition results and the while loop that follows executes. A dumpvars statement displays all defined variables, which includes the LDAP fields just retrieved. The match count is incremented, and at the bottom of the while loop a nextentry statement advances the next match. The while loop repeats until there are no more LDAP entries. while { dumpvars Matches += 1 nextentry }
The connection to the LDAP server is terminated with closedirectory. closedirectory
331
71328_Pman_CH14I
332
12/14/01 2:53 PM
Page 332
Network Query Language
If the number of matches found is zero, a message to that effect is displayed with show. if Matches==0 { show "No matching names were found" }
At this point, you’ve seen how to search LDAP servers and retrieve the results.
Further Exercises You could amend this example in a number of ways. Here are some interesting modifications that can be made: ■■
Reduce the likelihood of large numbers of search results for common names. You could count the number of matches and stop when there are too many.
■■
Ask for additional search criteria, such as state.
Chapter Summary Network Query Language supports the ability to connect to LDAP directory servers and search them. ■■
The opendirectory statement connects to an LDAP directory server.
■■
The search statement issues a search query. The fields of the first matching entry are automatically stored in variables.
■■
The nextentry statement advances to the next entry that matches the query.
■■
The closedirectory statement disconnects from an LDAP server.
The ability of NQL to access LDAP allows your scripts to search local and public directories for people, systems, and resources.
71328_Pman_CH15I
12/14/01 2:50 PM
Page 333
CHAPTER
15 Terminal Emulation
Terminal emulation allows you to connect to terminal-based computers over the network, including Unix systems and older legacy systems such as minicomputers and mainframe computers. Although such systems are designed to work with interactive users via terminals, they can also be communicated with programmatically if they are connected to the network and support the TELNET Internet protocol. A terminal emulation session allows you to mimic the actions of an interactive user, issuing commands and receiving responses. Network Query Language supports the TELNET protocol, allowing you to connect and communicate with terminal-based systems. This chapter describes terminal emulation and the NQL terminal emulation statements. The tutorial at the end of the chapter connects to a Unix system, issues a system status command, and captures the response.
The Basics of Terminal Emulation The common protocol for terminal emulation is called TELNET. The TELNET protocol is popular because it is simple, widespread, and easily implemented on many computer platforms, including older systems. TELNET is not the only terminal emulation protocol; communication with some mainframe computers from the big iron era often requires more extensive measures, including not only specialized software protocols
333
71328_Pman_CH15I
334
12/14/01 2:50 PM
Page 334
Network Query Language
but, in some cases, special hardware as well. For most terminal emulation needs, however, TELNET is sufficient. TELNET is a simple protocol. Like most TCP/IP protocols, it involves sending requests and receiving responses. In TELNET, the requests are simply input data to send to the remote system that would normally have been entered via a terminal keyboard. Likewise, the response data is the output from the remote system that would normally be displayed on a terminal screen. When you connect to a remote system via TELNET, the system you connect to spawns a process that mimics a terminal session. The primary difference with a true terminal session is that the input and the output are directed over the network. The standard TCP/IP port number for TELNET connections is port 23, but some environments may require different port numbers. It is also a common practice among network administrators to use non-standard port numbers for security reasons.
Modes In order to have a successful communication session with a terminal-based system, you will need a good understanding of the system’s prompts and command language as well as of the prompts and input required by any application programs you will be running. Terminal-based systems are modal; if the data you send is out of sync with the mode of the remote system, your session will be a failure. When you first connect, most remote systems will be prompting you for a user name or login ID, and soon afterward, a password. After a successful login, you’ll probably be at operating system level, where a command may be specified. If you enter a command that starts a program running, you may be prompted for input. In addition to keeping in sync with the mode of a remote system, timing is also important. For example, some systems require a login and password to be entered within several seconds or the system disconnects.
Terminal Emulation Operations NQL’s terminal emulation statements connect, interact, and disconnect from remote terminal-based systems. Any system that can act as a TELNET server should be accessible by NQL. Table 15.1 lists the NQL terminal emulation statements. The full names of these statements contain the word terminal, but this may be shortened to term in the interest of brevity. Thus, openterm may be used in place of openterminal. For the remaining sections of this chapter, we’ll use the term form of the statements. Table 15.2 lists the terminal emulation functions. Both the statements and functions accomplish the same tasks, so which should you use? For simple straightforward scripts where you are confident of the availability and command/response pattern of the remote system, the statements are the logical
71328_Pman_CH15I
12/14/01 2:50 PM
Page 335
Terminal Emulation Table 15.1 Terminal Emulation Statements STATEMENT
PARAMETERS
DESCRIPTION
clearterminal
Empties the receive buffer
closeterminal
Disconnects from the remote system
getterminal
Captures response data and pushes it onto the stack
getterminal
var
Captures response data and stores it in the specified variable
openterminal
[port]
Connects to a remote system on the specified port number
sendterminal
data
Sends data to the remote system
waitterminal
[response,] seconds
Waits for response within a time interval
waitterminalquiet
[response,] seconds
Waits for a period of quiet [after a response is seen]
Table 15.2 Terminal Emulation Functions FUNCTION
DESCRIPTION
boolean clearterminal()
Empties the receive buffer
boolean closeterminal()
Disconnects from the remote system
boolean getterminal()
Captures response data and pushes it onto the stack
boolean getterminal(var)
Captures response data and stores it in the specified variable
boolean openterminal([port])
Connects to a remote system on the specified port number
boolean sendterminal(data)
Sends data to the remote system
boolean waitterminal([response,] seconds)
Waits for response within a time interval
boolean waitterminalquiet([response,] seconds)
Waits for a period of quiet [after a response is seen]
choice. When checking for success, the functions allow you to combine terminal emulation actions with if and while statements. The NQL terminal emulation statements and functions are described individually in the following sections.
335
71328_Pman_CH15I
336
12/14/01 2:50 PM
Page 336
Network Query Language
Terminal Sessions The NQL terminal emulation operations are modeled on the idea of a session, in which the statements and functions must be used in a certain order. 1. A terminal emulation session is opened with openterminal. 2. Communications, waiting, and other actions are combined in any order desired, using the other terminal statements. 3. The terminal session is closed with closeterminal.
Connecting to a Remote System The first step in a terminal emulation session is to establish a connection to a remote system. The two pieces of information that are needed are the name of the system and the port number it uses for TELNET. The name of the system may be a DNS name such as mainframe or a TCP/IP address such as 103.5.16.3. If the remote system is not on your local network, expect to use a fully qualified Internet DNS name such as mainframe.my-domain.com. The port number will either be the standard port number of 23, or some other port number chosen for security reasons. The TELNET session is established with the openterm statement. openterm server [, port]
A success condition results if openterm successfully connects to the remote server. A failure condition results otherwise.
Sending Input The sendterm statement sends input data to the remote system. Depending on the mode of the remote system, the data you send could be a user ID, a password, a command, or input for a program. sendterm data
The input you supply to terminal-based systems may need to end in a carriage return, as line-oriented input is the norm on such systems. You can indicate a carriage return with the escape sequence \r in your input. The following script connects to a legacy system and sends this data to the remote system: a login ID, a login password, an operating system command, a program launch command, and input data for the program. openterm waitterm sendterm waitterm
"unix" "login:" "rpalmer\r" "password:"
71328_Pman_CH15I
12/14/01 2:50 PM
Page 337
Terminal Emulation sendterm "wormwood\r" sendterm "cd /programs\r" sendterm "month-end\r" sendterm "6/1/02\r" getterm closeterm
To put the preceding script into perspective, we can imagine a full terminal session that takes place as shown. Input is shown in boldface type. Accounting System login: rpalmer password: wormwood $ cd /programs $ month-end Month End Posting Program Please enter the period ending date: 6/1/02 Posting complete. $
Capturing Output The response from the remote system, normally intended for a display screen, can be captured with the getterm statement. getterm is frequently combined with clearterm in order to capture just the part of the output you wish to store. getterm [var]
The data from the remote system is stored in the specified variable. If no variable is specified, the data is stored on the stack. The following script shows the use of getterm to capture a file directory from a remote system. openterm "mini2" waitterm "User ID:" sendterm "gmendez\r" waitterm "Password:" sendterm "2348*grace\r" clearterm sendterm "ls\r" getterm closeterm
337
71328_Pman_CH15I
338
12/14/01 2:50 PM
Page 338
Network Query Language
Waiting for a Specific Response You can wait for a specific response from the remote system with the waitterm statement. There are two forms of waitterm: The first specifies a time interval in seconds. waitterm seconds
If there is any output from the remote system at all—even a single character—waitterm returns a success condition and allows the script to proceed. If there is no response within the specified number of seconds, waitterm sets a failure condition. The second form of waitterm specifies a response string as well as a time interval. waitterm response, seconds
If the specified response is encountered within the time interval, a success condition results and the script proceeds. If the response is not seen within the specified number of seconds, waitterm sets a failure condition. The use of waitterm is critical for ensuring that you are in sync with the remote system and that you match its timing.
Waiting for End of Response Waiting for periods of quiet (no output) can be just as critical as waiting for responses when dealing with terminal-based systems. Imagine you wanted to capture the output from a program on a remote system. How would you know when the output was finished? One method might be to wait for some data that you knew would be at the end of the output, in which case you could use the waitterm statement. But what if there were no end-of-output value to rely on? In that case, the only good way to know that the output was finished would be to detect that the remote system had stopped sending output. That’s the purpose of the waittermquiet statement. The waittermquiet statement waits for an interval of quiet. There are two forms of waittermquiet. The first specifies a time interval in seconds. waitterm seconds
waitterm waits until after the specified time interval passes without any output from the remote system. The second form of waitterm specifies a response string as well as a time interval. waitterm response, seconds
waitterm waits until the specified response has been encountered, then waits until after the specified time interval passes without any output from the remote system.
Clearing Screens As output is received from the remote system, it accumulates in a receive buffer for your terminal session. The receive buffer is emptied through two means: The getterm
71328_Pman_CH15I
12/14/01 2:50 PM
Page 339
Terminal Emulation
statement and the clearterm statement. Use getterm when you want to capture output from the remote system; use clearterm when you want to discard output from the remote system. If the purpose of your terminal emulation session is to capture information from a remote system, you may not want to capture the entire session. For example, the connection and login at the beginning of the session and the logoff and disconnection at the end of the session may be of no interest. The clearterm statement clears away any output from the remote system that is in the receive buffer of the terminal session. clearterm
Disconnecting A terminal emulation session is disconnected through the closeterm statement. closeterm
Depending on the type of system you are communicating with, it may or may not be necessary to formally log off of the system prior to disconnecting.
Tutorial: Unix Now we shall see terminal emulation in action. The script below connects to a Unix system, logs in, runs a system status command, and captures the output. For this tutorial, you will need access to a system running Unix or a Unix-derived operating system, such as Solaris or Linux. The system needs to permit TELNET access. If you don’t have local access to such a machine, you may be able find a Unix TELNET server on the Internet (for example, some public libraries provide TELNET access). Whether public or private, you’ll need to know the machine’s IP address or name, a user ID, and a password that you can use. There are four steps in this tutorial: 1. Launch the NQL development environment. 2. Enter the Unix script. 3. Run the Unix script. 4. Understand the Unix script. When you are finished with this tutorial, you will have seen how to do the following in NQL: ■■
Connect to a TELNET server and log on.
■■
Wait for prompts and issue commands.
339
71328_Pman_CH15I
340
12/14/01 2:50 PM
Page 340
Network Query Language ■■
Capture screens of output.
■■
Log off and disconnect.
Let’s begin!
Step 1: Launch the NQL Development Environment Launch the NQL development environment. On a Windows system, this can be accomplished by clicking on the NQL Client desktop icon, or by selecting Program Files, Network Query Language, NQL Client from the Start Menu. On other platforms, you should have a desktop icon and/or a command-line method of launching the NQL Client. At this point, you should have the NQL development environment active on your desktop, with an empty code window. Now you’re ready to enter the tutorial script.
Step 2: Enter the Unix Script In the NQL development environment, enter the script shown in Listing 15.1 and save it under the name Unix.nql. Enter the script, then save it by clicking the Save toolbar button (which has a disk icon). If you prefer, you may copy Unix.nql from the companion CD. If you have installed the companion CD on your system, you will have all of the book’s tutorial materials in a \Tutorials directory on your hard drive. Click the Open toolbar button (folder icon), and select Unix.nql from the Tutorials\ch15 folder. You’ll need to make some changes to this script. The variables defined at the top of the script specify the TELNET server IP address or name, your user ID, and password. Change all three to what will be needed for the system you plan to access. Also, if your system does not use a # prompt (which is the right prompt for a Solaris system), be sure to change the waittermquiet statement accordingly. You might need a dollar sign ($) or some other operating system prompt for your particular system. A good way to find these things out is to connect with an interactive TELNET client and access the system manually. At this point, the script in Listing 15.1 should be in your code window, either because you entered it by hand or because you opened the script from the companion CD. You are now ready to run the script.
Step 3: Run the Unix Script Check that your Unix system is up and on the network, then run the script. You can do this by selecting Build, Run from the menu, clicking the Run toolbar button, or pressing F5. The script performs communication, and after a few seconds a message box displays showing you the results of the ps (process status) command that was run on the Unix system, which might resemble the following:
71328_Pman_CH15I
12/14/01 2:50 PM
Page 341
Terminal Emulation
//Unix - connects to a Unix system and captures process status information string system = "sparky" string user = "admin" string pass = "secret*3452" if !openterm(system) { show "Error: Unable to connect to Unix system" end } //log on waitterm "login:" sendterm "{user}\r" sleep 1 sendterm "{pass}\r" waittermquiet "#" //send a process status command, wait for it to complete, and capture it clearterm sendterm "ps\r" waittermquiet 1 getterm //log off closeterm show
Listing 15.1 Unix script.
Last login: Sat Jul 28 10:53:39 from 172.16.200.111 Sun Microsystems Inc. SunOS 5.8 Generic February 2000 $ PID TTY TIME CMD 2716 pts/4 0:00 sh $
If this does not happen, check the following: ■■
Check your script for typographical errors.
■■
Ensure that your script is specifying the correct server name, user ID, and password.
■■
Check the NQL client’s Errors tab for error messages.
341
71328_Pman_CH15I
342
12/14/01 2:50 PM
Page 342
Network Query Language
At this point you should have seen the Unix script run, connecting to a terminalbased system and mimicking the actions of an interactive, terminal-based user.
Step 4: Understand the Unix Script We now want to make sure we understand every part of the Unix script. The first line is a comment line. //Unix - connects to a Unix system and captures process status information
Next, three variables are defined which specify the address of the server and the account information (user ID and password) to be used for identification. string system = "sparky" string user = "admin" string pass = "secret*3452"
The openterm statement connects to the Unix system, specifying the system name defined above. If it fails, an error is displayed and the script ends. if !openterm(system) { show "Error: Unable to connect to Unix system" end }
With a successful connection, the script can proceed to identify itself to the system. If you had connected to the server with an interactive TELNET client, you probably would have been greeted with a login: prompt. The script now explicitly waits for that text to appear with a waitterm statement. Once that response is seen, the script responds by sending the user ID and the return key (\r) with sendterm. The password and the return key are sent in the same way a second later. //log on waitterm "login:" sendterm "{user}\r" sleep 1 sendterm "{pass}\r"
Before proceeding, we want to be sure that the login has been accepted and the system is ready for our command. The waittermquiet statement accomplished this, waiting until the operating system prompt (# in our script for Solaris) has been seen along with a cessation of output. waittermquiet "#"
71328_Pman_CH15I
12/14/01 2:50 PM
Page 343
Terminal Emulation
With a successful login, we can issue a command to the system. First, we dispense with any previous data received, because we are interested only in capturing what comes next. The clearterm statement clears our input receive buffer. The command we wish to issue, ps, will report the status of system processes. The sendterm statement issues ps along with the return key (\r). The script then waits for a second of quiet with waittermquiet so that it knows when the command has finished. //send a process status command, wait for it to complete, and capture it clearterm sendterm "ps\r" waittermquiet 1
The output is captured with a getterm statement, which pushes the received data onto the stack. getterm
To logoff and disconnect from the system, a closeterm suffices. This terminates the TELNET connection to the Unix system. Note that on some other operating systems, it might be necessary to explicitly log off first. //log off closeterm
Lastly, we want to see the data that was captured. The show statement pops the data off of the stack and displays it on-screen. show
At this point, you’ve seen an NQL script connect, log on, and send commands to a Unix system, and capture the response.
Further Exercises You could amend this example in a number of ways. Here are some interesting modifications that can be made: ■■
Run programs that are more complex than ps and learn to interact with them in your scripts.
■■
Instead of displaying the captured information, save it to a file, spreadsheet, or database using the NQL statements described in other chapters of this book.
■■
Have the script analyze the information it receives from the Unix system, perhaps alerting you if a problem situation is detected.
343
71328_Pman_CH15I
344
12/14/01 2:50 PM
Page 344
Network Query Language
Chapter Summary Terminal emulation allows you to connect to terminal-based computers, such as Unix systems, minicomputers, and mainframe computers. TELNET is the primary terminal emulation protocol. Network Query Language supports terminal emulation through the TELNET protocol. ■■
TELNET sessions are opened with the openterm statement.
■■
Commands and data are sent to a TELNET server with the sendterm statement.
■■
Output from the TELNET server is captured with the getterm statement. The receive buffer can be cleared with clearterm.
■■
Responses and periods of quiet (no output) can be waited for with the waitterm and waittermquiet statements.
■■
TELNET sessions are terminated with the closeterm statement.
NQL-driven terminal emulation provides you with an automated way to make older systems full-fledged members of your network.
71328_Pman_CH16I
12/14/01 2:48 PM
Page 345
CHAPTER
16 Interacting with Applications
Interacting with other applications allows programs to interoperate with the local network to a high degree. Technologies such as OLE Automation are intended to allow applications to work together well. Network Query Language includes general statements for interacting with other applications, and also has specific support for generating Microsoft Office documents, spreadsheets, and presentations. This chapter describes the NQL statements for exporting and interacting with applications. The tutorial at the end of the chapter reads mail messages and contacts from Microsoft Outlook using OLE Automation.
Exporting to Microsoft Office Due to its dominance on the desktop, Microsoft Office is a frequent destination for exporting. Network Query Language has direct support for exporting data to Office documents, spreadsheets, and presentations. The NQL export statements are listed in Table 16.1. These statements are available only in the Microsoft Windows edition of NQL and require the presence of Microsoft Office. Table 16.2 lists the export functions. The export statements and functions are described individually in the following sections.
345
71328_Pman_CH16I
346
12/14/01 2:48 PM
Page 346
Network Query Language Table 16.1 Export Statements STATEMENT
PARAMETERS
closeexport
DESCRIPTION Closes an export session
createexport
filespec
Opens Office to create a new document, spreadsheet, or presentation
export
OutputFile, InputFile, Type
Creates a document, spreadsheet, or presentation from a text, table, or picture file
exportgotoline
line
Moves to a line in the current page of the current document
exportgotopage
page
Moves to a page in the current document
exportnewpage
Generates a new page, sheet, or slide in the current document
exportnextline
Moves to the next line in the current document
exportnextpage
Moves to the next page in the current document
insertpicture
filespec
Inserts an image into the current document
inserttable
filespec
Inserts a table into the current document
inserttext
filespec
Inserts text into the current document
openexport
filespec
Opens an existing document, spreadsheet, or presentation
setexportcolor
color
Sets the color for text insertion
setexportformat
font, size, bold, italic
Sets the font for text insertion
One-line Exporting The export statement creates a document, spreadsheet, or presentation in a single statement. All of the other export statements are used together, where a document is created or opened, built up in stages, and closed. The export statement is a one-line alternative for simple exporting needs where one item of text, a table, or an image will be exported. The parameters are an output file, an input file, and a type. export OutputFile, InputFile, Type boolean export(OutputFile, InputFile, Type)
The output file is a file specification that must be of type .doc, .xls, or .ppt. The input file contains text, table data, or an image to export. The type parameter is text, table, or picture.
71328_Pman_CH16I
12/14/01 2:48 PM
Page 347
Interacting with Applications Table 16.2 Export Functions FUNCTION
DESCRIPTION
boolean createexport(filespec)
Opens Office to create a new document, spreadsheet, or presentation
boolean export(OutputFile, InputFile, Type)
Creates a document, spreadsheet, or presentation from a text, table, or picture file
boolean exportgotoline(line)
Moves to a line in the current page of the current document
boolean exportgotopage(page)
Moves to a page in the current document
boolean exportnewpage()
Generates a new page, sheet, or slide in the current document
boolean exportnextline()
Moves to the next line in the current document
boolean exportnextpage()
Moves to the next page in the current document
boolean insertpicture(filespec)
Inserts an image into the current document
boolean inserttable(filespec)
Inserts a table into the current document
boolean inserttext(filespec)
Inserts text into the current document
boolean openexport(filespec)
Opens an existing document, spreadsheet, or presentation
boolean setexportcolor(color)
Sets the color for text insertion
boolean setexportformat(font, size, bold, italic)
Sets the font for text insertion
If the type is text, the input file is a text file whose contents are inserted into the document, spreadsheet, or presentation being created. If the type is table, the input file is a text data file containing table data, where each line contains a record of field values separated by commas. The very first line contains the number of columns, a comma, and the number of rows. A sample table data file is shown. 2,7 Biro Schreiber, Screenwriter May Estro, Director Manny Facture, Producer Youse Full, Best Boy Cam Mann, Key Grip Mark Cissus, Lead Actor Holly Wood, Lead Actress
If the type is “picture”, the file is an image file, such as a .bmp or .jpg file.
347
71328_Pman_CH16I
348
12/14/01 2:48 PM
Page 348
Network Query Language
If export is able to successfully create the document, spreadsheet, or presentation file and import the specified data, a success condition results. For more ambitious exporting, such as when you have a mixture of text, tables, and pictures, the discrete export statements that follow should be used instead of export.
Export Sessions The NQL transaction operations are modeled on the idea of a session, where the statements and functions must be used in a certain order. 1. An export session is opened with createexport or openexport. 2. One or more items of data are imported, using inserttext, inserttable, and insertpicture. 3. The export session is closed with closeexport.
Creating a New Office File The createexport statement or function creates a document, spreadsheet, or presentation file for export. Creating or opening an export file is a necessary first step in the export process. The parameter is a file specification, which must be of type .doc, .xls, or .ppt. createexport filespec boolean createexport(filespec)
If the appropriate Office application can be launched and the specified file is created, a success condition results and the other export statements may be used to insert data into the file. The following code uses createexport to create a PowerPoint presentation. if createexport("new.ppt") { inserttext "new.txt" closeexport }
To open an existing file instead of creating a new one, use the openexport statement instead.
Opening an Existing Office File The openexport statement or function opens an existing document, spreadsheet, or presentation file for modification. Creating or opening an export file is a necessary first step in the export process. The parameter is a file specification, which must be of type .doc, .xls, or .ppt. openexport filespec boolean openexport(filespec)
71328_Pman_CH16I
12/14/01 2:48 PM
Page 349
Interacting with Applications
If the appropriate Office application can be launched and the specified file is opened, a success condition results and the other export statements may be used to insert data into the file. The following code uses openexport to open a Microsoft Word document. if openexport("letter.ppt") { gotopage 2 inserttext "update.txt" closeexport }
To create a new file instead of opening an existing one, use the createexport statement instead.
Inserting Text To insert text into an Office file, the text must be stored in a text file. The inserttext statement or function inserts the text file into the Office file. The parameter is the file specification of the text file. inserttext filespec boolean inserttext(filespec)
If the specified file exists and Office imports it without error, a success condition results. The following code creates a PowerPoint presentation and imports text into the first slide. createxport "summary.ppt" inserttext "summary.txt" closeexport
You can combine multiple text, image, and table insertions to create compound documents.
Inserting Tables To insert a table into an Office file, the table data must be stored in a text data file. The inserttable statement or function inserts the table data into the Office file. The parameter is the file specification of the table data file. inserttable filespec boolean inserttable(filespec)
If the specified file exists and Office imports it without error, a success condition results.
349
71328_Pman_CH16I
350
12/14/01 2:48 PM
Page 350
Network Query Language
The input file is a text data file containing table data, where each line contains a record of field values separated by commas. The very first line contains the number of columns, a comma, and the number of rows. A sample table data file is shown. 2,7 Biro Schreiber, Screenwriter May Estro, Director Manny Facture, Producer Youse Full, Best Boy Cam Mann, Key Grip Mark Cissus, Lead Actor Holly Wood, Lead Actress
The following code creates an Excel worksheet and then imports table data into it. createexport "cast.xls" inserttable "cast.txt" closeexport
You can combine multiple text, image, and table insertions to create compound documents.
Inserting Pictures To insert an image into an Office file, you must start with an image file. The insertpicture statement or function inserts the image file into the Office file. The parameter is the file specification of the image file. insertpicture filespec boolean insertpicture(filespec)
If the specified file exists and Office imports it without error, a success condition results. The following code inserts a picture into a Word document. createxport "poster.doc" insertpicture "poster.bmp" closeexport
You can combine multiple text, image, and table insertions to create compound documents.
Interacting with Applications Using Automation NQL has statements for interaction with Windows applications through Automation (also known as OLE Automation, or COM). The NQL Automation statements are
71328_Pman_CH16I
12/14/01 2:48 PM
Page 351
Interacting with Applications Table 16.3 Automation Statements STATEMENT
PARAMETERS
closeobject
DESCRIPTION Closes an Automation object
do
command, parameter-list
Executes an Automation command
obtain
command, parameter-list
Retrieves an Automation value
openobject
program-ID [, server]
Opens an Automation object
set
command, value
Sets an Automation value
Table 16.4 Automation Functions FUNCTION
DESCRIPTION
boolean do(command, parameter-list)
Executes an Automation command
string obtain(command, parameter-list)
Retrieves an Automation value
boolean openobject(program-ID [, server])
Opens an Automation object
boolean set(command, value)
Sets an Automation value
listed in Table 16.3. These statements are available only in the Microsoft Windows edition of NQL. Table 16.4 lists the Automation functions. The Automation statements and functions are described individually in the following sections.
Automation Object Sessions The NQL Automation operations are modeled on the idea of a session, in which the statements and functions must be used in a certain order. 1. An Automation object session is opened with openobject. 2. Multiple commands, setting values, and retrieving values are performed as desired using do, set, and obtain. 3. The Automation object session is closed with closeobject.
Opening an Automation Object The openobject statement (or function) opens an Automation object. The required parameter is a program-ID that identifies the application to be opened. An optional second parameter specifies a server, which allows the application to be launched on a remote computer.
351
71328_Pman_CH16I
352
12/14/01 2:48 PM
Page 352
Network Query Language openobject program-ID [, server] boolean openobject(program-ID [, server])
The program ID must match the intended application’s Automation registry name, such as “Word.Application”. The application launches on the same machine that the NQL script is running on, unless the second server parameter is specified, in which case it launches on the specified machine. If the application launches successfully, a success condition results (the function returns true). The following code uses openobject to open Microsoft Word on the local machine. openobject "word.application"
Once an object has been opened, the do, obtain, and set statements and functions may be used to interact with the application.
Issuing Commands The do statement (or function) issues a command to an Automation object. The first parameter is a command, which should be an Automation command that the application recognizes. The valid commands vary from one application to the next, so you must be familiar with the commands your target application supports. The command may be a method name, such as “Quit”, but the command may also be preceded by one or more interface names separated by periods, such as “Documents.Add”. If the command requires values, they are specified as additional parameters. do command [, parameter-list] boolean do(command, parameter-list)
If the command executes successfully, the statement sets the success condition and the function returns true. The following code launches Microsoft Word, creates a new document, inserts a text file, and saves the result to disk. openobject "word.application" do "Documents.Add" do "Selection.InsertFile", "c:\\My Documents\\test1.txt" do "ActiveDocument.SaveAs", "c:\\My Documents\\test1.doc" do "ActiveDocument.Close" do "Quit" closeobject
Some Automation commands return values that you may be interested in capturing. In such instances, use the obtain statement in place of do.
71328_Pman_CH16I
12/14/01 2:48 PM
Page 353
Interacting with Applications
Retrieving Values The obtain statement (or function) retrieves a value from an Automation object. This is done by issuing a command that returns a value. The first parameter is a command, which should be an Automation command that the application recognizes. The valid commands vary from one application to the next, so you must be familiar with the commands your target application supports. The command may be a method name, such as “Quit”, but the command may also be preceded by one or more interface names separated by periods, such as “Documents.Add”. If the command requires values, they are specified as additional parameters. obtain command [, parameter-list] boolean obtain(command, parameter-list)
If the command executes successfully, a success condition results and the statement pushes the requested value on the stack. The function version of obtain returns the value. The following code launches Microsoft Word, creates a new document, inserts a text file, saves the result to disk, and uses the obtain function to retrieve the full file specification of the created document. openobject "word.application" do "Documents.Add" do "Selection.InsertFile", "test1.txt" do "ActiveDocument.SaveAs", "test1.doc" sFilespec = obtain("Selection.Document.FullName") do "ActiveDocument.Close" do "Quit" closeobject opendoc sFilespec
To set values rather than retrieve them, use the set statement. To issue Automation commands without regard to return values, use the do statement in place of obtain.
Setting Values The set statement (or function) sets a value from an Automation object. This is done by issuing a command and one or more values. The first parameter is a command, which should be an Automation command that the application recognizes. The valid commands vary from one application to the next, so you must be familiar with the commands your target application supports. The command may be a method name, such as “Quit”, but the command may also be preceded by one or more interface names separated by periods, such as “Selection.InsertFile”. If the command requires values, they are specified as additional parameters. set command [, parameter-list] boolean set(command, parameter-list)
353
71328_Pman_CH16I
354
12/14/01 2:48 PM
Page 354
Network Query Language
If the command executes successfully, a success condition results. The function version of set returns true if successful. The following code launches Microsoft Excel and creates a new spreadsheet, using set to set values in spreadsheet cells. openobject "excel.application" do "workbooks.add" set "activeworkbook.ActiveSheet.Cells(1,1).Value", "Total" set "activeworkbook.ActiveSheet.Cells(1,2).Value", nSubtotal + nTax + nFreight do "ActiveWorkbook.SaveAs", "test1.xls" do "ActiveWorkbook.Close" do "Quit" closeobject
To retrieve values rather than setting them, use the obtain statement.
Closing an Automation Object The closeobject statement closes an Automation object. There are no parameters. closeobject
If you fail to close an Automation object, it is closed automatically when your script ends.
Tutorial: Outlook The tutorial that follows uses OLE Automation to interoperate with Microsoft Outlook. The script will obtain information from the Contacts and Inbox folders. There are four steps in this tutorial: 1. Launch the NQL development environment. 2. Enter the Outlook script. 3. Run the Outlook script. 4. Understand the Outlook script. When you are finished with this tutorial, you will have seen how to do the following in NQL: ■■
Open a session to an Automation application.
■■
Request information from an Automation application.
Let’s begin!
71328_Pman_CH16I
12/14/01 2:48 PM
Page 355
Interacting with Applications
Step 1: Launch the NQL Development Environment Launch the NQL development environment. On a Windows system, this can be accomplished by clicking on the NQL Client desktop icon, or by selecting Program Files, Network Query Language, NQL Client from the Start Menu. On other platforms, you should have a desktop icon and/or a command-line method of launching the NQL Client. At this point, you should have the NQL development environment active on your desktop, with an empty code window. Now you’re ready to enter the tutorial script.
Step 2: Enter the Outlook Script In the NQL development environment, enter the script shown in Listing 16.1 and save it under the name outlook.nql. Enter the script, then save it by clicking the Save toolbar button (which has a disk icon).
//Outlook.nql - retrieves Outlook Inbox and Contacts information errors ignore //Open the Outlook object if !openobject("outlook.application") { show 'openobject failed' end } //Loop though the Outlook Inbox sOutlookInboxObject = 'GetNameSpace("MAPI").GetDefaultFolder(6)' nTotal = 0 nTotal = obtain(sOutlookInboxObject & '.Items.Count') if nTotal == 0 { show 'There are no messages in your Outlook Inbox folder' } else { if ask('Inbox', 'Do you want to loop through the ' & nTotal & continues
Listing 16.1 Outlook script.
355
71328_Pman_CH16I
356
12/14/01 2:48 PM
Page 356
Network Query Language
' messages in your Outlook Inbox folder?') { for nIndex = 1, nTotal { sSubject = '' sSubject = obtain sOutlookInboxObject & '.Items(' nIndex ').Subject' show 'Message Subject: ' & sSubject } } } //Loop though the Outlook contacts sOutlookContactObject = 'GetNameSpace("MAPI").GetDefaultFolder(10)' nTotalContacts = 0 nTotalContacts = obtain(sOutlookContactObject & '.Items.Count') if nTotalContacts == 0 { show 'There are no contacts in your Outlook Contacts folder' } else { if ask('Contacts', 'Do you want to loop through the ' & nTotalContacts & ' entries in your Outlook Contacts folder?') { for nIndex = 1, nTotalContacts { sFullName = '' sEmail = '' sFullName = obtain(sOutlookContactObject & '.Items(' & nIndex & ').FullName') sEmail = obtain(sOutlookContactObject & '.Items(' & nIndex & ').Email1Address') if sFullName != '' OR sEmail != '' { show 'Fullname: ' & sFullName & '\nEmail: ' & sEmail } } } } closeobject
Listing 16.1 Outlook script (continued).
If you prefer, you may copy outlook.nql from the companion CD. If you have installed the companion CD on your system, you will have all of the book’s tutorial
71328_Pman_CH16I
12/14/01 2:49 PM
Page 357
Interacting with Applications
materials in a \Tutorials directory on your hard drive. Click the Open toolbar button (folder icon), and select outlook.nql from the Tutorials\ch16 folder. At this point, the script in Listing 16.1 should be in your code window, either because you entered it by hand or because you opened the script from the companion CD. You are now ready to run the script.
Step 3: Run the Outlook Script Make sure you have Outlook running on your desktop, then go ahead and run the script. You can do this by selecting Build, Run from the menu, clicking the Run toolbar button, or pressing F5. A dialog appears telling you the number of messages in your Inbox folder and asking if you want them displayed. If you select Yes, the subject of each mail message is displayed in turn (you might not want to do this if you have thousands of mail messages). The script then does the same thing for the Contacts folder, displaying the number of contacts and asking if you want them displayed. If this does not happen, check the following: ■■
Check your script for typographical errors.
■■
Check the NQL client’s Errors tab for error messages.
At this point you should have seen the Outlook script run, interacting with Microsoft Outlook and retrieving folder data. Although we haven’t discussed how it works yet, you’ve seen the results of an NQL script first-hand, in this case exercising NQL’s abilities to apply OLE Automation to interoperate with an application. In the next step, we’ll dissect the script and explain exactly how it works.
Step 4: Understand the Outlook Script We now want to make sure we understand every part of the Outlook script. The first line is a comment line. //Outlook.nql - retrieves Outlook Inbox and Contacts information
The error handling is set to errors ignore. The reason for this will become apparent later in the script when we extract contact information. errors ignore
The script opens an Automation connection to Outlook through an openobject call. The parameter specifies the application name, which happens to be outlook.application for Microsoft Outlook. If openobject fails, the script displays an error message and ends. //Open the Outlook object if !openobject("outlook.application") {
357
71328_Pman_CH16I
358
12/14/01 2:49 PM
Page 358
Network Query Language show 'openobject failed' end }
Now that communication with Outlook has been successfully established, commands and requests can be issued to Outlook. The specific commands that may be issued are dependent on the application you are talking to. In the case of Outlook, the script issues the command to count the number of mail messages in the Inbox folder using the obtain function. In Outlook, the Inbox is referenced as folder number 6 of the GetDefaultFolder method. //Loop though the Outlook Inbox sOutlookInboxObject = 'GetNameSpace("MAPI").GetDefaultFolder(6)' nTotal = 0 nTotal = obtain(sOutlookInboxObject & '.Items.Count')
If the message count is zero, a message to that effect is displayed. if nTotal == 0 { show 'There are no messages in your Outlook Inbox folder' }
If there are messages, the script asks the user if they want to display the messages (via the ask function). If the response from the user is yes, the if block is executed. A for loop iterates through the messages, again with obtain. else { if ask('Inbox', 'Do you want to loop through the ' & nTotal & ' messages in your Outlook Inbox folder?') { for nIndex = 1, nTotal { sSubject = '' sSubject = obtain sOutlookInboxObject & '.Items(' & nIndex ').Subject' show 'Message Subject: ' & sSubject } } }
Now the script performs the same maneuvers, but this time for the Contacts folder. The count of contacts is obtained with obtain. In Outlook, the Contacts folder is referenced as folder number 10 of the GetDefaultFolder method. //Loop though the Outlook contacts sOutlookContactObject = 'GetNameSpace("MAPI").GetDefaultFolder(10)'
71328_Pman_CH16I
12/14/01 2:49 PM
Page 359
Interacting with Applications nTotalContacts = 0 nTotalContacts = obtain(sOutlookContactObject & '.Items.Count')
If the contact count is zero, a message to that effect is displayed. if nTotalContacts == 0 { show 'There are no contacts in your Outlook Contacts folder' }
If there are contacts, the script asks the user if they want to display the contacts (via the ask function). If the response from the user is yes, the if block is executed. A for loop iterates through the contacts, again with obtain. else { if ask('Contacts', 'Do you want to loop through the ' & nTotalContacts & ' entries in your Outlook Contacts folder?') { for nIndex = 1, nTotalContacts { sFullName = '' sEmail = '' sFullName = obtain(sOutlookContactObject & '.Items(' & nIndex & ').FullName') sEmail = obtain(sOutlookContactObject & '.Items(' & nIndex & ').Email1Address') if sFullName != '' OR sEmail != '' { show 'Fullname: ' & sFullName & '\nEmail: ' & sEmail } } } }
We are now finished talking to Outlook, so the Automation object can be closed with closeobject. closeobject
At this point, you’ve seen an NQL script control an application through Automation.
Further Exercises You could amend this example in a number of ways. Here are some interesting modifications that can be made: ■■
Retrieve more fields of information about messages and contacts. You’ll need access to the documentation on Outlook’s Automation commands in order to do this.
359
71328_Pman_CH16I
360
12/14/01 2:49 PM
Page 360
Network Query Language ■■
Instead of displaying the information, save it to a disk file or export it in some other way.
■■
Instead of returning all messages or all contacts, prompt the user for a keyword and return only the messages and contacts that contain the keyword.
Chapter Summary Network Query Language has features for exporting and for interacting with applications. The export statement and functions export text, tables, and pictures to Microsoft Office applications (Word, Excel, and PowerPoint). ■■
The export statement creates a document, spreadsheet, or presentation in a single statement.
■■
New office documents are created with the createexport statement.
■■
Existing office documents are opened for modification with the openexport statement.
■■
Text is inserted with the inserttext statement.
■■
Tables are inserted with the inserttable statement.
■■
Pictures are inserted with the insertpicture statement.
Applications can be controlled programmatically through Automation. The applications controlled can be on the same machine or a remote system. ■■
Automation sessions are opened with openobject.
■■
The do statement issues Automation commands.
■■
The obtain statement retrieves Automation property values.
■■
The set statement sets Automation property values.
■■
Automation sessions are closed with closeobject.
Exporting and automation give your scripts the power to pass data to applications and initiate processing.
71328_Pman_CH17I
12/14/01 2:47 PM
Page 361
CHAPTER
17 Socket Communications
Internet protocols such as HTTP, NNTP, POP3, and SMTP are all based on socket communications, where datagrams are sent and received using TCP/IP, the underlying protocol of the Internet. Network Query Language not only supports popular Internet protocols but also provides facilities for direct socket communications. This capability allows you to implement TCP/IP protocols not native to NQL and can also be used to create a custom protocol of your own. This chapter introduces the basics of socket communications, then covers socket programming in NQL. The tutorial at the end of the chapter implements a simple custom protocol that demonstrates the server and client ends of socket communication.
Background on Socket Communications Socket communications is the basis of TCP/IP, the underlying protocol of the Internet and intranets (corporate networks). A socket is an endpoint of communication between two machines. One machine initiates communications and is known as a client. The other responds to clients and is known as a server. Servers are designed to service requests from many incoming clients. Figure 17.1 illustrates the basic client/ server model. Both IP addresses and TCP port numbers figure prominently in socket communications. An IP address is a numbered locator of the form n1.n2.n3.n4, such as 176.12.10.73.
361
71328_Pman_CH17I
362
12/14/01 2:47 PM
Page 362
Network Query Language
Request
Client
Response
Server
Figure 17.1 TCP/IP client/server model.
It identifies a system’s location on a network in the same way that a street address identifies the location of a house. Logical names can be mapped to IP addresses, allowing users to work with logical names as www.my-web-site.com rather than numbers. Communications specify both IP addresses and an additional number called a TCP port number. Port numbers are kind of like television channel numbers: Different things are happening on different port numbers. Certain port numbers have special meanings associated with them and are referred to as the well-known port numbers. To appreciate the importance of port numbers, consider the following three activities: ■■
Browsing a Web site
■■
Transferring files
■■
Sending an email message
The Web browsing takes place on port 80, which both the client and server machines associate with Web protocols. Likewise, port 21 indicates the File Transfer Protocol, and email protocols use yet other port numbers. The use of standardized port numbers allows all three activities to be handled without confusion, even if all three events are being serviced by the same server simultaneously. To be more specific about port numbers, the well-known port numbers are in the range 0 through 1023. When you want to make a socket connection, then, you need to have an address (named or numbered) as well as a port number. The address is determined by the machine you are interested in connecting to. The port number is determined by the application you have in mind. If you are creating your own custom protocol for communication, you are free to come up with your own port number— but it’s wise to avoid using a well-known port number.
Clients The client is the machine initiating a socket communication. The client must connect to a server with an agreed-upon port number. A client sends a byte stream of information to the server, known as a request. The contents of the byte stream depend on the protocol (agreed-upon language) for the
71328_Pman_CH17I
12/14/01 2:47 PM
Page 363
Socket Communications
application in question. For example, in the FTP protocol commands (requests) are sent using simple text commands such as GET and STOR. In response to a request, a byte stream known as a response is returned. Like the request, the contents of the response are in the appropriate protocol. Some protocols allow for a great diversity of responses; for example, HTTP, the protocol of the World Wide Web, allows servers to respond with HTML, text, XML, and many other formats including multimedia content. An application follows the steps below to act as a client: 1. A socket connection is opened, specifying a port number indicative of the intended protocol. 2. A connection is made to a server, specifying the server’s IP address. 3. For each communication desired, a request is sent to the server and a response is received back from the server. 4. When the client is finished communicating, the socket connection is closed.
Servers The server is the machine responding to a socket communication. The server’s port number is standardized and implies a protocol. The client and server must agree on the port number. The server enters a listening mode, awaiting an incoming connection from a client. Once a client connection occurs, the incoming request (a byte stream) is received. The software on the server analyzes the response and decides what to do about it. A response (a byte stream) is generated and sent back to the client. An application follows these steps to act as a server: 1. A socket connection is created, specifying a port number indicative of the intended protocol. 2. The server enters listening mode, awaiting an incoming connection. 3. When an incoming connection occurs, the incoming request is received. 4. A response is generated based on the request and sent back to the client. 5. The server repeats steps 2 through 4 repeatedly.
Socket Programming in NQL NQL has statements that allow scripts to act as socket clients or socket servers. The NQL socket statements are listed in Table 17.1. There are function versions of the socket statements. Table 17.2 lists the socket functions. The socket statements and functions are described individually in the following sections.
363
71328_Pman_CH17I
364
12/14/01 2:47 PM
Page 364
Network Query Language Table 17.1 Socket Statements STATEMENT
PARAMETERS
closesocket connect
DESCRIPTION Closes a socket
url
listen
Connects to a server Listens for an incoming connection
opensocket
port
Opens a socket
receive
[var]
Receives data from a socket
send
value
Sends data to a socket
Table 17.2 Socket Functions FUNCTION
DESCRIPTION
bool connect(url)
Connects to a server
bool opensocket(port)
Opens a socket
bool receive(var)
Receives data from a socket
bool send(value)
Sends data to a socket
Socket Sessions The NQL socket operations are modeled on the idea of a session, in which the statements and functions must be used in a certain order. 1. A socket session is opened with opensocket. 2. If a server, a connection is waited for with listen. If a client, a connection is made using connect. 3. Multiple communications may now take place between client and server, always initiated by the client. If a client, information is transmitted with send and the response is captured with receive. If a server, requests are captured with receive and responses are generated with send. 4. The socket session is closed with closesocket. Generally, clients issue closesocket.
Opening a Socket The opensocket statement or function opens a TCP/IP socket. The parameter is a port number. opensocket port bool opensocket(port)
71328_Pman_CH17I
12/14/01 2:47 PM
Page 365
Socket Communications
If the socket is successfully opened, a success condition results (the function returns true). The following code opens a socket on port 80, the standard port for HTTP (World Wide Web) communications. opensocket 80
Once a socket has been successfully opened, a server may use the listen, receive, and send statements and functions. A client may use the connect, send, and receive statements and functions.
Listening for an Incoming Connection Once a socket has been opened, a server needs to listen for an incoming connection. The listen statement waits until an incoming connection occurs from a client. There are no parameters. listen
Once a connection is made from a client, script execution continues at the next statement. The following code opens a socket, listens for an incoming connection, receives the request from the client, and sends a hard-coded response. opensocket 123 listen receive send "I see you!" closesocket
The reciprocal of listen is the connect statement, which a client issues. The server should open a socket and go into listen mode as early as possible in order to be able to handle as many incoming connections as possible.
Making a Connection to a Server Once a socket has been opened, a client needs to connect to a server. The connect statement or function attempts a connection. The parameter is the URL of the server. connect(url) bool connect(url)
If the connection is established, a success condition results (the function returns true). The following code opens a socket and makes a connection to a server. opensocket 123 connect "server.my-net.com"
365
71328_Pman_CH17I
366
12/14/01 2:47 PM
Page 366
Network Query Language send "I see you!" closesocket
The counterpart to connect is the listen statement, which a server issues.
Sending Data A client or a server sends data with the send statement or function. The parameter is a value to transmit. send value bool send(value)
If the data is transmitted without error, a success condition results (the function returns true). Clients always send data first and then receive responses. Servers do the reverse, accepting requests first and then sending responses. The following client code opens a socket, makes a connection to a server, and sends several requests to the server using send. opensocket 123 connect "server.my-net.com" send "command1" receive sResponse1 send "command2" receive sResponse2 closesocket
The counterpart to send is the receive statement, which captures data.
Receiving Data A client or a server receives data with the receive statement or function. The parameter is a variable to receive the data. The parameter is optional in the statement form of receive, and if omitted the response is pushed onto the stack. receive [var] bool receive(var)
If the data is received without error, a success condition results (the function returns true). Clients always send data first and then receive responses. Servers do the reverse, receiving requests first and then sending responses. The following server code opens a socket, listens for an incoming connection, and receives responses using receive. opensocket 123 listen receive sRequest
71328_Pman_CH17I
12/14/01 2:47 PM
Page 367
Socket Communications send "got it!" closesocket
The counterpart to receive is the send statement, which transmits data.
Closing a Socket The closesocket statement closes a TCP/IP socket. There are no parameters. closesocket
If the socket is successfully opened, a success condition results (the function returns true). The following code opens a socket on port 80, the standard port for HTTP (World Wide Web) communications. opensocket 80
Once a socket has been successfully opened, a server may use the listen, receive, and send statements and functions. A client may use the connect, send, and receive statements and functions.
Tutorial: Client/Server Now it’s time to see socket connections work in NQL. In this tutorial, you will create two scripts that will implement a custom TCP/IP protocol, one acting as a client and the other as a server. The client will issue request messages on a specific port number. The server will respond to those requests with response messages. The protocol we will implement is a simple one that we are making up, which we’ll call Tutorial17. The Tutorial17 protocol will use port 1000, and its response/request definitions are shown in Table 17.3. You will need to run the client and server scripts on separate machines, and will need NQL on both machines. There are seven steps in this tutorial:
Table 17.3 The Tutorial17 Protocol REQUEST
RESPONSE
“hello”
“how are you?”
“date”
the current system date
“time”
the current system time
anything else
“come again?”
367
71328_Pman_CH17I
368
12/14/01 2:47 PM
Page 368
Network Query Language
1. Launch the NQL development environment. 2. Enter the client script. 3. Enter the server script. 4. Run the server script. 5. Run the client script. 6. Understand the server script. 7. Understand the client script. When you are finished with this tutorial, you will have seen how to do the following in NQL: ■■
Create a socket on a server and respond to requests from clients.
■■
Create a socket on a client and issue requests to servers.
Let’s begin!
Step 1: Launch the NQL Development Environment Launch the NQL development environment. On a Windows system, this can be accomplished by clicking on the NQL Client desktop icon, or by selecting Program Files, Network Query Language, NQL Client from the Start Menu. On other platforms, you should have a desktop icon and/or a command-line method of launching the NQL Client. Since we are creating two scripts in this tutorial, you should launch the NQL development environment twice, on separate machines. At this point, you should have two instances of the NQL development environment active on your desktop, each with an empty code window. Now you’re ready to enter your scripts.
Step 2: Enter the Client Script In the first instance of the NQL development environment, enter the script shown in Listing 17.1 and save it under the name Client.nql. Enter the script, then save it by clicking the Save toolbar button (which has a disk icon). If you prefer, you may copy Client.nql from the companion CD. If you have installed the companion CD on your system, you will have all of the book’s tutorial materials in a \Tutorials directory on your hard drive. Click the Open toolbar button (folder icon), and select Client.nql from the Tutorials\ch17 folder. You need to make one change to the client script. Change the connect statement’s parameter to be the IP address of your server (the same computer you are working on right now). This can be a numeric IP address such as “16.10.100.3” or a logical system name, such as “rwalters”.
71328_Pman_CH17I
12/14/01 2:47 PM
Page 369
Socket Communications
//client - socket client opensocket "1000" connect "172.16.200.63" sRequest = "hello" send sRequest receive sResponse show sResponse sRequest = "date" send sRequest receive sResponse show sResponse sRequest = "time" send sRequest receive sResponse show sResponse sRequest = "surprise" send sRequest receive sResponse show sResponse closesocket end
Listing 17.1
Client script.
At this point, the script in Listing 17.1 should be in your code window, either because you entered it by hand or because you opened the script from the companion CD.
Step 3: Enter the Server Script Now for the second script, the server side. In the second instance of the NQL development environment, on a different machine from step 2, enter the script shown in Listing 17.2 and save it under the name Server.nql. Enter the script, then save it by clicking the Save toolbar button (which has a disk icon). If you prefer, you may copy Server.nql from the companion CD. If you have installed the companion CD on your system, you will have all of the book’s tutorial materials in a \Tutorials directory on your hard drive. Click the Open toolbar button (folder icon), and select Server.nql from the Tutorials\ch17 folder.
369
71328_Pman_CH17I
370
12/14/01 2:47 PM
Page 370
Network Query Language
//server - socket server opensocket "1000" listen while { receive sRequest if sRequest=="hello" { sResponse = "how are you?" } elseif sRequest=="date" { sResponse = date() } elseif sRequest=="time" { sResponse = time() } else { sResponse = "come again?" } send sResponse listen } closesocket end
Listing 17.2
Server script.
At this point, the script in Listing 17.2 should be in your code window, either because you entered it by hand or because you opened the script from the companion CD. With both the client and server scripts entered, you are now ready to run them.
Step 4: Run the Server Script Start by running the Server.nql script. Go to the instance of the NQL development environment where you entered the server script. To run the script, select Build, Run from the menu, click the Run toolbar button, or press F5. When you run the server script, you see the hourglass indicating busyness, but nothing else appears to happen, no matter how long you wait. This is not a problem: It is exactly what the script should be doing, waiting for an incoming client connection. If this is not the behavior you see, check the following:
71328_Pman_CH17I
12/14/01 2:47 PM
Page 371
Socket Communications ■■
Check your script for typographical errors.
■■
Check the NQL client’s Errors tab for error messages.
Leave the server script running, and proceed to the next step.
Step 5: Run the Client Script Now the client script can be run, on a different machine. Go to the instance of the NQL development environment where you entered the Client script. To run the script, select Build, Run from the menu, click the Run toolbar button, or press F5. When you run the client script, a connection is made to the server and communication follows. The client issues four separate requests to the server, and each time it displays the response it received in a message box. If you do not see this happen, check the following: ■■
Make sure the client script specified the correct address for the server.
■■
Check your script for typographical errors.
■■
Make sure the server script is running.
■■
Check the NQL client’s Errors tab for error messages.
The first request issued by the client is the text “hello”, and the response received back should have been “how are you?”, in agreement with the rules we devised for our imaginary Tutorial17 protocol. The second request issued by the client is the text “date”, and the response received back should have been the current system date. The third request issued by the client is the text “time”, and the response received back should have been the current system time. The fourth request is a deliberate value that is not an expected command. In the Tutorial17 protocol, we chose “come again?” as the response for an unexpected request. At this point you should have seen client/server socket communication in action.
Step 6: Understand the Server Script We now want to make sure we understand every part of the scripts, beginning with the server script. The first line is a comment line. //server - socket server
A socket is opened with the opensocket statement, specifying a port number of 1000. Why that number? Because that is the well-defined port number we invented for our tutorial’s imaginary protocol. If you were writing an implementation of a standardized protocol, you would follow that protocol’s port number convention. For example, you would specify port 80 if you were writing an HTTP Web server.
371
71328_Pman_CH17I
372
12/14/01 2:47 PM
Page 372
Network Query Language opensocket "1000"
Once the socket has been opened, the server’s job is to be available for clients. The listen statement puts the server in a waiting mode. The script will not execute further until an incoming connection is made by a client. listen
Once a client connects, the listen statement completes and sets a success condition. This causes us to enter a while loop to process the request. At the bottom of the loop is another listen statement. Thus, after the server handles a request it goes back to listening for the next incoming connection. while { ...process request... listen }
Within the body of the while loop, a receive statement obtains the request message from the client and stores it in the variable sRequest. receive sRequest
The value in sRequest is now checked against the values that might be reasonably expected, namely the definitions in our made-up protocol. A series of if and elseif statements check for the messages hello, date, and time. In each case, a suitable response is devised and stored in the variable sResponse, including a default response for unrecognized requests. if sRequest=="hello" { sResponse = "how are you?" } elseif sRequest=="date" { sResponse = date() } elseif sRequest=="time" { sResponse = time() } else { sResponse = "come again?" }
The response in sResponse is then sent back to the client with a send statement.
71328_Pman_CH17I
12/14/01 2:47 PM
Page 373
Socket Communications send sResponse
The server goes back to listening at this point. Because the server script is intended to run in perpetuity, it never gets to the final part of the script: closesocket end
At this point, you’ve seen the server’s view of socket communication. Now let’s get the client’s perspective.
Step 7: Understand the Client Script Let’s go through the client script and see how it works. The first line is a comment line. //client - socket client
A socket is opened on port 1000 with opensocket. The client and server must be using the same port number or nothing will work. opensocket "1000"
A connection is now made to the server, which we assume is ready for us and awaiting us to connect. The connect statement specifies the IP address or name of the server. connect "172.16.200.63"
After a connection has been made, the client is free to send requests to the server. We send four to demonstrate the range of commands we have defined, and to test the server’s response to an unexpected command. For each command, a request is assembled in the variable sRequest and sent to the server via a send statement. The response back from the server is received into sResponse with a receive statement. The script uses a show statement to display the response on your screen. sRequest = "hello" send sRequest receive sResponse show sResponse sRequest = "date" send sRequest receive sResponse show sResponse sRequest = "time" send sRequest receive sResponse
373
71328_Pman_CH17I
374
12/14/01 2:47 PM
Page 374
Network Query Language show sResponse sRequest = "surprise" send sRequest receive sResponse show sResponse
The socket is closed with closesocket, and the script ends. closesocket end
At this point, you’ve seen NQL scripts handle both the client and server sides of socket communication.
Further Exercises You could amend this example in a number of ways. Here are some interesting modifications that can be made: ■■
Change the custom protocol to be more robust. Allow the client to specify requests that include the names of files, and have the server respond with the contents of those files.
■■
Add error checking to handle failures in opening sockets or sending and receiving data. You could change opensocket, connect, listen, send, and receive to be functions rather than statements and check the true/false return values.
■■
Change the port number to 80 and turn the server script into a simple HTTP Web server. You can use a standard Web browser as the client.
Chapter Summary TCP/IP is based on client/server socket communications. ■■
Servers await responses from clients and respond to them.
■■
Clients initiate connections to servers and issue requests.
IP addresses and port numbers are relied upon in socket communications. ■■
IP addresses appear as dotted numbers, such as 200.45.6.13, or as logical names such as www.my-site.com that are mapped to IP numbered addresses.
■■
Port numbers define the purpose of the communication. Well-known port numbers are used for standardized protocols such as HTTP, FTP, and many others. A client and server must use the same port number or they will not be able to communicate.
NQL contains statements for socket communication that permit scripts to act as clients or servers.
71328_Pman_CH17I
12/14/01 2:47 PM
Page 375
Socket Communications ■■
Sockets are opened with the opensocket statement.
■■
Servers listen for incoming client connections with the listen statement.
■■
Clients connect to servers with the connect statement.
■■
Clients and servers send data with the send statement.
■■
Clients and servers receive data with the receive statement.
■■
Sockets are closed with the closesocket statement.
Socket support in NQL allows you to implement new protocols, including your own custom ones, with short, simple scripts.
375
71328_Pman_CH17I
12/14/01 2:47 PM
Page 376
71328_Pman_CH18I
12/14/01 2:46 PM
Page 377
CHAPTER
18 Serial Communications
Serial ports are a traditional way to connect modems, printers, and other kinds of local devices to computers. Serial communications allow you to interact with devices directly connected to your computer. Network Query Language provides basic services for sending and receiving data over serial ports. This chapter describes how serial programming is accomplished in NQL. The tutorial at the end of the chapter interacts with a digital scale to weigh merchandise.
Serial Programming in NQL NQL has statements that allow scripts to work with serial ports. The NQL serial communication statements are listed in Table 18.1. Table 18.2 lists the serial communications functions. The serial communications statements and functions are described individually in the following sections.
Serial Communication Sessions The NQL serial communication operations are modeled on the idea of a session, in which the statements and functions must be used in a certain order.
377
71328_Pman_CH18I
378
12/14/01 2:46 PM
Page 378
Network Query Language Table 18.1 Serial Communications Statements STATEMENT
PARAMETERS
closecommport
DESCRIPTION Closes a communications port
opencommport
port
Opens a communications port
readcommport
port, var, byte-count
Receives data over a communications port
setcommport
port, baud-rate, byte-size, parity, stop-bits
Configures a communications port
setcommtimeout
port, [read-interval-timeout [, read-total-timeout-multiplier [, read-total-timeout-constant [, write-total-timeout-multiplier [, write-total-timeoutconstant]]]]]
Sets the time-out features for read and write operations
writecommport
port, data, byte-count
Sends data over a communications port
Table 18.2 Serial Communications Functions FUNCTION
DESCRIPTION
boolean opencommport(port)
Opens a communications port
boolean readcommport(port, var, byte-count)
Receives data over a communications port
boolean setcommport(port, baud-rate, byte-size, parity, stop-bits)
Configures a communications port
boolean setcommtimeout(port, [read-intervaltimeout [, read-total-timeout-multiplier [, readtotal-timeout-constant [, write-total-timeoutmultiplier [, write-total-timeout-constant]]]]])
Sets the time-out features for read and write operations
boolean writecommport(port, data, byte-count)
Sends data over a communications port
1. A serial communications session is opened with opencommport. 2. The communication port is configured with setcommport. 3. Multiple reads and/or writes are performed using readcommport and writecommport. 4. The serial communications session is closed with closecommport.
71328_Pman_CH18I
12/14/01 2:46 PM
Page 379
Serial Communications
Opening a Communications Port The opencommport statement opens a serial port. The parameter is the name of the port, such as “COM1”. opencommport port boolean opencommport(port)
If the port is successfully opened, a success condition results (the function returns true). The following code opens the COM2 port. opencommport "COM2"
The port is initially opened with the following settings: 9600 baud, 8-bit byte, no parity, and 1 stop bit. After opening the port, it may be configured to other settings with setcommport. Once a port has been successfully opened and configured, the readcommport and writecommport statements and functions may be used to pass data.
Configuring a Communications Port The setcommport statement configures a serial port, specifying baud rate (speed) and other settings. The parameters are a port name, a baud rate, a byte size, parity, and the number of stop bits. The port must be open before setcommport can be used. The baud rate can be any positive number the port supports. The byte size must be between 4 and 8 bits inclusive. The parity value must be one of the following string values: noparity, oddparity, evenparity, markparity, or spaceparity. The stop bit value must be either 1, 1.5, or 2. setcommport port, baud-rate, byte-size, parity, stop-bits boolean setcommport(port, baud-rate, byte-size, parity, stop-bits)
If the port is successfully configured to the new settings, a success condition results (the function returns true). The following code opens the COM1 port and configures it to 14,400 baud, a byte size of 8 bits, no parity, and 1 stop bit. opencommport "com1" setcommport "com1", "14400", "8", "noparity", "1" writecommport "com1", "Hello", 5 closecommport "com1"
If you open a serial port and do not configure it with setcommport, the opencommport statement’s default conditions (9600 baud, 8-bit byte, no parity, 1 stop bit) apply.
379
71328_Pman_CH18I
380
12/14/01 2:46 PM
Page 380
Network Query Language
Sending Data The writecommport statement sends data over a serial port. The parameters are a port name, the data to send, and a byte count. The byte count is the maximum number of characters that are written at a time to the port. writecommport port, data, byte-count boolean writecommport(port, data, byte-count)
If the data is transmitted successfully, a success condition results (the function returns true). The following code uses writecommport to transmit the contents of a text file to a serial port. opencommport "com1" load "data.txt" pop data writecommport "com1", data, 1 closecommport
The reciprocal of writecommport is the readcommport statement, which receives data from a serial port.
Reading Data The readcommport statement receives data over a serial port. The parameters are a port name, the data to send, and a byte count. The byte count is the maximum number of characters that are read at a time from the port. readcommport port, var, byte-count boolean readcommport(port, var, byte-count)
If the data is received successfully, a success condition results (the function returns true). The following code uses readcommport to receive data and store it in a text file. opencommport "com1" readcommport "com1", data, 1 push data save "data.txt" closecommport
The reciprocal of readcommport is the writecommport statement, which sends data to a serial port.
Configuring Timeouts Reading and writing to serial ports can be immediate operations, or the operating system can be cued to wait a certain amount of time for characters to be sent or received.
71328_Pman_CH18I
12/14/01 2:46 PM
Page 381
Serial Communications
The setcommtimeout statement controls a variety of timeout settings. The parameters for Windows are shown. setcommtimeout port, [read-interval-timeout [, read-total-timeoutmultiplier [, read-total-timeout-constant [, write-total-timeoutmultiplier [, write-total-timeout-constant]]]]]
This statement’s parameters and their exact descriptions are platform-specific. For more specific information, refer to the statement reference sheets in the NQL documentation.
Tutorial: Scale Now it’s time to put serial communications to work in an NQL script. In this tutorial, you will create script that interfaces to a digital scale connected to your computer via a serial port. The scale uses a simple interface: When it receives a carriage return over its serial connection, it weighs whatever object is on its bed and returns a numeric string indicating the weight, such as 0.0245. You probably won’t be able to run this tutorial for real, unless you happen to have access to a digital scale. If you have a different serial device, you may be able to modify the tutorial script accordingly to work with your device. There are four steps in this tutorial: 1. Launch the NQL development environment. 2. Enter the Scale script. 3. Run the Scale script. 4. Understand the Scale script. When you are finished with this tutorial, you will have seen how to do the following in NQL: ■■
Open a serial port.
■■
Send and receive characters over a serial port.
Let’s begin!
Step 1: Launch the NQL Development Environment Launch the NQL development environment. On a Windows system, this can be accomplished by clicking on the NQL Client desktop icon, or by selecting Program Files, Network Query Language, NQL Client from the Start Menu. On other platforms, you should have a desktop icon and/or command line method of launching the NQL Client.
381
71328_Pman_CH18I
382
12/14/01 2:46 PM
Page 382
Network Query Language
At this point, you should have the NQL development environment active on your desktop, with an empty code window. Now you’re ready to enter the tutorial script.
Step 2: Enter the Scale Script In the NQL development environment, enter the script shown in Listing 18.1 and save it under the name Scale.nql. Enter the script, then save it by clicking the Save toolbar button (which has a disk icon). If you prefer, you may copy Scale.nql from the companion CD. If you have installed the companion CD on your system, you will have all of the book’s tutorial materials in a \Tutorials directory on your hard drive. Click the Open toolbar button (folder icon), and select Scale.nql from the Tutorials\ch18 folder. At this point, the script in Listing 18.1 should be in your code window, either because you entered it by hand or because you opened the script from the companion CD. You are now ready to run the script.
//Scale - interacts with a digital scale via a serial port Port = "COM1" //open comm port if !opencommport(Port) { show "Error: cannot open comm port " Port end } setcommport Port, "9600", "8", "noparity", "1" //prompt user to weight something show "Place an item on the scale, and click OK" //get a weight from the scale writecommport Port, "\r", 1 sleep 1 readcommport Port, Weight, 20 closecommport Port //Display the weight show "The weight is " Weight end
Listing 18.1 Scale script.
71328_Pman_CH18I
12/14/01 2:46 PM
Page 383
Serial Communications
Step 3: Run the Scale Script Run the script. You can do this by selecting Build, Run from the menu, clicking the Run toolbar button, or pressing F5. When the script completes, a weight from the scale is displayed on the screen. If the script does not seem to be working, check the following: ■■
Check for typographical errors in your script.
■■
Check that the scale is connected to your computer.
■■
Check the NQL client’s Errors tab for error messages.
At this point you should have seen the Scale script run, interacting with a device via a serial port.
Step 4: Understand the Scale Script We now want to make sure we understand every part of the Scale script. The first line is a comment line. //Scale - interacts with a digital scale via a serial port
A variable named Port is set to the name of the serial port to be accessed (COM1). Port = "COM1"
The serial port is opened for communications with the opencommport function. If it fails, an error message is displayed and the script ends. If the port is opened, its speed, number of data bits, parity, and other settings are configured with setcommport. //open comm port if !opencommport(Port) { show "Error: cannot open comm port " Port end } setcommport Port, "9600", "8", "noparity", "1"
The user is now prompted to put something on the scale, as we don’t want to request weight before we know something is on the scale’s bed. The show statement prompts the user and waits until the message window’s OK button is clicked. //prompt user to weight something show "Place an item on the scale, and click OK"
383
71328_Pman_CH18I
384
12/14/01 2:46 PM
Page 384
Network Query Language
To obtain the weight from the scale, the scale is sent a carriage return with a writecommport statement. The scale should reply very quickly with a weight. The script waits one second with a sleep statement to be sure the response has been issued, then reads up to 20 characters with a readcommport statement. The weight is assigned to the variable Weight. //get a weight from the scale writecommport Port, "\r", 1 sleep 1 readcommport Port, Weight, 20
Serial communications are finished, so the serial port can be closed with closecommport. closecommport Port
The weight is then displayed with a show statement, and the script ends. //Display the weight show "The weight is " Weight end
At this point, you’ve seen how to transfer data to and from a device through a serial port in NQL.
Chapter Summary Network Query Language can communicate with serial ports. ■■
The opencommport statement opens a communications port.
■■
The readcommport statement receives data over a communications port.
■■
The setcommport statement configures a communications port.
■■
The setcommtimeout statement sets a variety of time-out features for read and write operations.
■■
The writecommport statement sends data over a communications port.
Serial port communication allows NQL scripts to interact with, monitor, and control local devices.
71328_Pman_CH19I
12/14/01 2:42 PM
Page 385
CHAPTER
19 Synchronization
This chapter describes Network Query Language’s synchronization features. Many applications today are of a distributed nature, such that multiple programs need to cooperate with each other. Synchronization features allow multiple programs to coordinate their activities. The chapter describes both inter-process communication methods and locking methods and provides a tutorial for each.
Inter-process Communication NQL allows scripts to communicate with each other through the use of communication pipes. Communication pipes are network wide, allowing even programs running on different computers to exchange messages. Table 19.1 summarizes the communication pipe statements. The communication pipe functions are listed in Table 19.2. The NQL communication pipe statements are described individually in the following sections.
Communication Pipe Sessions The NQL communication pipe operations are modeled on the idea of a session, in which the statements and functions must be used in a certain order.
385
71328_Pman_CH19I
386
12/14/01 2:42 PM
Page 386
Network Query Language Table 19.1 Communication Pipe Statements STATEMENT
PARAMETERS
closepipe
DESCRIPTION Closes a communications pipe
createpipe
name [, type]
Creates a new communication pipe
getpipe
[var]
Receives a message
openpipe
name [, type]
Connects to an existing communication pipe
sendpipe
[data]
Sends a message to the open communications pipe
waitpipe
[var]
Waits for a message and receives it
Table 19.2 Communication Pipe Functions FUNCTION
DESCRIPTION
boolean createpipe(name [, type])
Creates a new communication pipe
string getpipe([var])
Receives a message
boolean openpipe(name [, type])
Connects to an existing communication pipe
boolean sendpipe([data])
Sends a message to the open communications pipe
boolean waitpipe([var])
Waits for a message and receives it
1. A communications pipe session is created with createpipe or openpipe. 2. One or more pipe operations take place, such as sending, receiving, or waiting, using sendpipe, getpipe, and waitpipe. 3. The communications pipe session is closed with closepipe.
Types of Communication Pipes There are various names and types of communication pipes that vary between operating systems, but two common types are (to use Microsoft terminology) mailslots and named pipes, both of which are described in the following sections. Pipes have to be identified in some way. Under Windows, mailslots and named pipes are identified by filename.type style names that resemble disk filenames. These names may be preceded by a \\server\ prefix if communicating with a remote system.
Mailslots Mailslots are a one-way method of process-to-process communication. One program creates a mailslot with a specific name (the server), and one or more other programs
71328_Pman_CH19I
12/14/01 2:42 PM
Page 387
Synchronization
(the clients) can send messages to the mailslot. Clients can send messages only to the server and the server can receive messages only from clients.
Named Pipes Named pipes are a two-way method of process-to-process communication. One program creates a named pipe with a specific name (the server), and one or more other programs (the clients) can connect to it. Both the clients and the server are free to send messages to the server as well as receive responses from the server.
Creating a Communication Pipe The createpipe statement or function creates a communication pipe for the server process. There are two parameters, a name and an optional type. createpipe name [, type] boolean createpipe(name [, type])
The first parameter specifies the name of the communication pipe. Some operating systems allow any kind of name, but others place restrictions on them. The second parameter is the type of communication pipe, which may be “mailslot” or “named pipe”. This parameter may be omitted and defaults to “mailslot”. If createpipe encounters an error, a failure condition results (the function returns false). The following code creates a named pipe called shop.msg. createpipe "shop.msg", "named pipe"
Opening a Communication Pipe The openpipe statement opens an existing communication pipe for client processes. The statement form is openpipe name, type
The first parameter specifies the name of the communication pipe. The second parameter is the type of communication pipe, which may be “mailslot” or “named pipe”. This parameter may be omitted and defaults to “mailslot”. The following sample openpipe statement connects to a named pipe called shop.msg on the server machine named server1. openpipe "\\server1\\shop.msg", "named pipe"
If openpipe encounters an error, a failure condition results.
387
71328_Pman_CH19I
388
12/14/01 2:42 PM
Page 388
Network Query Language
Sending a Message Once a communication pipe has been created or opened, messages are sent with the sendpipe statement. The sendpipe statement takes the form below. sendpipe message
There are no predefined rules about what a message may contain—that’s up to you. You can invent your own format for messages, or you may want to adopt one of the standards for agent-to-agent communication, such as Knowledge Query Management Language (KQML). If you design your own message format, you may find it useful to include both a number and a text part to your messages. The numbers are more readily processed by programs, and the text is more easily reported to human beings. The following sample sendpipe statement sends a status message to a pipe. sendpipe "15 Out of disk space"
If sendpipe encounters an error, a failure condition results.
Receiving a Message Once a communication pipe has been created or opened, messages are received with the getpipe statement. The getpipe statement takes one of the forms below. getpipe getpipe variable
Both forms of getpipe receive any pending message information from the pipe, setting a failure condition if nothing is received. The first form places the message received on the stack. The second form stores the message in the specified variable. The following sample getpipe statement retrieves a message and stores it in the variable msg. getpipe msg
If getpipe encounters an error, a failure condition results.
Waiting for a Message The waitpipe statement waits for a message and retrieves it. It is just like getpipe except that it waits for an incoming message. The waitpipe statement takes one of the following forms. waitpipe waitpipe variable
71328_Pman_CH19I
12/14/01 2:42 PM
Page 389
Synchronization
Both forms of waitpipe wait for a message from the pipe and retrieve it. The first form places the received message on the stack. The second form stores the message in the specified variable. The following sample waitpipe statement waits for a message and stores it in the variable msg. waitpipe msg
If waitpipe encounters an error, a failure condition results.
Closing a Pipe The closepipe statement terminates a pipe. You should call closepipe when you are finished working with a pipe. The closepipe statement takes the following form. Closepipe
If you fail to close a pipe, it closes automatically when the script ends.
Tutorial: Communications Now to observe communication in action. In this tutorial, you will create two scripts which will need to communicate with each other. The first script, comm1, will be the computation half of the solution. The second script, comm2, will prompt for a subtotal and tax rate, pass the information to comm1 for computation, and display the results. 1. Launch the NQL development environment. 2. Create the comm1 Script. 3. Create the comm2 Script. 4. Run both scripts and observe their interaction.
Step 1: Launch the NQL Development Environment Launch two instances of the NQL development environment, since there are two scripts to enter and run. On a Windows system, this can be accomplished by clicking on the NQL Client desktop icon, or by selecting Program Files, Network Query Language, NQL Client from the Start Menu. On other platforms, you should have a desktop icon and/or a command-line method of launching the NQL Client. Repeat the process to launch a second instance. At this point, you should have two instances of the NQL development environment active on your desktop, with an empty code window in each. Now you’re ready to enter the two scripts.
389
71328_Pman_CH19I
390
12/14/01 2:42 PM
Page 390
Network Query Language
Step 2: Creating the Comm1 Script Our first script will handle the computation side of things. It creates a pipe, waits to receive a subtotal and tax rate, and passes back the computed total. In the NQL development environment, enter the script shown in Listing 19.1 and save it under the name comm1.nql. Enter the script, then save it by clicking the Save toolbar button (which has a disk icon). If you prefer, you may copy comm1.nql from the companion CD. If you have installed the companion CD on your system, you will have all of the book’s tutorial materials in a \Tutorials directory on your hard drive. Click the Open toolbar button (folder icon), and select comm1.nql from the Tutorials\ch19 folder. Let’s walk through what the statements in this script do. The first line creates a new named pipe called tax.1. The second line waits for an incoming message, which is stored in the variable subtotal. The third line acknowledges the communication by sending a response of “ack”. The fourth line waits for an additional message which is stored in the variable tax. The fifth line responds with the computed total. Finally, the sixth line closes the pipe. At this point you should have created a script named comm1.nql containing the code shown in Listing 19.1.
Step 3: Creating the Comm2 Script Our second script will prompt for subtotal and tax rate, interact with comm1 for the computation, and display the total. In the second instance of the NQL development environment, enter the script shown in Listing 19.2 and save it under the name comm2.nql. Enter the script, then save it by clicking the Save toolbar button (which has a disk icon). If you prefer, you may copy comm2.nql from the companion CD. If you have installed the companion CD on your system, you will have all of the book’s tutorial materials in a \Tutorials directory on your hard drive. Click the Open toolbar button (folder icon), and select comm2.nql from the Tutorials\ch19 folder. Let’s walk through what the statements in this script do. The first two lines prompt for a subtotal and store the result in the variable subtotal. The next two lines prompt for
//Comm1 - named pipe example (1 of 2) float subtotal, tax createpipe "tax.1", "named pipe" waitpipe subtotal sendpipe "ack" waitpipe tax sendpipe subtotal + (subtotal * tax) closepipe
Listing 19.1 Comm1 script.
71328_Pman_CH19I
12/14/01 2:42 PM
Page 391
Synchronization
//Comm2 - named pipe example (2 of 2) float subtotal, tax prompt "Subtotal", "Enter a subtotal" pop subtotal prompt "Tax rate", "Enter a tax rate" pop tax openpipe "tax.1", "named pipe" sendpipe subtotal waitpipe ack sendpipe tax waitpipe total show total closepipe
Listing 19.2 Comm2 script.
a tax rate and store the result in the variable tax. The fifth line opens a connection to the pipe which was created by the other script, comm1.nql. The sixth line sends the subtotal and the seventh line waits for an acknowledgement. The eighth line sends the tax rate and the ninth line waits for the computed total. The tenth line displays the total. The eleventh line closes the pipe. At this point you should have created a script named comm2.nql containing the code shown in Listing 19.2.
Step 4: Running Both Scripts Now we are ready to run the scripts in parallel and observe how they interact. 1. Start comm1.nql running. 2. Start comm2.nql running. 3. When prompted, enter a subtotal amount (such as 150.00) and tax rate (such as 0.08). 4. The computed total will be displayed. At this point you should have witnessed communication between two NQL scripts.
Inter-process Locking When you need to control access to a shared resource, locking is essential. For example, consider multiple agents that wish to periodically update a data file. If they do not take turns, information could be lost or an agent might encounter a file-in-use error from the operating system. The use of locking allows this multiple process access to
391
71328_Pman_CH19I
392
12/14/01 2:42 PM
Page 392
Network Query Language Table 19.3 Locking Statements STATEMENT
DESCRIPTION
lock
Sets a lock, waiting if lock is in use
unlock
Clears a lock
proceed smoothly. NQL employs a structure known as a mutex to implement interprocess locking. Table 19.3 summarizes the locking statements. The lock and unlock statements are described individually in the following sections.
Setting a Lock The lock statement sets a lock. The statement form is shown. lock name
The one parameter is the name of the lock. If this parameter is omitted, the name nql is used by default. The lock statement first determines if the named lock already exists or not. If it does, lock waits patiently until the lock is freed. After any necessary waiting, the named lock is created and script execution proceeds. The sample lock statement below sets a lock named customer-file. lock "customer-file"
When a script ends, any held locks are automatically unlocked.
Clearing a Lock Once you are finished using a locked resource, the unlock statement is used to free up the lock. The statement form is shown. unlock name
The one parameter is the name of the lock. If this parameter is omitted, the name nql is used by default. The following sample unlock statement clears a lock named “customer-file”. unlock "customer-file"
Tutorial: Locking Let’s put locking to work. In this tutorial, you will create two scripts which will need to take turns accessing a disk file. The first script will periodically write to the file, while the second script will periodically read from it. Four steps are required, as follows:
71328_Pman_CH19I
12/14/01 2:42 PM
Page 393
Synchronization
1. Launch the NQL development environment. 2. Create the lock1 script. 3. Create the lock2 script. 4. Run both scripts and observe their interaction.
Step 1: Launch the NQL Development Environment Launch two instances of the NQL development environment, since there are two scripts to enter and run. On a Windows system, this can be accomplished by clicking on the NQL Client desktop icon, or by selecting Program Files, Network Query Language, NQL Client from the Start Menu. On other platforms, you should have a desktop icon and/or a command-line method of launching the NQL Client. Repeat the process to launch a second instance. At this point, you should have two instances of the NQL development environment active on your desktop, with an empty code window in each. Now you’re ready to enter the two scripts.
Step 2: Creating the Lock1 Script Our first script will write the system time to a disk file every few seconds. In the NQL development environment, enter the script shown in Listing 19.3 and save it under the name lock1.nql. Enter the script, then save it by clicking the Save toolbar button (which has a disk icon). If you prefer, you may copy lock1.nql from the companion CD. If you have installed the companion CD on your system, you will have all of the book’s tutorial materials in a \Tutorials directory on your hard drive. Click the Open toolbar button (folder icon), and select lock1.nql from the Tutorials\ch19 folder.
//Lock1 - demonstrate agent synchronization (1 of 2) timeout 60 every 15 { lock "time" create "time.dat" time now write now close unlock "time" }
Listing 19.3 Lock1 script.
393
71328_Pman_CH19I
394
12/14/01 2:42 PM
Page 394
Network Query Language
At this point you should have created a script named comm1.nql containing the code shown in Listing 19.3.
Step 3: Creating the Lock2 Script Our second script will read the system time from the same disk file every few seconds and output the time. In the second instance of the NQL development environment, enter the script shown in Listing 19.4 and save it under the name lock2.nql. Enter the script, then save it by clicking the Save toolbar button (which has a disk icon). If you prefer, you may copy lock2.nql from the companion CD. If you have installed the companion CD on your system, you will have all of the book’s tutorial materials in a \Tutorials directory on your hard drive. Click the Open toolbar button (folder icon), and select lock1.nql from the Tutorials\ch19 folder. At this point you should have created a script named comm2.nql containing the code shown in Figure 19.4.
Step 4: Running Both Scripts Now it is time to run both scripts—simultaneously. 1. Start lock1.nql running. 2. Start lock2.nql running. 3. Wait for both scripts to finish running. 4. Examine the output of lock2.nql. The output of lock2.nql will be the system time over five-second intervals as read from the disk file. You should notice pauses in the sequence, which reflect the times that lock2.nql had to wait for lock1.nql to finish writing.
//Lock2 - demonstrate agent synchronization (2 of 2) timeout 60 every 5 { lock "time" open "time.dat" read now output now close unlock "time" }
Listing 19.4 Lock2 script.
71328_Pman_CH19I
12/14/01 2:42 PM
Page 395
Synchronization
Chapter Summary Two methods of synchronizing processes are communication and locking. Communication between processes is through communication pipes. There are two kinds of communication pipes, mailslots and named pipes. Mailslots are unidirectional, named pipes are bidirectional. Once an NQL script creates a communication pipe, other scripts can connect to the pipe and send or receive messages. ■■
The createpipe statement creates a pipe on a server.
■■
The openpipe statement connects to a pipe.
■■
The sendpipe statement transmits data to a pipe.
■■
The getpipe statement receives data from a pipe.
■■
The waitpipe statement waits for data to be received from a pipe.
■■
The closepipe statement closes a pipe.
Locking between processes is through locks called mutexes. ■■
The lock statement sets a lock.
■■
The unlock statement frees a lock.
Communication and locking provide the synchronization that is essential for distributed processing solutions.
395
71328_Pman_CH19I
12/14/01 2:42 PM
Page 396
71328_Pman_CH20I
12/14/01 2:38 PM
Page 397
CHAPTER
20 E-Commerce
Network Query Language has features for submitting credit card transactions and for interacting with financial organizations. This chapter begins with merchant credit card submission, followed by Open Financial Exchange. The tutorial at the end of the chapter submits a credit card approval request.
Credit Card Transactions Accepting payments by credit card involves a partnership of three organizations: a merchant, a bank, and a service provider. The merchant is you, the person or organization accepting payments. The bank is your bank. The service provider is a company that interfaces with credit card systems such as Visa and MasterCard, as well as with the thousands of banks and other organizations that issue credit cards. Figure 20.1 shows the relationship between your customer, you the merchant, your service provider, the credit card system, and the banks. Your customers deal only with you, providing credit card information when they wish to order a product. Your applications identify themselves to the merchant provider and pass on both the credit card information and the amount to approve, debit, or credit. The service provider then interacts with many parties. The credit card system is accessed to ensure the card is valid, has not expired, and has sufficient funds
397
71328_Pman_CH20I
398
12/14/01 2:38 PM
Page 398
Network Query Language
Customer
Credit Card Info
Merchant
Merchant ID, Credit Card Info, Transaction
Service Provider
Credit Card System
Bank Issuing Credit Card
Merchant's Bank
Figure 20.1 Credit card processing.
available. If everything validates, funds are removed from the bank that issued the customer’s credit card and are deposited in your merchant account, minus processing fees. The method of interacting with service providers varies from one provider to the next. NQL supports several of the popular providers. At the time of this writing, the two supported providers are CyberCash and CyberSource, but be aware that the supported providers may change over time. If you aren’t using one of the supported providers, you won’t be able to use NQL for credit card payments. Before you can address the technical side of accepting credit card payments, you will need to choose a service provider. You will need to spend time working closely with the service provider and your bank, which could take days to weeks. On the technical front, you will need to set up a dedicated e-commerce server, obtain a digital certificate, and write an e-commerce application. The specific steps required are as follows: 1. Select a service provider, such as CyberCash or CyberSource. Be sure to find out what computer platforms the service provider’s software is compatible with. 2. Fill out an application with the service provider. The service provider will in turn work directly with your bank. 3. Follow any steps outlined by your bank and service provider to set up a merchant account. This may take days to weeks, depending on the organizations you are working with.
71328_Pman_CH20I
12/14/01 2:38 PM
Page 399
E-Commerce
4. Your service provider will provide you with account information, a software development kit, and programming instructions and examples. 5. Set up a dedicated e-commerce server, and install the service provider’s software on it. 6. Obtain a digital certificate from a certificate authority (such as VeriSign) for your e-commerce server. Your bank and service provider will insist on the use of a digital certificate and the Secure Sockets Layer (SSL, also known as HTTPS) for security reasons. 7. Develop and test your e-commerce application. 8. Instruct your service provider when you want to switch from test status to live status. There are three basic operations in the world of credit card processing: approvals, charges, and refunds. An approval checks the availability of funds for a future charge; a charge withdraws funds; a refund returns funds.
NQL’s Transaction Operations The NQL statements for credit card transactions are listed in Table 20.1. There are function versions of some of the credit card transaction statements. The credit card functions are shown in Table 20.2. The transaction statements and functions are described individually in the following sections.
Transaction Sessions The NQL transaction operations are modeled on the idea of a session, in which the statements and functions must be used in a certain order. Table 20.1 Transaction Statements STATEMENT
PARAMETERS
closetrx
DESCRIPTION Closes a transaction session
opentrx
provider
Opens a transaction session
trxapprove
[message-type]
Submits an approval
trxcharge
[message-type]
Submits a charge
trxget
[field-name [, var]]
Retrieves a field value after an operation
trxid
merchant-ID, merchantkey, provider-url
Identifies a merchant account to a service provider
trxrefund
[message-type]
Submits a refund
trxset
field-name, value
Sets a field value before an operation
399
71328_Pman_CH20I
400
12/14/01 2:38 PM
Page 400
Network Query Language Table 20.2 Transaction Functions FUNCTION
DESCRIPTION
boolean opentrx(provider)
Opens a transaction session
boolean trxapprove([message-type])
Submits an approval
boolean trxcharge([message-type])
Submits a charge
boolean trxget([field-name [, var]])
Retrieves a field value after an operation
boolean trxid(merchant-ID, merchant-key, provider-url)
Identifies a merchant account to a service provider
boolean trxrefund([message-type])
Submits a refund
boolean trxset(field-name, value)
Sets a field value before an operation
1. A transaction session is opened with opentrx. 2. Merchant identification takes place with trxid. 3. One or more transactions are issued. For each transaction, fields are set with trxset, the transaction itself is issued with trxapprove, trxcharge, or trxrefund, and result fields may be examined with trxget. 4. The transaction session is closed with closetrx.
Opening a Transaction Session A transaction session is opened with the opentrx statement or function. The parameter is the name of a provider NQL supports, such as “cybercash” or “cybersource”. opentrx provider boolean opentrx(provider)
If the transaction is opened successfully, a success condition results (the function returns true). No communication with the service provider has taken place yet, however. All opentrx does is prepare NQL for transaction work and identify the service provider to be used. The following code opens a transaction session for CyberSource. opentrx "cybersource"
Once a transaction session has been opened, merchant identification is necessary using the trxid statement.
Closing a Transaction Session Once all credit card processing is completed, a transaction session is closed with the closetrx statement. There are no parameters.
71328_Pman_CH20I
12/14/01 2:38 PM
Page 401
E-Commerce clostrx
The transaction session is terminated. The following code opens, then closes a transaction session. opentrx "cybersource" ... closetrx
If you don’t explicitly close a transaction session, it is closed automatically when a script terminates.
Merchant Identification After opening a transaction session with opentrx, you must identify your merchant information using the trxid statement or function. The parameters are a merchant ID, a merchant key, and a URL for accessing the service provider. Your service provider will supply you with your account information and a URL. trxid merchant-ID, merchant-key, provider-url boolean trxid(merchant-ID, merchant-key, provider-url)
If the fields you specify appear to be valid, a success condition results (the function returns true). The specific meaning and format of the three parameters is specific to your service provider. For CyberCash, the merchant-ID parameter is the name of a local file (such as merchant_conf.txt) that is created by the CyberCash software. Be sure to specify a full path. The merchant-key field is not used and may be an empty string. The url parameter is the test URL or live URL CyberCash has assigned to you. The following code opens a transaction and performs merchant identification for CyberCash. opentrx "cybercash" trxid "c:\\inetpub\\wwwroot\\merchant_conf.txt", "", "cr.cybercash.com/cgi-bin/cr21api.cgi/"
For CyberSource, you will have been issued a merchant-ID (that is, an account name such as acmeshipping) and merchant-key (a PIN number or password, such as 03). The url parameter is the test URL or live URL CyberSource has assigned to you. The following code opens a transaction and performs merchant identification for CyberSource. opentrx "cybersource" trxid "customerone", "17", "ics2test.ic3.com"
Once merchant identification is completed, the other transaction statements and functions may be used to process approvals, charges, and refunds.
401
71328_Pman_CH20I
402
12/14/01 2:38 PM
Page 402
Network Query Language
Setting Fields Prior to performing an approval, charge, or refund, credit card information and transaction information need to be specified. The trxset statement or function sets an information field. The first parameter is a field name. The second parameter is a value for the field. The specific fields required are dependent upon your service provider. trxset field-name, value boolean trxset(field-name, value)
If the field name is recognized, a success condition results (the function returns true). The following code sets various fields before performing an approval: trxset "card-number", "4113764542105701" trxset "card-exp", "10/00" trxset "card-name", "Sidney Jamph" trxset "order-id", "neworder3qaed058394y" trxset "amount", "usd 124.99" if trxapprove() { ...approval was granted... } else { ...declined... }
Once fields have been set with trxset, the trxapprove, trxcharge, or trxrefund statements may be used to perform a transaction.
Issuing an Approval An approval is issued using the trxapprove statement or function. The optional parameter is a message type, which is used by some providers. trxapprove [message-type] boolean trxapprove([message-type])
When using CyberCash, the optional parameter specifies a CashRegister message. See your Merchant Connection Kit documentation provided by CyberCash for a listing of these messages and how to use them. If CyberCash is the service provider and the parameter is omitted, the message defaults to “mauthonly”. The message parameter is ignored if CyberSource is the service provider. Prior to issuing trxapprove, various fields must be set using the trxset statement. The specific fields required are dependent on your service provider.
71328_Pman_CH20I
12/14/01 2:38 PM
Page 403
E-Commerce
If the transaction is successful, a success condition results (the function returns true). The following code issues an approval. trxset "card-number", "4113764542105701" trxset "card-exp", "10/00" trxset "card-name", "Sidney Jamph" trxset "order-id", "neworder3qaed058394y" trxset "amount", "usd 124.99" if trxapprove() { ...approval was granted... } else { ...declined... }
Once an approval has taken place, result fields may be retrieved using trxget.
Issuing a Charge A charge is issued using the trxcharge statement or function. The optional parameter is a message type, which is used by some providers. trxcharge [message-type] boolean trxcharge([message-type])
When using CyberCash, the optional parameter specifies a CashRegister message. See your Merchant Connection Kit documentation provided by CyberCash for a listing of these messages and how to use them. If CyberCash is the service provider and the parameter is omitted, the message defaults to “mauthonly”. The message parameter is ignored if CyberSource is the service provider. Prior to issuing trxcharge, various fields must be set using the trxset statement. The specific fields required are dependent on your service provider. If the transaction is successful, a success condition results (the function returns true). The following code issues a charge. trxset "card-number", "4113764542105701" trxset "card-exp", "10/00" trxset "card-name", "Sidney Jamph" trxset "order-id", "neworder3qaed058394y" trxset "amount", "usd 124.99" if trxcharge() { ...charge was granted... } else
403
71328_Pman_CH20I
404
12/14/01 2:38 PM
Page 404
Network Query Language { ...declined... }
Once a charge has taken place, result fields may be retrieved using trxget.
Issuing a Refund A refund is issued using the trxrefund statement or function. The optional parameter is a message type, which is used by some providers. trxrefund [message-type] boolean trxrefund([message-type])
When using CyberCash, the optional parameter specifies a CashRegister message. See your Merchant Connection Kit documentation provided by CyberCash for a listing of these messages and how to use them. If CyberCash is the service provider and the parameter is omitted, the message defaults to “mauthonly”. The message parameter is ignored if CyberSource is the service provider. Prior to issuing trxrefund, various fields must be set using the trxset statement. The specific fields required are dependent on your service provider. If the transaction is successful, a success condition results (the function returns true). The following code issues a refund. trxset "card-number", "4113764542105701" trxset "card-exp", "10/00" trxset "card-name", "Sidney Jamph" trxset "order-id", "neworder3qaed058394y" trxset "amount", "usd 124.99" if trxrefund() { ...refund was granted... } else { ...declined... }
Once a refund has taken place, result fields may be retrieved using trxget.
Retrieving Fields After performing an approval, charge, or refund, result information can be retrieved. The trxget statement or function retrieves an information field. The first parameter is a field name. The second parameter is a variable to receive the field value. The specific field names used are dependent upon your service provider. trxget [field-name [, var]] boolean trxget([field-name [, var]])
71328_Pman_CH20I
12/14/01 2:38 PM
Page 405
E-Commerce
If no parameters are specified, trxget returns the entire response data from your last transaction on the stack. The format of this response data is specific to your service provider. If you specify one parameter only, a field name, that field’s value alone is pushed onto the stack. If you specify both field name and variable parameters, the field’s value is stored in the specified variable. If the field name is recognized, a success condition results (the function returns true). The following code retrieves various fields after performing an approval: trxset "card-number", "4113764542105701" trxset "card-exp", "10/00" trxset "card-name", "Sidney Jamph" trxset "order-id", "neworder3qaed058394y" trxset "amount", "usd 124.99" if trxapprove() { trxget "auth-code", AuthorizationCode trxget "order-id", OrderID }
Open Financial Exchange Open Financial Exchange (OFX) is a communications protocol that allows a large body of financial institutions to be safely accessed by a variety of organizations and applications. It is used by products such as Intuit’s Quicken and Microsoft Money to perform online banking. The full specification on OFX is available at www.ofx.net. Network Query Language supports OFX, allowing your programs to connect to financial organizations and interact with them. Depending on what a bank authorizes you to do, it is possible for your programs to download account information or even transfer funds. A financial organization supports OFX by running an OFX server. The OFX server accepts secure Web requests (using SSL, the https:// protocol) and responds with information, confirmation of an operation, or an error message. Someone wanting to access a financial organization issues secure Web requests, much as a browser would, and accepts the responses. The software doing the accessing is known as an OFX client. An OFX client can be a well-known application, such as Quicken, or an application you create. It is very simple to create an OFX client application in NQL. Figure 20.2 illustrates the OFX communication between client and server. Although Web protocols are used for communication, OFX is not the Web. Unlike the Web’s URL requests and HTML responses, OFX requests and responses are in a specific format, using Structured Generalized Markup Language (SGML). The OFX specification describes the various requests and responses that are legal in OFX. You may find that some financial organizations use their own specific formats for requests and responses, which they may or may not be willing to share with you. As widespread as OFX is, you should be aware that not all financial organizations choose to support it. Even among those who do support OFX, you may need to obtain
405
71328_Pman_CH20I
406
12/14/01 2:38 PM
Page 406
Network Query Language
HTTPS POST OFX Request
OFX Response
OFX Client
OFX Server
Figure 20.2 Open Financial Exchange.
authorization for OFX access in order to learn the URL, a valid ID, and a valid password or PIN. OFX requests may require that you also know a bank’s routing/transit number (RTN), your own account number, or other information.
NQL’s OFX Operations The NQL OFX statements are listed in Table 20.3. The OFX functions are shown in Table 20.4. The OFX statements and functions are described individually in the following sections.
Table 20.3 OFX Statements STATEMENT
PARAMETERS
DESCRIPTION
ofxget
field-name, var
Retrieves an SGML field from an OFX response
ofxload
filespec
Loads an OFX template
ofxsend
url
Sends an OFX request
ofxset
field-name, value
Sets an SGML field prior to issuing an OFX request
Table 20.4 OFX Functions FUNCTION
DESCRIPTION
boolean ofxget(field-name, var)
Retrieves an SGML field from an OFX response
boolean ofxload(filespec)
Loads an OFX template
boolean ofxsend(url)
Sends an OFX request
boolean ofxset(field-name, value)
Sets an SGML field prior to issuing an OFX request
71328_Pman_CH20I
12/14/01 2:38 PM
Page 407
E-Commerce
OFX Sessions The NQL transaction operations are modeled on the idea of a session in which the statements and functions must be used in a certain order. 1. An OFX template file is loaded onto the stack using ofxload. 2. Field values are set using ofxset. 3. The OFX request is sent, using ofxsend. The response replaces the request on the stack. 4. Response fields are retrieved using ofxget. 5. The response is popped off of the stack.
Loading an OFX Template A transaction template is an SGML file with placeholders for information that will need to be set at run time, such as the account number and PIN of a bank account. The ofxload statement or function loads a template file and pushes it onto the stack. The parameter is a filename. By default, the file type .ofx is assumed. Unless you specify a full path, the template will be loaded from the NQL \ofx directory. ofxload template boolean ofxload(template)
If successful, an SGML document will be on the stack and a success condition results (the function returns true). The following code uses ofxload to load a template. ofxload "acctinfo"
Once a template has been loaded, use ofxset to configure its fields and ofxsend to send the request.
Setting OFX Fields Once a template has been loaded, fields in the template need to be set with real values. This is the purpose of the ofxset statement. The parameters are a field name and a value. ofxset field-name, value boolean ofxset(field-name, value)
If the specified field name is found as a tag in the SGML template on the stack, it is set to the specified value and a success condition results (the function returns true). The following code uses ofxset to set fields in an account information request. errors continue if ofxload("acctinfo")
407
71328_Pman_CH20I
408
12/14/01 2:38 PM
Page 408
Network Query Language { ofxset "USERID", "450657499" ofxset "USERPASS", "uhu*32424" ofxset "ORG", "Bank1" ofxset "APPID", "Agent" ofxsend "https://ofx.bank1.com/ofx/ofx_server.dll" }
After setting transaction fields with ofxset, use ofxsend to send the request.
Sending a Request Once a template has been loaded and field values have been set, the ofxsend statement is used to send the request to an OFX server. The parameter is the secure URL of the OFX server. ofxsend url boolean ofxsend(url)
If the request is successfully transmitted, a response is received which replaces the request on the stack and a success condition results (the function returns true). The following code uses ofxsend to send an OFX request. ofxload "acctinfo" ofxset "USERID", "450657499" ofxset "USERPASS", "uhu*32424" ofxset "ORG", "Bank1" ofxset "APPID", "Agent" if ofxsend("https://ofx.bank1.com/ofx/ofx_server.dll") { ofxget "DESC", name ofxget "PHONE", phone ofxget "STATUS", status ofxget "MESSAGE", message show name, phone, status, message show } else { show "ofxsend failed" }
After a successful ofxsend, the response data, an SGML document, will be on the stack. To retrieve individual fields, use the ofxget statement.
Retrieving OFX Fields After an OFX request has been sent, fields may be retrieved from the response using the ofxget statement. The parameters are a field name and a variable to receive the field value.
71328_Pman_CH20I
12/14/01 2:38 PM
Page 409
E-Commerce ofxget field-name, var boolean ofxget(field-name, var)
If the specified field name is found as a tag in the SGML template on the stack, its value is returned in the specified variable and a success condition results (the function returns true). The following code uses ofxget to retrieve fields after an account information request. ofxload "acctinfo" ofxset "USERID", "450657499" ofxset "USERPASS", "uhu*32424" ofxset "ORG", "Bank1" ofxset "APPID", "Agent" if ofxsend("https://ofx.bank1.com/ofx/ofx_server.dll") { ofxget "DESC", name ofxget "PHONE", phone ofxget "STATUS", status ofxget "MESSAGE", message show name, phone, status, message show } else { show "ofxsend failed" }
After retrieving all desired information from the OFX response, use pop to clean up the stack.
Tutorial: Approval Now it is time to put e-commerce to work in an actual NQL program. In this tutorial, you will create a script that submits a credit card approval using CyberSource. You won’t actually be able to run this script unless you have a merchant account and are set up with CyberSource for electronic credit card processing. There are four steps in this tutorial: 1. Launch the NQL development environment. 2. Enter the Approval script. 3. Run the Approval script. 4. Understand the Approval script. When you are finished with this tutorial, you will have seen how to do the following in NQL:
409
71328_Pman_CH20I
410
12/14/01 2:38 PM
Page 410
Network Query Language ■■
Open an e-commerce session.
■■
Set the submittal fields prior to an approval.
■■
Submit an approval to CyberSource.
■■
Retrieve the result fields after an approval.
Let’s begin!
Step 1: Launch the NQL Development Environment On a Windows system, launching the NQL development environment can be accomplished by clicking on the NQL Client desktop icon, or by selecting Program Files, Network Query Language, NQL Client from the Start Menu. On other platforms, you should have a desktop icon and/or a command-line method of launching the NQL Client. At this point, you should have the NQL development environment active on your desktop, with an empty code window. Now you’re ready to enter a script.
Step 2: Enter the Approval Script In the NQL development environment, enter the script shown in Listing 20.1 and save it under the name approval.nql. Enter the script, then save it by clicking the Save toolbar button (which has a disk icon). If you prefer, you may copy Approval.nql from the companion CD. If you have installed the companion CD on your system, you will have all of the book’s tutorial materials in a \Tutorials directory on your hard drive. Click the Open toolbar button (folder icon), and select approval.nql from the Tutorials\ch20 folder. At this point, the script in Listing 20.1 should be in your code window, either because you entered it by hand, or because you opened the script from the companion CD. You are now ready to run the script.
Step 3: Run the Approval Script Now run the script. You can do this by selecting Build, Run from the menu, clicking the Run toolbar button, or pressing F5. If all goes well, a credit card approval will be processed, and the result codes from the transaction will be displayed. If this does not happen, check the following: ■■
Check for typographical errors in your script.
■■
Check that the merchant identification information is correct.
■■
Check that the payment information is correct.
■■
Check the NQL client’s Errors tab for error messages.
71328_Pman_CH20I
12/14/01 2:38 PM
Page 411
E-Commerce
/Approval - submits a credit card approval through CyberSource //open transaction session if !opentrx("cybersource") { goto ErrorUnknownVendor } //identify ourselves if !trxid("ICS2Test", "01", "ics2test.ic3.com") { goto ErrorBadID } //set up the fields for an approval if !trxset("customer_firstname", "John") { goto ErrorInvalidField } if !trxset("customer_lastname", "Doe") { goto ErrorInvalidField } if !trxset("customer_email", "[email protected]") { goto ErrorInvalidField } if !trxset("customer_phone", "714-555-5555") { goto ErrorInvalidField } if !trxset("customer_cc_number", "4111111111111111") { goto ErrorInvalidField } if !trxset("customer_cc_expmo", "08") { goto ErrorInvalidField } if !trxset("customer_cc_expyr", "2002") { goto ErrorInvalidField } if !trxset("bill_address1", "555 Main Street") { goto ErrorInvalidField } if !trxset("bill_city", "Santa Ana") { goto ErrorInvalidField } if !trxset("bill_state", "CA") { goto ErrorInvalidField } if !trxset("bill_zip", "92704") { goto ErrorInvalidField } if !trxset("bill_country", "US") { goto ErrorInvalidField } if !trxset("currency", "USD") { goto ErrorInvalidField } if !trxset("offer0", "amount:1.00^merchant_product_sku:Toy5555^quantity:1") { goto ErrorInvalidField } //submit the approval if !trxapprove() { goto ErrorServer } //retrieve approval results if !trxget("ics_rcode", sCode) { goto GeneralError } show sCode closetrx end ErrorUnknownVendor: continues
Listing 20.1 Approval script.
411
71328_Pman_CH20I
412
12/14/01 2:38 PM
Page 412
Network Query Language
show "Error: cannot open transaction" end ErrorBadID: show "Error: invalid ID parameters" closetrx end ErrorInvalidField: show "Error setting named value pairs" closetrx end
Listing 20.1 Approval script (continued).
At this point you should have seen the Approval script run, accessing search engine sites in parallel to find the fastest one. In the next step, we will dissect the script and explain exactly how it works.
Step 4: Understand the Approval Script We now want to make sure we understand every part of the Approval script. The first line is a comment line. //Approval - submits a credit card approval through CyberSource
A transaction session is opened with opentrx. The provider is identified as CyberSource. If the session cannot be opened, a jump takes place to an error handler that displays an error message and ends the script. One reason opentrx might fail is if you don’t have CyberSource’s software set up on your computer for NQL to interface with. //open transaction session if !opentrx("cybersource") { goto ErrorUnknownVendor }
The script next identifies itself with the trxid function, specifying merchant identification information and a URL for submitting transactions. Again, if an error occurs, a jump to an error-handling section of the script takes place. //identify ourselves if !trxid("ICS2Test", "01", "ics2test.ic3.com") { goto ErrorBadID }
The details of the transaction now need to be defined. The trxset statements set field values that define the approval. These include the customer name and contact information, billing address, credit card information, and amount. The specific fields and
71328_Pman_CH20I
12/14/01 2:38 PM
Page 413
E-Commerce
formats of their values are dependent on the provider in use (CyberSource, in this case). If any of the trxset functions return false, it is unsafe to proceed and a jump is made to an error handler. //set up the fields for an approval if !trxset("customer_firstname", "John") { goto ErrorInvalidField } if !trxset("customer_lastname", "Doe") { goto ErrorInvalidField } if !trxset("customer_email", "[email protected]") { goto ErrorInvalidField } if !trxset("customer_phone", "714-555-5555") { goto ErrorInvalidField } if !trxset("customer_cc_number", "4111111111111111") { goto ErrorInvalidField } if !trxset("customer_cc_expmo", "08") { goto ErrorInvalidField } if !trxset("customer_cc_expyr", "2002") { goto ErrorInvalidField } if !trxset("bill_address1", "555 Main Street") { goto ErrorInvalidField } if !trxset("bill_city", "Santa Ana") { goto ErrorInvalidField } if !trxset("bill_state", "CA") { goto ErrorInvalidField } if !trxset("bill_zip", "92704") { goto ErrorInvalidField } if !trxset("bill_country", "US") { goto ErrorInvalidField } if !trxset("currency", "USD") { goto ErrorInvalidField } if !trxset("offer0", "amount:1.00^merchant_product_sku:Toy5555^ quantity:1") { goto ErrorInvalidField }
The approval has now been defined, and can be submitted to the provider. The trxapprove function returns true if the approval is allowed. If it is not, a jump to an error handler occurs. //submit the approval if !trxapprove() { goto ErrorServer }
The approval results can now be retrieved. The trxget function is used to retrieve an approval code. A show statement displays the approval code, and the script ends. //retrieve approval results if !trxget("ics_rcode", sCode) { goto GeneralError } show sCode closetrx end
The error handlers are next. Each displays an appropriate error message and ends the script. ErrorUnknownVendor: show "Error: cannot open transaction" end
413
71328_Pman_CH20I
414
12/14/01 2:38 PM
Page 414
Network Query Language ErrorBadID: show "Error: invalid ID parameters" closetrx end ErrorInvalidField: show "Error setting named value pairs" closetrx end
At this point, you’ve witnessed NQL-driven credit card transactions.
Further Exercises You could amend this example in a number of ways. Here are some interesting modifications that can be made: ■■
Submit charges.
■■
Submit refunds.
Chapter Summary Network Query Language has the ability to submit credit card approvals, charges, and debuts. ■■
The two supported providers are CyberCash and CyberSource. NQL knows how to interface with these providers’ software. If you use a different provider, you won’t be able to use NQL’s credit card features.
■■
A transaction session is opened with the opentrx statement.
■■
A merchant identification is made with the trxid statement.
■■
Before a transaction, fields are set with the trxset function.
■■
After a transaction, fields are retrieved with the trxget function.
■■
The trxapprove statement submits an approval.
■■
The trxcharge statement submits a charge.
■■
The trxrefund statement submits a refund.
■■
The required format of parameters and required fields are dependent on the provider.
Credit card processing abilities in NQL allow you to create connected applications that can perform transactions.
71328_Pman_CH21I
12/14/01 2:35 PM
Page 415
CHAPTER
21 Graphics
Graphics and presentation are important elements of modern software. Network Query Language is one of the few programming languages that can create images dynamically on the fly, including Web graphics. Some examples of what can be achieved with NQL’s graphics statements are listed. ■■
An NQL-powered Web site can create dynamic labels and buttons that contain personalized text for the current visitor.
■■
An agent can acquire images from a Web camera and add a caption and timestamp to each image.
■■
A logo graphic can be overlaid with custom text, such as a restaurant sign showing the number of hamburgers sold.
■■
A performance chart can be created from historical stock quote data and be displayed, emailed, or viewed through the Web.
■■
A graphic in BMP format can be converted to JPEG or GIF format for inclusion in a Web page.
In addition to generating graphics, NQL can also interface with TWAIN digital devices such as scanners and cameras. Captured images can be saved or modified using the graphics statements.
415
71328_Pman_CH21I
416
12/14/01 2:35 PM
Page 416
Network Query Language
Image Operations The NQL image operations provide general facilities for creating and modifying images. They include the ability to set colors, draw shapes, and render text. The NQL statements for image operations are listed in Table 21.1. There are function versions of some of the image statements. The image functions are shown in Table 21.2. The image statements and functions are described individually in the following sections.
Table 21.1 Image Statements STATEMENT
PARAMETERS
DESCRIPTION
backcolor
[#image-ID,] color
Sets the background color
closeimage
[#image-ID]
Closes an image session
createimage
[#image-ID,] width, height
Creates a new image session
drawcircle
[#image-ID,] x1, y1, x2, y2
Draws a circle or ellipse
drawcolor
[#image-ID,] color
Sets the drawing color
drawfont
[#image-ID,] state, size, style
Sets the font for text rendering
drawline
[#image-ID,] x1, y1, x2, y2
Draws a line
drawpie
[#image-ID,] x, y, radius
Draws a pie chart
drawpieslice
[#image-ID,] percent [, color [, text [, degree]]]
Draws a pie chart slice
drawpoint
[#image-ID,] x, y
Draws a point
drawrectangle
[#image-ID,] x1, y1, x2, y2
Draws a rectangle
drawstyle
[#image-ID,] style
Sets the drawing style
drawtext
[#image-ID,] x, y, text [, rotation]
Draws text, left-aligned
drawtextcenter
[#image-ID,] x, y, text [, rotation]
Draws text, center-aligned
drawtextright
[#image-ID,] x, y, text [, rotation]
Draws text, right-aligned
drawwidth
[#image-ID,] pixels
Sets the drawing width
imagecopy
#image-ID1, x1, y1, width, height, #image-ID2, x2, y2
Copies a section of an image to another image
openimage
[#image-ID,] filespec
Opens an existing image
saveimage
[#image-ID,] filespec
Saves an image to disk
71328_Pman_CH21I
12/14/01 2:35 PM
Page 417
Graphics Table 21.2 Image Functions FUNCTION
DESCRIPTION
boolean closeimage([#image-ID])
Closes an image session
boolean createimage([#image-ID,] width, height)
Creates a new image session
boolean imagecopy(#image-ID1, x1, y1, width, height, #image-ID2, x2, y2)
Copies a section of an image to another image
boolean openimage([#image-ID,] filespec)
Opens an existing image
boolean saveimage([#image-ID,] filespec)
Saves an image to disk
Image Sessions The NQL image operations are modeled on the idea of a session, in which the statements and functions must be used in a certain order. 1. An image session is opened with createimage or openimage. 2. Any desired series of drawing operations is performed using the other image statements. 3. The image is saved to disk using saveimage. 4. The image session is closed with closeimage.
Multiple Image Sessions NQL uses a very simple syntax for image operations, such as the following line. createimage 800, 600
When there is a need to open multiple images simultaneously, identifiers are needed to distinguish one image session from another. In NQL, these identifiers are known as image session IDs. An image session ID is a name preceded by a pound sign, such as #chart or #logo. When a session ID is specified, it is the first parameter of a statement or function. For example, createimage #pic1, 640, 480
Creating a New Image The createimage statement or function begins an image session by creating a new image in memory. The parameters are a width and height, both in pixels. createimage [#image-ID,] width, height boolean createimage([#image-ID,] width, height)
417
71328_Pman_CH21I
418
12/14/01 2:35 PM
Page 418
Network Query Language
If the image is created successfully, a success condition results (the function returns true). The draw settings are initialized to a background color of white, a draw color of black, a drawing width of one pixel, and a draw style of hollow. The following code uses createimage to create a 600 ⫻ 800 pixel image. createimage 800, 600
To open an existing image instead of creating a new one, use openimage. Once an image session has been created, use the other image statements to set colors, draw shapes, set fonts, and render text. To save the image on disk, use saveimage.
Opening an Existing Image The openimage statement or function begins an image session by loading an existing image from a disk file. The parameter is the file specification of a .bmp, .gif, or .jpg file. openimage [#image-ID,] filespec boolean openimage([#image-ID,] filespec))
If the image is opened successfully, a success condition results (the function returns true). The draw settings are initialized to a background color of white, a draw color of black, a drawing width of one pixel, and a draw style of hollow. The following code uses openimage to open a GIF file. openimage "test.gif"
Once an image session has been created, use the other image statements to set colors, draw shapes, set fonts, and render text.
Saving an Image The saveimage statement or function saves an image to disk. The parameter is the file specification of a .bmp, .gif, or .jpg file. saveimage [#image-ID,] filespec boolean saveimage([#image-ID,] filespec)
If the image is saved successfully, a success condition results (the function returns true). The following code creates an image and saves it to disk as a .jpg file. createimage 100, 100 drawtext 0,0, "hello" drawcircle 20, 20, 60, 60 saveimage "test.jpg"
Once an image has been saved, the image session in memory can be freed through closeimage.
71328_Pman_CH21I
12/14/01 2:35 PM
Page 419
Graphics
Closing an Image Session Once you are finished with an image session, it can be closed with closeimage. There are no parameters other than the optional image ID. closeimage [#image-ID] boolean closeimage([#image-ID])
The image session is terminated. The following code opens and then closes an image session. openimage 400, 200 ... closeimage
If you don’t explicitly close an image session, it is closed automatically when a script terminates.
Drawing Circles and Ellipses The drawcircle statement draws a circle or ellipse. The parameters are the X-Y coordinates of the top-left and bottom-right corners of the bounding rectangle of the ellipse. drawcircle [#image-ID,] x1, y1, x2, y2
The specified ellipse is drawn onto the image in the current draw color. The thickness of the line is controlled by the current draw width. The ellipse is hollow or filled depending on the current draw style. The following code draws a circle with drawcircle. createimage 400, 200 drawcircle 10, 10, 389, 189
Once you are finished with all drawing operations, use saveimage to save the image to disk.
Drawing Lines The drawline statement draws a line. The parameters are the X-Y coordinates of the top-left and bottom-right endpoints of the line. drawline [#image-ID,] x1, y1, x2, y2
The specified line is drawn onto the image in the current draw color. The thickness of the line is controlled by the current draw width. The following code draws two diagonal lines using drawline.
419
71328_Pman_CH21I
420
12/14/01 2:35 PM
Page 420
Network Query Language createimage 400, 200 drawline 0, 0, 399, 199 drawline 0, 199, 399, 0
Once you are finished with all drawing operations, use saveimage to save the image to disk.
Drawing Pie Charts The drawpie and drawpieslice statements work together to draw a pie chart. The drawpie statement draws the outside circle of the pie chart. A drawpieslice statement is used to draw each pie slice. The parameters for drawpie are the X-Y coordinates of the top left of the bounding rectangle of the pie, and the radius of a pie slice. drawpie [#image-ID,] x, y, radius
The specified pie chart circle is drawn onto the image in the current draw color. The thickness of the line is controlled by the current draw width. The pie chart is hollow or filled depending on the current draw style. The parameters for drawpieslice are a percentage, a draw color, text for the pie slice, and a degree of rotation for the text. Only the percent parameter is required. drawpieslice [#image-ID,] percent [, color [, text [, degree]]]
The pie slice is drawn within the pie chart circle (previously created by drawpie) with the appropriate size for the specified percentage. The following code draws a pie chart using drawpie and drawpieslice. createimage 400, 400 drawpie 0, 0, 200 drawstyle "solid" drawpieslice "30", "#FF0000", "30%" drawpieslice "15", "#0000FF", "15%" drawpieslice "55", "#00FF00", "55%" saveimage "pie1.bmp" closeimage opendoc "pie1.bmp"
Once you are finished with all drawing operations, use saveimage to save the image to disk.
Drawing Points The drawpoint statement draws a point. The parameters are the X-Y coordinates of the point.
71328_Pman_CH21I
12/14/01 2:35 PM
Page 421
Graphics drawpoint [#image-ID,] x, y
The specified point is drawn onto the image in the current draw color. The following code draws a rectangle with drawrectangle. createimage 400, 200 drawpoint 200, 100
Once you are finished with all drawing operations, use saveimage to save the image to disk.
Drawing Squares and Rectangles The drawrectangle statement draws a square or rectangle. The parameters are the X-Y coordinates of the top-left and bottom-right corners of the rectangle. drawrectangle [#image-ID,] x1, y1, x2, y2
The specified rectangle is drawn onto the image in the current draw color. The thickness of the line is controlled by the current draw width. The rectangle is hollow or filled depending on the current draw style. The following code draws a rectangle with drawrectangle. createimage 400, 200 drawrectangle 10, 10, 389, 189
Once you are finished with all drawing operations, use saveimage to save the image to disk.
Drawing Text The drawtext statement draws text with left-justified alignment. The parameters are the X-Y coordinates of the starting point of the text, the text to render, and an optional degree of rotation for the text. drawtext [#image-ID,] x, y, text [, rotation]
The specified text is drawn left-aligned starting at the specified point. The current font, draw color, and background color affect the appearance of the text. The following code draws some text with drawtext. createimage 400, 200 drawtext 0,0, "top left corner" saveimage "text.bmp" closeimage
421
71328_Pman_CH21I
422
12/14/01 2:35 PM
Page 422
Network Query Language
To draw text with centered or right-justified alignment, use drawtextcenter or drawtextright. Once you are finished with all drawing operations, use saveimage to save the image to disk.
Drawing Centered Text The drawtextcenter statement draws text with centered alignment. The parameters are the X-Y coordinates of the mid-point of the text, the text to render, and an optional degree of rotation for the text. drawtextcenter [#image-ID,] x, y, text [, rotation]
The specified text is drawn horizontally centered at the specified point. The current font, draw color, and background color affect the appearance of the text. The following code draws some text with drawtextcenter. createimage 400, 200 drawtextcenter 200,100, "centered text" saveimage "text.bmp" closeimage
To draw text with left-justified or right-justified alignment, use drawtext or drawtextright. Once you are finished with all drawing operations, use saveimage to save the image to disk.
Drawing Right-Justified Text The drawtextright statement draws text with right-justified alignment. The parameters are the X-Y coordinates of the ending point of the text, the text to render, and an optional degree of rotation for the text. drawtextright [#image-ID,] x, y, text [, rotation]
The specified text is drawn right-aligned to the specified point. The current font, draw color, and background color affect the appearance of the text. The following code draws some text with drawtextright. createimage 400, 200 drawtextright 399,0, "top right corner" saveimage "text.bmp" closeimage
To draw text with left-justified or centered alignment, use drawtext or drawtextcenter. Once you are finished with all drawing operations, use saveimage to save the image to disk.
71328_Pman_CH21I
12/14/01 2:35 PM
Page 423
Graphics
Setting Colors The backcolor and drawcolor statements set the background and draw colors. The background color applies to drawing text. The draw color applies to all drawing statements. Both take one parameter, a color code of the form #rrggbb, which includes two digits for each hexadecimal value of red, green, or blue. backcolor [#image-ID,] color drawcolor [#image-ID,] color
The following code sets the draw color in order to draw several different color lines. createimage 400, 200 drawcolor "#FF0000" drawline 0, 0, 399, 199 drawcolor "#0000FF" drawline 0, 199, 399, 0 saveimage "colors.bmp" closeimage
When you first begin an image session, the background color defaults to white (#FFFFFF) and the draw color defaults to black (#000000).
Setting Fonts The drawfont statement sets the font family, size, and style used in drawing text. The parameters are a typeface name, a font size in points, and a string of style flags. drawfont [#image-ID,] state, size, style
The style parameter is a string that may contain a combination of the following flags: P for plain text, B for boldface type, I for italicized type, and U for underline type. The following code sets the font, then draws text in that font. createimage 400, 200 drawfont "Times New Roman", 18, "BI" drawtext 0,0, "Invitation" saveimage "invite.bmp" closeimage opendoc "invite.bmp"
Setting Draw Width The drawwidth statement sets the width of the pen for drawing lines and shapes. The parameter is a line width in pixels.
423
71328_Pman_CH21I
424
12/14/01 2:35 PM
Page 424
Network Query Language drawwidth [#image-ID,] width
The following code sets the draw width, then draws a rectangle. createimage 400, 200 drawwidth 3 drawrectangle 50, 50, 350, 150 saveimage "rect.bmp" closeimage
Setting Drawing Style The drawstyle statement sets the drawing style for shapes. The parameter is the word “hollow” or “solid”. drawstyle [#image-ID,] style
The following code sets the draw style, then draws a filled rectangle. createimage 400, 200 drawstyle "solid" drawrectangle 50, 50, 350, 150 saveimage "rect.bmp" closeimage
Copying an Image When you have more than one image session open, you can copy some or all of the first image onto the second image. The imagecopy statement performs an image copy between two image sessions. The parameters specify the image source and the destination. On the source side, the first five parameters are an image-ID, a top-left corner X-Y coordinate, a width, and a height. The next three parameters specify the destination image’s image ID and a target X-Y coordinate. imagecopy
#image-ID1, x1, y1, width, height, #image-ID2, x2, y2
The specified area of the source image is copied into the destination image at the specified coordinate. The following code copies the top-left quadrant of a large image onto a smaller image. openimage #img1, "large200x200.jpg" openimage #img2, "small50x50.jpg" imagecopy #img1, 0, 0, 50, 50, #img2, 0, 0 saveimage "rect.bmp" closeimage
71328_Pman_CH21I
12/14/01 2:35 PM
Page 425
Graphics
Acquiring Images from TWAIN Devices Network Query Language can acquire images from image-oriented devices that support the TWAIN protocol, such as digital cameras, scanners, and Webcams. The NQL statements for TWAIN operations are listed in Table 21.3. There are function versions of some of the TWAIN statements. The TWAIN functions are shown in Table 21.4.
Table 21.3 TWAIN Statements STATEMENT
PARAMETERS
closetwain
DESCRIPTION Closes a TWAIN device
colordepth
[#image-ID,] depth
Sets the color depth for a TWAIN device
opentwain
[twain-sourcename]
Opens a TWAIN device
scan
[filespec]
Acquires and stores an image from a TWAIN device
twaingetimage
[#image-ID,] [display-interface]
Acquires an image from a TWAIN device
twaingetsources twainshowsources
Returns a list of available TWAIN devices [var]
Displays TWAIN sources and gets a user selection
Table 21.4 TWAIN Functions FUNCTION
DESCRIPTION
boolean colordepth([#image-ID,]
Sets the color depth for a TWAIN device depth)
boolean opentwain([twain-sourcename])
Opens a TWAIN device
boolean scan([filespec])
Acquires and stores an image from a TWAIN device
boolean twaingetimage([#image-ID,] [display-interface])
Acquires an image from a TWAIN device
boolean twaingetsources()
Returns a list of available TWAIN devices
boolean twainshowsources([var])
Displays TWAIN sources and gets a user selection
425
71328_Pman_CH21I
426
12/14/01 2:35 PM
Page 426
Network Query Language
The TWAIN statements and functions are described individually in the following sections.
TWAIN Sessions The NQL TWAIN operations are modeled on the idea of a session, in which the statements and functions must be used in a certain order. 1. A TWAIN session is opened with opentwain. 2. Images are acquired using scan, or using combinations of the other TWAIN statements. 3. The TWAIN session is closed with closetwain.
Opening a TWAIN Session The opentwain statement or function opens a TWAIN session. The parameter is the name of the TWAIN source to open, which is optional. If omitted, the last referenced TWAIN device is used. boolean opentwain([twain-source-name]) opentwain [twain-source-name]
If the TWAIN device is accessible, a success condition results (the function returns true). The following code uses opentwain to open a TWAIN session. if opentwain() { ...work with TWAIN device... }
Once a TWAIN session is open, you have the option of acquiring and storing images with the all-in-one scan statement, or through sequences of the other, lower-level TWAIN statements.
Closing a TWAIN Session The closetwain statement closes a TWAIN session. There are no parameters. closetwain
The TWAIN device is closed. The following code shows the use of closetwain to close a TWAIN session. if opentwain() {
71328_Pman_CH21I
12/14/01 2:35 PM
Page 427
Graphics ...work with TWAIN device... closetwain }
If you do not explicitly close a TWAIN session, it is closed automatically when the script terminates.
Scanning an Image The scan statement scans an image and stores it. The parameter is an optional file name of type .bmp, .gif, or .jpg. If no file name is specified, an image session is created in memory, and the graphics image statements (described earlier in this chapter) may be used to manipulate and store the image. scan [filespec] boolean scan([filespec])
The image is acquired and stored, either to disk or to an in-memory image session, depending on parameters. If no errors occur, a success condition results (the function returns true). The following code shows the use of scan to acquire and save images. if opentwain() { scan "picture.jpg" closetwain }
The sequence scan (without parameters) is identical to the following sequence: twaingetimage : colordepth 24
The sequence scan (with a file name parameter) is identical to the following sequence: twaingetimage : colordepth 24 : saveimage filespec : closeimage
Acquiring an Image The twaingetimage statement acquires an image from the current TWAIN device and creates an image session in memory. The parameters are an optional image ID (if you have multiple image sessions open at the same time) and a display interface flag, which defaults to false. If set to true, the TWAIN device’s drive may display a dialogue during image capture. twaingetimage [#image-ID,] [display-interface] boolean twaingetimage([#image-ID,] [display-interface])
427
71328_Pman_CH21I
428
12/14/01 2:35 PM
Page 428
Network Query Language
The image is acquired and stored in-memory in an image session. If no errors occur, a success condition results (the function returns true). The following code shows the use of twaingetimage to acquire an image. if opentwain() { twaingetimage colordepth 8 saveimage "pic1.bmp" closetwain }
For simple scan-and-store applications, the scan statement is more automatic.
Obtaining a List of TWAIN Sources The twaingetsources statement or function retrieves a list of TWAIN devices. There are no parameters. twaingetsources boolean twaingetsources()
The result is a string value pushed onto the stack, which is a list of TWAIN sources separated by newlines. If the TWAIN device list is returned, a success condition results (the function returns true). The following code shows the use of twaingetsources. twaingetsources while nextline(source) { show source }
User Selection of a TWAIN Source The twainshowsources statement or function displays a list of TWAIN devices to the user and allows one to be selected. The parameter is an optional variable to receive the name of the selected TWAIN source. twaingetsources [var] boolean twaingetsources([var])
If the user selects a TWAIN source, a success condition results (the function returns true). If the user cancels the dialogue, a failure condition results (the function returns false). The following code shows the use of twainshowsources. if twainshowsources(sSource) {
71328_Pman_CH21I
12/14/01 2:35 PM
Page 429
Graphics opentwain(sSource) scan "image1.jpg" closetwain }
Tutorial: Counter Now it is time to create an NQL script that uses the graphics statements. In this tutorial, you will create a program that creates an odometer-style counter Web graphic, as shown in Figure 21.1. Each time the script is run, the number will increment by one. There are four steps in this tutorial: 1. Launch the NQL development environment. 2. Enter the Counter script. 3. Run the Counter script. 4. Understand the Counter script. When you are finished with this tutorial, you will have seen how to do the following in NQL: ■■
Create an image in memory.
■■
Draw lines and rectangles.
■■
Render text.
■■
Save an image as a JPEG file.
Let’s begin!
Step 1: Launch the NQL Development Environment Launch the NQL development environment. On a Windows system, this can be accomplished by clicking on the NQL Client desktop icon, or by selecting Program Files, Network Query Language, NQL Client from the Start Menu. On other platforms, you should have a desktop icon and/or a command-line method of launching the NQL Client. At this point, you should have the NQL development environment active on your desktop, with an empty code window. Now you’re ready to enter the tutorial script.
Figure 21.1 Counter graphic.
429
71328_Pman_CH21I
430
12/14/01 2:35 PM
Page 430
Network Query Language
Step 2: Enter the Counter Script In the NQL development environment, enter the script shown in Listing 21.1 and save it under the name counter.nql. Enter the script, then save it by clicking the Save toolbar button (which has a disk icon).
//Counter - generates an odometer-style counter graphic int nLastNumber string sNumber //read last counter value from file open "counter.dat" if !read(nLastNumber) { nLastNumber = 0 } close //increment counter and write udpate value to file nLastNumber += 1 create "counter.dat" write nLastNumber close //pad number with leading zeroes to get to 5 digits sNumber = nLastNumber sNumber = right("00000" | sNumber, 5) //create the image createimage 80, 25 drawstyle "solid" drawcolor "#000000" drawrectangle 0, 0, 79, 24 drawcolor "#ffffff" drawstyle "hollow" drawrectangle 0, 0, 79, 24 drawline drawline drawline drawline
16, 32, 48, 64,
0, 0, 0, 0,
16, 32, 48, 64,
24 24 24 24
Listing 21.1 Counter script.
71328_Pman_CH21I
12/14/01 2:35 PM
Page 431
Graphics
//render the digits backcolor "#000000" drawfont "arial", 14, "" for d = 1, 5 { c = mid(sNumber, d, 1) drawtextcenter ((d-1)*16)+8, 2, c } saveimage "counter.jpg" closeimage opendoc "counter.jpg"
Listing 21.1 Counter script (continued).
If you prefer, you may copy counter.nql from the companion CD. If you have installed the companion CD on your system, you will have all of the book’s tutorial materials in a \Tutorials directory on your hard drive. Click the Open toolbar button (folder icon), and select counter.nql from the Tutorials\ch21 folder. At this point, the script in Listing 21.1 should be in your code window, either because you entered it by hand or because you opened the script from the companion CD. You are now ready to run the script.
Step 3: Run the Counter Script Now run the script. You can do this by selecting Build, Run from the menu, clicking the Run toolbar button, or pressing F5. If all goes well, a few seconds will pass and an odometer image will open up on your desktop. Run the script a second time, and the number in the odometer will have increased by one. If this does not happen, check the following: ■■
Make sure you have entered the script correctly.
■■
Check the NQL client’s Errors tab for error messages.
At this point you should have seen the Counter script run, dynamically generating a different image each time it is run. In the next step, we’ll dissect the script and explain exactly how it works.
Step 4: Understand the Counter Script We now want to make sure we understand every part of the Counter script. The first line is a comment line.
431
71328_Pman_CH21I
432
12/14/01 2:35 PM
Page 432
Network Query Language //Counter - generates an odometer-style counter graphic
Two variables are declared, nLastNumber and sNumber. The number last shown on the odometer will be read into the integer variable nLastNumber, incremented, and written back to disk for next time. The string variable sNumber will hold a copy of the odometer number padded with leading zeroes so that its length is five digits. int nLastNumber string sNumber
The first order of business is to find out what the last number displayed on the odometer was. The script stores this number in a data file named counter.dat. The open statement opens counter.dat (or creates an empty file if it does not exist). The read statement reads a number from this file into nLastNumber. If it fails, this is the first time the script is being run and nLastNumber is set to 0. The file is then closed with close. //read last counter value from file open "counter.dat" if !read(nLastNumber) { nLastNumber = 0 } close
The nLastNumber variable is incremented by one, which is the number that we will display in the graphic image we are about to generate. //increment counter and write update value to file nLastNumber += 1
The new value needs to be written to the counter.dat file so that the next time the script runs, the number will advance. The file is created new with a create statement. The value in nLastNumber is written with a write statement. The file is closed. create "counter.dat" write nLastNumber close
Next, we need a five-character copy of the number to display: The odometer image we will create has five digits, so we need leading zeroes to get the length right. The value in nLastNumber is copied to the string variable sNumber. The right function ensures the sNumber has leading zeroes to fill it to a length of five. //pad number with leading zeroes to get to 5 digits sNumber = nLastNumber sNumber = right("00000" | sNumber, 5)
The image can now be created. The first step is to create an image 80 pixels wide by 25 high using createimage. The background of the image is a black rectangle. To draw it,
71328_Pman_CH21I
12/14/01 2:35 PM
Page 433
Graphics
the drawing style is set to solid with drawstyle, the draw color is set to 000000 (black) with drawcolor, and a solid black rectangle is drawn with drawrectangle. //create the image createimage 80, 25 drawstyle "solid" drawcolor "#000000" drawrectangle 0, 0, 79, 24
The rest of our drawing will be in white, so we set the draw color to ffffff (white) with drawcolor. We now want to draw a white frame around the outside of the solid black rectangle that was just drawn. The drawstyle statement sets the hollow drawing mode, and another drawrectangle statement draws a white rectangle. drawcolor "#ffffff" drawstyle "hollow" drawrectangle 0, 0, 79, 24
We need four vertical white lines to make the image resemble an odometer with five individual digits. The image is 80 pixels across, so the lines need to be drawn at X coordinates of 16, 32, 48, and 64. The Y coordinates for the lines will be from 0 to 24, the full height of the image. The lines are drawn with the drawline statement. drawline drawline drawline drawline
16, 32, 48, 64,
0, 0, 0, 0,
16, 32, 48, 64,
24 24 24 24
We now have a convincing-looking odometer, except that there are no digits. We have to render the digits as text to complete the image. The text foreground color is already white, because it is the same as the drawing color. The text background color needs to be set to black, which is handled by the backcolor statement. The desired font is set to Arial 14 with the drawfont statement. //render the digits backcolor "#000000" drawfont "arial", 14, ""
A loop from one to five draws the digits. The digit character to display is extracted into the variable c by the mid function. The drawtextcenter statement draws each digit, centered on the unit space for that digit on the image. The digit’s location is computed by taking the current digit (d), subtracting one, and multiplying by 16. This gives us 0 for the leftmost digit, 16 for the next, 32 for the next, and so on. We then add 8, half the unit width, because we are using drawtextcenter. The Y coordinate is not zero because that would overwrite part of the border. A value of 2 drops the digits slightly below the border.
433
71328_Pman_CH21I
434
12/14/01 2:35 PM
Page 434
Network Query Language for d = 1, 5 { c = mid(sNumber, d, 1) drawtextcenter ((d-1)*16)+8, 2, c }
The image is complete, but it does not exist on disk yet. The saveimage statement saves the image as a JPEG file named counter.jpg. The image session is no longer needed, and is terminated with closeimage. saveimage "counter.jpg" closeimage
The image is opened on the desktop with opendoc. The default application for displaying JPEG images will be launched, and counter.doc will be opened in it. opendoc "counter.jpg"
At this point, you’ve witnessed the generation of dynamic Web graphics in an NQL script.
Further Exercises You could amend this example in a number of ways. Here are some interesting modifications that can be made: ■■
Alter the Y coordinate of one of the digits for drawtextcenter, to give the illusion of a real odometer with a digit that hasn’t fully rolled into place yet.
■■
Change the file to use for counting to the registry, so that the directory the script is run from is immaterial in computing the number to display.
■■
Create an NQL script that runs as a Web application, generating and displaying an updated counter each time the page is accessed.
Chapter Summary Network Query Language can create or modify images. Graphics in GIF, JPEG, and bitmap formats can be generated. ■■
New images are created with the createimage statement.
■■
Existing images are opened for modification with the openimage statement.
■■
Images are saved to disk with the saveimage statement.
■■
Image sessions are closed with the closeimage statement.
Drawing operations allow various shapes to be drawn.
71328_Pman_CH21I
12/14/01 2:35 PM
Page 435
Graphics ■■
Circles and ellipses are drawn with the drawcircle statement.
■■
Lines are drawn with the drawline statement.
■■
Pie charts are drawn with drawpie and drawpieslice statements.
■■
Points are drawn with the drawpoint statement.
■■
Rectangles and squares are drawn with the drawrectangle statement.
■■
The drawing color is set with the drawcolor statement.
■■
The drawing width is set with the drawwidth statement.
■■
The drawing style, solid or hollow, is set with the drawstyle statement.
■■
Images or portions of images can be copied from one image to another with the imagecopy statement.
Text can be rendered onto images. ■■
The drawtext statement draws left-aligned text.
■■
The drawtextcenter statement draws centered text.
■■
The drawtextright statement draws right-aligned text.
■■
The backcolor statement sets the text background color. The text foreground color is determined by the drawing color.
■■
The drawfont statement specifies a font for text rendering.
NQL can interface with TWAIN devices, such as digital cameras and scanners. Images captured from TWAIN devices can be operated on by the graphic statements. ■■
The opentwain statement opens a TWAIN session for a device. If a specific device is not specified, it defaults to the last TWAIN device used.
■■
The closetwain statement closes a TWAIN session.
■■
An image can be scanned with the scan statement. One form of scan handles all details of device location, scanning an image and saving it to a file in a single statement.
For more control, there are TWAIN statements that operate at a lower level than the scan statement: ■■
The colordepth statement sets the color depth for a TWAIN image capture.
■■
The twaingetimage statement acquires an image from a TWAIN device and opens an image session.
■■
The twaingetsources statement returns a list of the available TWAIN devices.
■■
The twainshowsources statement displays TWAIN sources and allows the user to select one.
NQL allows your connected applications to generate graphics dynamically, create images and charts of real-time information, and capture images from digital devices.
435
71328_Pman_CH21I
12/14/01 2:35 PM
Page 436
71328_Pman_CH22I
12/14/01 2:34 PM
Page 437
CHAPTER
22 Agent Characters
On-screen characters give your scripts a personable way to present information to users on the desktop. Network Query Language has direct support for Microsoft Agent, which provides desktop animated characters that speak and move. This chapter describes how to control agent characters from NQL scripts. The tutorial at the end of the chapter enacts some Shakespeare with three agent characters.
Microsoft Agent Microsoft Agent is an interface for displaying agent characters and having them speak, move, and take actions. It is available free from Microsoft, and can be downloaded from http://msdn.microsoft.com/msagent. Figure 22.1 shows Merlin, one of the characters that comes with Microsoft Agent. Several other characters come with Microsoft Agent, and you can add your own. Many third-party characters for Microsoft Agent can be found on the Internet. Characters can speak dialogue balloons visibly on the desktop, or they can speak audibly if your PC has a text-to-speech engine installed. Agent characters have movements, such as waving or bowing. All of this can easily be put under your control when programming in NQL.
437
71328_Pman_CH22I
438
12/14/01 2:34 PM
Page 438
Network Query Language
Figure 22.1 Merlin character.
Agent Operations The NQL statements for agent character operations are listed in Table 22.1. There are function versions of some of the agent character statements. The agent character functions are shown in Table 22.2. The agent character statements and functions are described individually in the following sections.
Agent Character Sessions The NQL agent character operations are modeled on the idea of a session, in which the statements and functions must be used in a certain order. 1. An agent character session is opened with openagent. 2. Any desired series of agent operations is performed using the other agent statements. 3. The agent character session is closed with closeagent.
Multiple Agent Character Sessions NQL uses a very simple syntax for agent operations, as shown in the following line: showagent "Hello, you have new mail"
71328_Pman_CH22I
12/14/01 2:34 PM
Page 439
Agent Characters Table 22.1 Agent Character Statements STATEMENT
PARAMETERS
DESCRIPTION
closeagent
[#agent-ID]
Closes an agent session
hideagent
[#agent-ID]
Makes an agent character invisible on the desktop
listagentactions [#agent-ID]
Returns a list of available agent actions
listagents
Returns a list of available agent characters
moveagent
[#agent-ID,] x, y
Moves an agent character to a different position on the desktop
openagent
[#agent-ID,] charactername [, visible]
Opens an agent session
playagent
[#agent-ID,] action
Causes an agent character to play an action on the desktop
pointagent
[#agent-ID,] x, y
Causes an agent character to gesture toward a position on the desktop
showagent
[#agent-ID,] [x, y] [message]
Makes an agent character visible, moves it to a position, and speaks a message
Table 22.2 Agent Character Functions FUNCTION
DESCRIPTION
boolean listagentactions([#agent-ID])
Returns a list of available agent actions
boolean listagents()
Returns a list of available agent characters
boolean openagent([#agent-ID,] character-name [, visible])
Opens an agent session
When multiple agents are needed on the desktop simultaneously, identifiers distinguish one agent character session from another. In NQL, these identifiers are known as agent session IDs. An agent session ID is a name preceded by a pound sign, such as #merlin or #StockBot. When a session ID is specified, it is the first parameter of a statement or function. For example, showagent #peedy, "Hello, you have new mail"
Opening an Agent Character Session The openagent statement or function begins an agent character session. The parameters are the name of the character to use and an optional visible flag, which defaults to true.
439
71328_Pman_CH22I
440
12/14/01 2:34 PM
Page 440
Network Query Language
Some of the agent characters that come with Microsoft Agent are Merlin, Peedy, Robby, and Genie, but the system also allows custom characters to be defined. openagent [#agent-ID,] character-name [, visible] boolean openagent([#agent-ID,] character-name [, visible])
If the agent character is successfully located, it displays on the desktop (unless the visible parameter is set to false) and a success condition results (the function returns true). The following code opens an agent character with openagent. openagent "merlin"
Once an agent character has been opened, it may be positioned, made visible or invisible, made to gesture, and made to speak.
Positioning an Agent Character The moveagent statement moves an agent to a specific location on the desktop. The parameters are the X-Y coordinates to move to. moveagent [#agent-ID,] x, y
The agent moves to the specified position. It is valid to reposition an agent with moveagent whether or not it is visible. The following code opens an agent character and repositions it to the top left corner of the screen with moveagent. openagent "peedy" moveagent 0, 0
Making an Agent Character Speak The showagent statement can be used to speak a message. The message is displayed in a dialogue balloon and, if the computer supports it, is also rendered as speech. The parameters are optional X-Y coordinates and message text. showagent [#agent-ID,] [x, y] [message]
The agent is made visible, is repositioned (if coordinates were specified), and speaks the specified message. The following code uses showagent to make an agent character speak. openagent "robby" showagent "Time for your coffee break"
71328_Pman_CH22I
12/14/01 2:34 PM
Page 441
Agent Characters wait 10 showagent "Time for lunch" closeagent
Playing an Agent Action An agent character comes with actions that can be played. The playagent statement plays an action. The parameter is an action word, such as “bow.” The available actions can be determined with the listagentactions statement. playagent
[#agent-ID,] action
The agent plays the specified action. The following code makes an agent wave. playagent "wave"
Making an Agent Gesture Agent characters can gesture toward a point on the screen. The pointagent statement gestures to a specific location. The parameters are an X, Y coordinate on the screen. pointagent
[#agent-ID,] X, Y
The agent gestures toward the specified coordinate in an animation that varies from one character to the next. The following code makes an agent gesture toward the upper-left-hand corner of the screen. pointagent 0, 0
Closing an Agent Session The closeagent statement closes an agent session. closeagent
[#agent-ID]
If a script ends, any open agent sessions are closed automatically.
Showing and Hiding Agents Agent characters can be visible or invisible at times under your direct control. The showagent statement makes an agent visible. The simplest form of showagent has no parameters and makes the agent character visible on the desktop.
441
71328_Pman_CH22I
442
12/14/01 2:34 PM
Page 442
Network Query Language showagent
The converse of showagent is hideagent, which makes an agent character invisible. hideagent
Displaying Messages The showagent statement serves a number of purposes, one of which is displaying messages. The messages will be shown in a dialog balloon and, if a speech engine is installed, spoken audibly. The parameters are optional X-Y coordinates and an optional message. showagent [#agent-ID,] [x, y] [message]
The showagent statement can perform several functions. It always makes the agent character visible. If X-Y coordinates are specified, it causes the agent to reposition (like moveagent). If a message is specified, the agent speaks the message. The following code positions an agent character at a point on the screen, where it then speaks a message. showagent 300, 100, "The backup is complete".
Tutorial: Hamlet Now that you are well-versed in agent characters, let’s write a script that uses them. In this tutorial, you will create a script that launches a total of three agent characters and has them enact a brief bit of Shakespeare’s “Hamlet.” The characters will speak parts as well as make movements. Figure 22.2 shows one of the characters speaking a part. Three standard characters that come with Microsoft Agent will be used: Robby the robot will play Polonius, Merlin the magician will play King Claudius, and Peedy the parrot will play Hamlet. In order to run this tutorial, you will need Microsoft Agent installed. There are four steps in this tutorial: 1. Launch the NQL development environment. 2. Enter the Hamlet script. 3. Run the Hamlet script. 4. Understand the Hamlet script. When you are finished with this tutorial, you will have seen how to do the following in NQL:
71328_Pman_CH22I
12/14/01 2:34 PM
Page 443
Agent Characters
Figure 22.2 Peedy character playing Hamlet.
■■
Display agent characters.
■■
Reposition agent characters.
■■
Display agent character messages.
■■
Play agent character actions and gestures.
Let’s begin!
Step 1: Launch the NQL Development Environment On a Windows system, launching the NQL development environment can be accomplished by clicking on the NQL Client desktop icon, or by selecting Program Files, Network Query Language, NQL Client from the Start Menu. On other platforms, you should have a desktop icon and/or a command-line method of launching the NQL Client. At this point, you should have the NQL development environment active on your desktop, with an empty code window. Now you are ready to enter the tutorial script.
Step 2: Enter the Hamlet Script In the NQL development environment, enter the script shown in Listing 22.1 and save it under the name Hamlet.nql. Enter the script, then save it by clicking the Save toolbar button (which has a disk icon).
443
71328_Pman_CH22I
444
12/14/01 2:34 PM
Page 444
Network Query Language
If you prefer, you may copy Hamlet.nql from the companion CD. If you have installed the companion CD on your system, you will have all of the book’s tutorial materials in a \Tutorials directory on your hard drive. Click the Open toolbar button (folder icon), and select Hamlet.nql from the Tutorials\ch22 folder. At this point, the script in Listing 22.1 should be in your code window, either because you entered it by hand, or because you opened the script from the companion CD.
Step 3: Run the Hamlet Script You are now ready to run the script (and to be entertained). You can do this by selecting Build, Run from the menu, clicking the Run toolbar button, or pressing F5. Merlin (King Claudius) and Polonius (Robby) appear on the screen and interact, move, and speak dialog. Peedy (Hamlet) follows with his own movements and dialog. If this does not happen, check the following: ■■
Check your script for typographical errors.
■■
Ensure that Microsoft Agent is installed on your system, and that the Robby, Merlin, and Peedy characters have been installed.
■■
Check the NQL client’s Errors tab for error messages.
At this point you should have seen the Hamlet script run, controlling multiple agent characters. In the next step, we will dissect the script and explain exactly how it works.
Step 4: Understand the Hamlet Script We now want to make sure we understand every part of the Hamlet script. The first few lines are comments. //Hamlet - demonstrates use of agent characters to enact a bit of Shakespeare. //Note that you need to have Microsoft Agent and the characters used in //the script - you can get these at http://msdn.microsoft.com/msagent/. //Be sure to install a speech engine as well. //Dramatis personae - characters for this short take from Hamlet: // // Polonius = Robby // King Claudius = Merlin // Hamlet = Peedy
The first two characters are opened using openagent. If either one fails, the user is told the character is not present, and the script ends. //since we have multiple characters we use session identifiers //for each instance of an Agent character. We supply the false //argument so they will become visible exactly where we want them.
71328_Pman_CH22I
12/14/01 2:34 PM
Page 445
Agent Characters
//Hamlet - demonstrates use of agent characters to enact a bit of Shakespeare. //Note that you need to have Microsoft Agent and the characters used in the //script - you can get these at http://msdn.microsoft.com/msagent/. Be sure //to install a speech engine as well. //Dramatis personae - characters for this short take from Hamlet: // // Polonius = Robby // King Claudius = Merlin // Hamlet = Peedy //since we have multiple characters we use session identifiers //for each instance of an Agent character. We supply the false //argument so they will become visible exactly where we want them. if !openagent (#King, "Merlin", false) { show "You need to have the Microsoft Merlin Agent character installed" end } if !openagent (#Polonius, "Robby", false) { show "You need to have the Microsoft Robby Agent character installed" end }
//move to the starting location and then make them appear moveagent moveagent showagent showagent
#King, 300,300 #Polonius, 200,300 #King, 300,300 #Polonius, 200,300
//they are fine actors.... use some body movements playagent #Polonius, "gestureleft" playagent #King, "lookleft" continues
Listing 22.1 Hamlet script.
445
71328_Pman_CH22I
446
12/14/01 2:34 PM
Page 446
Network Query Language
//deliver the dialog showagent #Polonius, "I hear him coming: let’s withdraw, my lord." //exit stage left closeagent #Polonius closeagent #King //pause a second, for dramatic purposes sleep 1 if !openagent (#Hamlet, "Peedy", false) { show "You need to have the Microsoft Peedy Agent character installed" end } moveagent #Hamlet, 300,400 //Now Peedy can deliver a well known dialog showagent playagent showagent playagent showagent showagent showagent showagent playagent showagent showagent
#Hamlet, #Hamlet, #Hamlet, #Hamlet, #Hamlet, #Hamlet, #Hamlet, #Hamlet, #Hamlet, #Hamlet, #Hamlet,
"To be, or not to be?" "think" "That is the question." "gestureup" "Whether 'tis nobler in the mind to suffer" "The slings and arrows of outrageous fortune," "Or to take arms against a sea of troubles," "And by opposing end them?" "think" "To die," "to sleep..."
//time to take a bow! sleep 2 playagent #Hamlet, playagent #Hamlet, playagent #Hamlet, playagent #Hamlet, showagent #Hamlet, closeagent #Hamlet
"lookdownleft" "lookdownright" "lookdownleft" "lookdownright" "that’s all folks!"
end
Listing 22.1 Hamlet script (continued).
71328_Pman_CH22I
12/14/01 2:34 PM
Page 447
Agent Characters if !openagent (#King, "Merlin", false) { show "You need to have the Microsoft Merlin Agent character installed" end } if !openagent (#Polonius, "Robby", false) { show "You need to have the Microsoft Robby Agent character installed" end }
The characters are now positioned with moveagent and made visible with showagent. //move to the starting location and then make them appear moveagent moveagent showagent showagent
#King, 300,300 #Polonius, 200,300 #King, 300,300 #Polonius, 200,300
Polonius is made to play a gestureleft action and King Claudius a lookleft action with the playagent statement. //they are fine actors.... use some body movements playagent #Polonius, "gestureleft" playagent #King, "lookleft"
The showagent statement speaks a part. //deliver the dialog showagent #Polonius, "I hear him coming: let's withdraw, my lord."
Both characters are closed, and they vanish from the screen. This is the end of Act I for our script. In the next act, Hamlet (Peedy) will enter. //exit stage left closeagent #Polonius closeagent #King
After a one-second delay, a third agent character is opened with openagent.
447
71328_Pman_CH22I
448
12/14/01 2:34 PM
Page 448
Network Query Language //pause a second, for dramatic purposes sleep 1 if !openagent (#Hamlet, "Peedy", false) { show "You need to have the Microsoft Peedy Agent character installed" end }
Hamlet is moved to a point on the screen with moveagent, then made to speak dialog and perform actions repeatedly with playagent and showagent. moveagent #Hamlet, 300,400 //Now Peedy can deliver a well known dialog showagent playagent showagent playagent showagent showagent showagent showagent playagent showagent showagent
#Hamlet, #Hamlet, #Hamlet, #Hamlet, #Hamlet, #Hamlet, #Hamlet, #Hamlet, #Hamlet, #Hamlet, #Hamlet,
"To be, or not to be?" "think" "That is the question." "gestureup" "Whether 'tis nobler in the mind to suffer" "The slings and arrows of outrageous fortune," "Or to take arms against a sea of troubles," "And by opposing end them?" "think" "To die," "to sleep..."
//time to take a bow! sleep 2 playagent playagent playagent playagent showagent
#Hamlet, #Hamlet, #Hamlet, #Hamlet, #Hamlet,
"lookdownleft" "lookdownright" "lookdownleft" "lookdownright" "that's all folks!"
The show is over. The Peedy agent character is closed, and vanishes from the stage. The script ends. closeagent #Hamlet end
At this point, you’ve seen an NQL script control the locations, speech, and actions of multiple agent characters.
71328_Pman_CH22I
12/14/01 2:34 PM
Page 449
Agent Characters
Further Exercises You could amend this example in a number of ways. Here are some interesting modifications that can be made: ■■
Use different Microsoft Agent characters for the three parts.
■■
Use a different set of speech and actions for the characters.
■■
Adapt the script to present useful information from your enterprise or the Internet, such as a stock price or the current outside temperature.
Chapter Summary Agent characters allow your scripts to control desktop emissaries who can move and speak. To use agent characters in Network Query Language requires the presence of Microsoft Agent software. ■■
The listagents statement lists the available agent characters.
■■
The openagent statement opens an agent session.
■■
The showagent statement makes an agent visible, and can also position an agent or speak a message.
■■
The hideagent statement makes an agent invisible.
■■
The moveagent statement positions an agent.
■■
The listagentactions statement lists the actions an agent can perform.
■■
The playagent statement plays an agent action.
■■
The pointagent statement causes an agent to gesture toward a point on the screen.
■■
The closeagent statement closes an agent session.
Agent characters are a useful form of user interface for connected applications that reside on the desktop.
449
71328_Pman_CH22I
12/14/01 2:34 PM
Page 450
71328_Pman_CH23I
12/14/01 2:33 PM
Page 451
CHAPTER
23 Fuzzy Logic
Traditional programming relies on the concepts of true and false. The binary nature of computers has nurtured this strong reliance on two-state logic and a black-and-white view of information. Fuzzy logic, in contrast, recognizes degrees of belief and can be used to work with gray areas, partial information, and concepts such as almost. Fuzzy logic allows software to make better decisions, even if there are complex combinations of pros and cons that must be taken into account. Fuzzy logic is also a useful tool in representing the weight (relative importance) of rules. Network Query Language provides language facilities for expressing fuzzy conditions and working with fuzzy values. This chapter begins with background information on fuzzy logic, then goes on to describe how it is used in NQL. In the tutorial at the end of the chapter you will create a program that uses fuzzy logic to find and rank musical events.
Introduction to Fuzzy Logic The fundamental concept of fuzzy logic is an extremely simple one: Representing logic in the constraining black-and-white world of ones and zeroes is often inadequate for software applications that deal with the real world. To appreciate this, consider the problems that arise when attempting to represent any of the following scenarios as traditional true/false values:
451
71328_Pman_CH23I
452
12/14/01 2:33 PM
Page 452
Network Query Language ■■
Whether or not someone is tall
■■
Whether or not a vehicle is moving quickly
■■
Whether or not someone is sick
■■
Whether or not a carton is full
■■
Whether or not a price is good
■■
Whether or not two photographs are similar
■■
Whether or not someone is trustworthy
Although you can use a simple Boolean true/false value to embody these kinds of values, the results will likely be disappointing. Let’s consider the first scenario, whether or not someone is tall. If the programmer decides that anyone 6 feet high or taller is tall, then a program would consider someone with a height of 6 feet, 4 inches to be tall (true), and someone with a height of 4 feet, 3 inches as not tall (false). It is easy to see where this kind of simple representation breaks down: Someone 5 feet, 11 inches is considered short. Moreover, that person’s tallness is represented identically to someone who is only 3 inches tall! Programs that represent values so imprecisely can’t help but make poor judgments. Fuzzy logic is a far more appropriate way to represent values such as tallness. As we shall see, although fuzzy logic has a name that implies imprecision to some, the opposite is true. Fuzzy values provide a way to represent shades of meaning and degrees of belief. Programs that represent values accurately are able to make better decisions.
Fuzzy Values The key to representing information in fuzzy logic is to allow all of the real numbers between 0 and 1 to be used to represent a true/false value. For example, something could be 0.75 true, which is more true than 0.66 but less true than 0.9. In this system, 0.0 is absolutely false and 1.0 is absolutely true. The number line in Figure 23.1 illustrates how fuzzy values work. A value of 0.60 is somewhat true, in that it is more true than false. A value of 0.85 is far more true. A value of 1.0 is as true as can be. If we use fuzzy values to represent a characteristic like tallness, we can represent all degrees of tallness in the same 0.0-1.0 scale, as Figure 23.1 shows. To do so, we must
0.0
0.60
completely false
somewhat true
Figure 23.1 Fuzzy values number line.
0.85
1.0
more completely true true
71328_Pman_CH23I
12/14/01 2:33 PM
Page 453
Fuzzy Logic
0.0
0.25
0.50
3'
4'
5'
0.75
5'9" 6'
1.0
6'4"
7'
Figure 23.2 Tallness represented on a fuzzy value scale.
choose an upper limit for what 1.0 represents and a lower limit for what 0.0 represents. In Figure 23.2, we use 3 feet as a minimum height and 7 feet as a maximum height. Fuzzy values, then, allow for an unlimited amount of distinction between the two absolutes of 0.0 (completely false) and 1.0 (completely true). With the freedom of fuzzy values, you can easily represent the following categories of information: Degrees of a measurable attribute, such as tallness or speed Degrees of belief, such as “environmental conditions are safe” Concepts like nearly, mostly, almost, possibly, and hardly Ranking on a scale, such as an exam grade or a temperature Probabilities, such as the likelihood that a region will experience an earthquake
Combining Fuzzy Values Fuzzy values can be combined into composite fuzzy values. For example, the composite value largeness could be a composite of two other values: height and weight. There are many different ways to combine fuzzy values into a composite value. The simplest method is to add the individual values, then divide by the number of values so that the result is still within the standard fuzzy logic range of 0.0-1.0. For example, the composite value should I see a movie tonight might be derived from the individual values something interesting is playing tonight, I have money, and tonight is not a school night. If the latter three values were 0.7, 1.0, and 1.0, this would yield a value of (0.7+1.0+1.0)/3, or 0.9. What if you want to combine terms with an unequal weighting? In this case, the method is to again sum each of the values, but first multiplying each value by its weighting factor. The total is divided by the sum of the weights rather than the number of terms. To revisit the movie example, assume we wish the condition something interesting is playing tonight to be three times more important than the other two factors. This would be evaluated as ((0.7*3)+(1.0*1)+(1.0*1))/5, or 0.82.
Logical Operations In traditional Boolean algebra, true and false values can be combined using logical operations such as AND and OR. There are equivalent operations for fuzzy values.
453
71328_Pman_CH23I
454
12/14/01 2:33 PM
Page 454
Network Query Language ■■
A fuzzy OR operation takes the maximum of two fuzzy values. Thus, 1.0 OR 0.5 equals 1.0, and 0.1 OR 0.44 equals 0.44.
■■
A fuzzy AND operation takes the minimum of two fuzzy values. Thus, 0.6 AND 0.4 equals 0.4, and 1.0 AND 0.9 equals 0.9.
■■
A fuzzy NOT operation is performed by subtracting the value from 1.0. Thus, NOT 1.0 equals 0.0, and NOT 0.20 equals 0.80.
Fuzzy Logic Support in NQL You can choose to follow a fuzzy logic approach in just about any programming language, since fuzzy logic values can be represented as floating-point numbers. However, NQL has features expressly designed to make it natural and easy to apply fuzzy logic in your programs. NQL includes a fuzzy variable type, fuzzy logic operators, and the ability to specify fuzzy logic functions.
The NQL Fuzzy Logic Statements and Operators NQL has both statements and operators for fuzzy logic. The NQL fuzzy logic statements are listed in Table 23.1. The fuzzy operators are listed in Table 23.2. The fuzzy logic statements and operators are described individually in the following sections.
Table 23.1 Fuzzy Logic Statements STATEMENT
PARAMETERS
DESCRIPTION
condition
name var-list
Declares a fuzzy condition; followed by a code block
evaluate
name var-list
Computes a fuzzy value by executing its condition function
fuzzy
var-list
Declares one or more variables of type fuzzy
is
result-expression
Returns a fuzzy result in a condition function
is
result-expression, condition-expression
Returns a fuzzy result in a condition function if a logical condition is met
otherwise
result-expression
Returns a fuzzy result in a condition function if no other result has been specified
71328_Pman_CH23I
12/14/01 2:33 PM
Page 455
Fuzzy Logic Table 23.2 Fuzzy Logic Operators OPERATOR
DESCRIPTION
FUZZYOR
Performs a fuzzy OR operation on its two terms
^|
Performs a fuzzy OR operation on its two terms
FUZZYAND
Performs a fuzzy AND operation on its two terms
^&
Performs a fuzzy AND operation on its two terms
Fuzzy Variables One of NQL’s variable types is fuzzy. A fuzzy variable is similar to a floating-point variable, but enforces the range of 0.0—1.0. If you attempt to assign a negative value to a fuzzy variable, it will be set to 0.0. Likewise, attempting to set a fuzzy variable to a value greater than 1.0 will store 1.0. Fuzzy variables are declared with the fuzzy keyword. fuzzy Weight, Height, IsLarge Weight = 185/300 Height = 6.4/7.0 IsLarge = Weight FUZZYOR Height
Fuzzy values otherwise act like the other numeric types. You can add, subtract, multiply, and divide them. You can intermix them with other numeric types in expressions. At all times, the range of 0.0—1.0 is enforced.
Fuzzy Operators The FUZZYOR operator performs a fuzzy OR operation on its two terms. An alternate symbol for FUZZYOR is ^|. The following two expressions are functionally identical. IsLarge = Weight FUZZYOR Height IsLarge = Weight ^| Height
In addition, the standard OR function will perform a fuzzy OR if at least one of the two terms is of type fuzzy. The FUZZYAND operator performs a fuzzy AND operation on its two terms. An alternate symbol for FUZZYAND is ^&. The following two expressions are functionally identical: IsLarge = Weight FUZZYAND Height IsLarge = Weight ^& Height
In addition, the standard AND function will perform a fuzzy AND if at least one of the two terms is of type fuzzy.
455
71328_Pman_CH23I
456
12/14/01 2:33 PM
Page 456
Network Query Language
The NOT function performs a fuzzy NOT when applied to a fuzzy variable. IsSmall = NOT(IsLarge)
Condition Functions Fuzzy logic values are often created from one or more other values using specialized logic. For example, the fuzzy value reasonable price for a given price of a candy bar might be computed using rules like these: 1. If the price is less than 0.25, the result is 0.0 because the price is unacceptable (to the seller). 2. If the price is greater than 0.75, the result is 0.0 because the price is unacceptable (to the buyer). 3. Otherwise, the price is reasonable and the value is computed as (price-0.25)*2, which will map any price between 0.25 and 0.75 to the scale of 0.0 to 1.0. Although you could represent this logic using standard language statements, NQL allows you to express it more naturally through the use of a condition function. A condition function resembles a standard function, but employs the is and otherwise keywords. The is statement sets a fuzzy return value, given that its condition is true. A result expression and a condition expression are specified. If the condition expression is true, the result expression is the result that will be returned by the function. is result-expression, condition-expression
The otherwise statement sets a fuzzy return value if no other value has been specified by an is statement. It is a catch-all, in case the other logic in the function failed to set a result. otherwise result-expression
A sample condition function is shown. Given someone’s age, U.S. citizenship, and conviction record, are they eligible to run for President of the United States? An age under 35, lack of citizenship, or record of conviction will make someone ineligible. condition IsEligibleForPresident(float Age, boolean IsCitizen, boolean IsConvict) { is 0.0, Age < 35 is 0.0, NOT IsCitizen is 0.0, NOT IsConvict otherwise 1.0 }
The function, which returns a fuzzy value, may be used in an expression.
71328_Pman_CH23I
12/14/01 2:33 PM
Page 457
Fuzzy Logic Eligibility = IsEligibleForPresident(ApplicantAge, ApplicantCitizenship, ApplicationConviction)
Another way to call the function is with the evaluate statement. This evaluates a condition function and sets a fuzzy variable with the same name as the function. evaluate IsEligibleForPresident(ApplicantAge, ApplicantCitizenship, ApplicationConviction) show IsEligibleForPresident
Tutorial: Concerts Now that you are familiar with fuzzy logic, let’s put that knowledge to use in a script. In this tutorial, you will create a script that scans an XML document of concert opportunities, scoring each by weighing pros and cons, and recommends the best overall opportunity. The source will be Concerts.xml, a document included with the tutorial script on the companion CD. The script will be biased to especially prefer Classical Music and to especially avoid Hip Hop, with a neutral stance toward all other genres of music. Another bias will be a venue preference for Irvine, California and a strong preference for Las Vegas, Nevada. Lastly, prices from $1 to $100 will be ranked by price, with a 1.0 score for $0.00 (the best price of all) and a 0.0 score for ticket prices over $100 (too expensive). There are four steps in this tutorial: 1. Launch the NQL development environment. 2. Enter the Concerts script. 3. Run the Concerts script. 4. Understand the Concerts script. When you are finished with this tutorial, you will have seen how to do the following in NQL: ■■
Work with fuzzy variables.
■■
Use direct comparisons to set fuzzy values.
■■
Use condition functions to set fuzzy values.
■■
Compute combined fuzzy scores from other fuzzy values.
Let’s begin!
Step 1: Launch the NQL Development Environment Launch the NQL development environment. On a Windows system, this can be accomplished by clicking on the NQL Client desktop icon, or by selecting Program
457
71328_Pman_CH23I
458
12/14/01 2:33 PM
Page 458
Network Query Language
Files, Network Query Language, NQL Client from the Start Menu. On other platforms, you should have a desktop icon and/or a command-line method of launching the NQL Client. At this point, you should have the NQL development environment active on your desktop, with an empty code window. Now you are ready to enter the tutorial script.
Step 2: Enter the Concerts Script In the NQL development environment, enter the script shown in Listing 23.1 and save it under the name Concerts.nql. Enter the script, then save it by clicking the Save toolbar button (which has a disk icon). If you prefer, you may copy Concerts.nql from the companion CD. If you have installed the companion CD on your system, you will have all of the book’s tutorial materials in a \Tutorials directory on your hard drive. Click the Open toolbar button (folder icon), and select Concerts.nql from the Tutorials\ch23 folder.
//Concerts - ranks concert events using fuzzy logic fuzzy score, scoreGenre, scoreCity, scorePrice string BestConcert fuzzy BestScore load "concerts.xml" setinput //read concerts from XML document while inputrecord("Concert") { input Show, Performer, Genre, Dates, City, State, Zip, TicketPriceLow, TicketPriceHigh score = 0.0 scoreGenre = 0.5 if Genre=="Classical" { scoreGenre = 1.0 } if Genre=="Hip Hop" { scoreGenre = 0.0 } scoreCity = 0.25 if Genre=="Irvine" { scoreCity = 0.75 } if Genre=="Las Vegas" { scoreCity = 1.0 } evaluate scorePrice score = (scoreGenre + scoreCity + scorePrice) / 3.0
Listing 23.1 Concerts script.
71328_Pman_CH23I
12/14/01 2:33 PM
Page 459
Fuzzy Logic
if score > BestScore { BestScore = score BestConcert = Show } outputrecord "Concert" output Show, Performer, City, score } show "The best concert opportunity is\n\n{BestConcert}, with a score of {BestScore}" end condition scorePrice { is 0.0, TicketPriceLow > 100.00 is 1.0, TicketPriceLow == 0.00 otherwise TicketPriceLow/100.00 }
Listing 23.1 Concerts script (continued).
You will need to create or copy Concerts.xml, which is the data source for the script. Concerts.xml is shown in Listing 23.2. The Tutorials\ch23 folder contains this file, which needs to be in the same directory as your script.
<Show>Chamber Music Yo Yo Ma Classical 10/01/02 through 11/15/02 Boston <State>MA 142024 <TicketPriceLow>$35.00 <TicketPriceHigh>$75.00 continues
Listing 23.2 Concerts.xml file.
459
71328_Pman_CH23I
460
12/14/01 2:33 PM
Page 460
Network Query Language
<Show>Hip Happenings Thumper Hip Hop 10/13/02 through 10/16/02 Memphis <State>TN 35442 <TicketPriceLow>$27.00 <TicketPriceHigh>$60.00 <Show>Goin’ Home The Rocking Chair Gang Country 10/25/02 through 11/15/02 Nashville <State>TN 37617 <TicketPriceLow>$30.00 <TicketPriceHigh>$109.00 <Show>Orchestrations Pacific Symphony Orchestra Classical 10/01/02 through 10/31/02 Irvine <State>CA 92720 <TicketPriceLow>$37.50 <TicketPriceHigh>$90.00 <Show>Panoramas 2002 Panorama Country 09/23/02 through 10/02/02 Las Vegas <State>NV 89112 <TicketPriceLow>$29.00 <TicketPriceHigh>$150.00
Listing 23.2 Concerts.xml file (continued).
71328_Pman_CH23I
12/14/01 2:33 PM
Page 461
Fuzzy Logic
At this point, the script in Listing 23.1 should be in your code window, either because you entered it by hand or because you opened the script from the companion CD. Your script and the Concerts.xml file shown in Listing 23.2 should be in the same directory. You are now ready to run the script.
Step 3: Run the Concerts Script Now run the script. You can do this by selecting Build, Run from the menu, clicking the Run toolbar button, or pressing F5. When the script completes, a message displays the best opportunity, and a summary of all opportunities examined—and their scores—is in the Output tab as XML. If the script does not seem to be working, check the following: ■■
Check for typographical errors in your script.
■■
Make sure Concerts.nql and Concerts.xml are present in the same directory.
■■
Check the NQL client’s Errors tab for error messages.
At this point you should have seen the Concerts script run, using fuzzy logic to score concert events and select the best opportunity.
Step 4: Understand the Concerts Script We now want to make sure we understand every part of the Concerts script. The first line is a comment line. //Concerts - ranks concert events using fuzzy logic
Variables are defined. The scoring variables include the total score, plus scores for genre, city, and price. They will hold fuzzy values and are thus declared to be of type fuzzy. A string and a fuzzy variable are declared to hold, respectively, the best concert name and the best score. As fuzzy scores are computed for each concert opportunity, every time a new high score is encountered these two variables will be updated. fuzzy score, scoreGenre, scoreCity, scorePrice string BestConcert fuzzy BestScore
The concerts.xml file is loaded onto the stack and assigned to become the input stream. This permits the use of the inputrecord and input statements to extract data from the XML. load "concerts.xml" setinput
A while loop processes each record, which is identified by the and tags. The use of inputrecord searches for the next occurrence of these tags.
461
71328_Pman_CH23I
462
12/14/01 2:33 PM
Page 462
Network Query Language //read concerts from XML document while inputrecord("Concert") {
In the while loop, the individual fields of the concert are loaded into variables of the same name, with an input statement. input Show, Performer, Genre, Dates, City, State, Zip, TicketPriceLow, TicketPriceHigh
The total score is initialized to 0.0. We will next be coming up with three subscores, which will be amalgamated into a final score shortly. score = 0.0
First, the genre is examined and scored. The initial score is a neutral 5.0, pending special cases. A genre of “Classical” raises the score to 1.0. A genre of “Hip Hop” lowers it to 0.0. scoreGenre = 0.5 if Genre=="Classical" { scoreGenre = 1.0 } xif Genre=="Hip Hop" { scoreGenre = 0.0 }
Second, the city is examined and scored. The initial score is 0.25, indicating a dislike of travel to just about anywhere. If the city is Irvine, California, the score raises to a respectable 0.75. If the venue is Las Vegas, a favorite, a full 1.0 is scored. scoreCity = 0.25 if Genre=="Irvine" { scoreCity = 0.75 } if Genre=="Las Vegas" { scoreCity = 1.0 }
Third, the price is scored, this time with a condition function. The variable scorePrice is set by the function. evaluate scorePrice
The total score can now be computed. The genre, city, and price scores are equal factors, so coming up with a total score is a simple matter of adding the three scores and dividing by three. score = (scoreGenre + scoreCity + scorePrice) / 3.0
The score is now checked to see if it is a new best score. If so, BestScore is set to the new high score, and BestConcert is set to the name of the show.
71328_Pman_CH23I
12/14/01 2:33 PM
Page 463
Fuzzy Logic if score > BestScore { BestScore = score BestConcert = Show }
A summary of the concert and its score are now output in XML. The outputrecord statement groups the output for this concert in a record. The output statement outputs some of the concert fields. The results will be visible in the Output tab of the development environment after the script ends. outputrecord "Concert" output Show, Performer, City, score }
The while loop continues until there are no more concert opportunities to examine. A show statement declares the winning opportunity, the concert that scored the highest. The script ends. show "The best concert opportunity is\n\n{BestConcert}, with a score of {BestScore}" end
Lastly, we have the definition of scorePrice, a fuzzy condition function. The low ticket price is checked against $100.00: If greater, the lowest possible score will be returned, 0.0. If equal to $0.00, the best possible score is returned, 0.0. Otherwise, the score is rated in the range $0.00 = 0.0 through $100.00 = 1.0. The result sets the variable scorePrice, which the main code uses in its computation of a total score. condition scorePrice { is 0.0, TicketPriceLow > 100.00 is 1.0, TicketPriceLow == 0.00 otherwise TicketPriceLow/100.00 }
At this point, you’ve seen how to perform fuzzy logic calculations in an NQL script.
Further Exercises You could amend this example in a number of ways. Here are some interesting modifications that can be made: ■■
Alter the likes and dislikes of the script to reflect different tastes.
■■
Change or extend the Concerts.xml file. See how the script handles mixtures of positive and negative characteristics in the data.
463
71328_Pman_CH23I
464
12/14/01 2:33 PM
Page 464
Network Query Language
Chapter Summary Fuzzy logic replaces the strict concept of true and false with infinite degrees in between the two extremes of 0.0 and 1.0. This makes it possible to better represent such things as the presence of characteristics, degrees of belief, and probabilities. The use of fuzzy values allows software to deal with real-world values and make better decisions, even with partial information. Fuzzy values may be combined in a variety of ways to compute aggregate values, including summing individual values and dividing by the number of terms or weighting factors. Logical operations such as AND and OR have been defined for fuzzy logic. Although fuzzy logic is primarily an approach the developer uses, NQL includes specific features to assist. ■■
There is a fuzzy variable type for holding fuzzy values.
■■
Fuzzy operators perform logical operations on fuzzy values.
■■
Fuzzy condition functions make it easy to express the logic for computing fuzzy values.
The NQL statements for fuzzy logic are condition, evaluate, fuzzy, is, and otherwise. The NQL fuzzy operators are FUZZYAND and FUZZYOR.
71328_Pman_CH24I
12/14/01 2:31 PM
Page 465
CHAPTER
24 Neural Networks
One of the most promising developments of artificial intelligence research is the neural network: software modeled after the workings of the human brain. Neural networks are fascinating in that they can learn, useful for their ability to match patterns and make predictions, and indispensable in that they can be taught tasks you may not have an algorithm for. Best of all, they are practical and can be applied to solve real-world problems. For all their power, neural networking has yet to become a standard item in the programmer’s tool chest. Network Query Language includes support for four kinds of neural networks. This chapter begins with background information on neural networks, then goes on to describe how they are created, trained, and applied in NQL. In the tutorial at the end of the chapter you will create a neural network capable of recognizing letters, digits, and other symbols.
Introduction to Neural Networks Most programmers have never worked with neural networks, so it is essential to introduce the topic before going into NQL specifics. Neural networks can’t be used effectively without an understanding of their abilities and limitations. The following introduction puts neural networks into perspective. Neural networks are a form of artificial intelligence, a field known for its failures as well as its successes. It is important to not confuse neural networks and artificial intelligence
465
71328_Pman_CH24I
466
12/14/01 2:31 PM
Page 466
Network Query Language
with actual thinking, which computers are not capable of. At the same time, dismissing neural networks out of hand would deprive you of a powerful tool.
What Is a Neural Network? What exactly is a neural network? The term is unnerving to some people, evoking images of Frankenstein or robots. The term neural networking implies imitating the way the human brain works: simulating in software what we know about the workings of the human brain. We still know very little about how the brain functions, so neural networks are nowhere near being able to think. However, they are quite good at learning. That’s really what a neural network is: software that can learn. Neural networks are one of the few areas of computer science that don’t require an algorithm, plan, or list of steps to follow. You can teach a neural network something by showing it examples of what you want. A learning system like this is tremendously valuable; there are some tasks we don’t know how to approach using traditional programming methods. For example, imagine you were tasked with the job of writing software that matches fingerprints against fingerprint archives, a mammoth challenge. With a neural network, you have the option of training software by showing it fingerprint examples rather than writing complex, challenging code. Neural networks must be used with care as they are not guaranteed to generate a correct answer. A well-trained network of the correct type and arrangement can make predictions that seem almost magical; a poorly-trained or poorly-designed network will not be very useful.
Applications for Neural Networks What can you do with a neural network? Generally speaking, the applications are pattern matching, prediction, and analysis of information. Neural networks are being used a lot more than you might realize. Here are some examples of how neural networks are being put to use today: ■■
The wine industry has computers classify the grade of corks using neural networks.
■■
Analysts on Wall Street use neural networks to forecast how stocks are likely to perform.
■■
Economists in all major governments use neural networks to forecast the economy.
■■
Credit card systems use neural networks to detect when someone is likely to be using a card fraudulently.
■■
Petroleum companies use neural networks for process control.
■■
Neural networks grade pig carcasses in Danish slaughterhouses.
■■
Neural networks are used for cancer diagnosis in medical clinics.
71328_Pman_CH24I
12/14/01 2:31 PM
Page 467
Neural Networks ■■
When an insurance claim is made, the likelihood of insurance fraud is checked by neural networks.
■■
Campaign committees use neural networks to identify the demographics of swing voters.
■■
Neural networks are used in the telecommunications industry to route long distance connections.
■■
The engine control of the Concorde is optimized with a neural network.
■■
Aerospace firms use neural networks to identify and retrieve 2-D and 3-D engineering designs—so they don’t create a part they have already made for some other project.
■■
Electric companies use neural networks to reroute the power grid around trouble spots.
How Neural Networks Work To understand how software neural networks work, we first need to know something about the genuine article: biological neurons in the human brain. Even though much of the brain is still a mystery, science has learned quite a bit about individual brain cells and how they interact with each other.
Biological Neurons Biological neurons, or brain cells, seem fairly simple at the individual level. Figure 24.1 shows a neural brain cell, or neuron. The neuron receives inputs on its dendrites in the form of electrical impulses. The core, or soma, performs some processing on those inputs. If the result of that processing
dendrites
core
dendrites axon Figure 24.1 A biological neuron.
467
71328_Pman_CH24I
468
12/14/01 2:31 PM
Page 468
Network Query Language
reaches a certain threshold, the axon generates output that is passed on to other neurons.
The Connections Are What Matter Neurons are organized into layers, with a lot of complex connections between the neurons. The big thing about neurons is that the connections matter more than the neurons themselves do. As the brain learns, it alters the strength of the connections between neurons. This explains why the loss of a single brain cell is not catastrophic to the brain.
Artificial Neurons So what does a software simulation of a neuron look like? Figure 24.2 shows the composition of an artificial neuron. Like the biological neuron, it must receive inputs, perform processing, and generate output. It must have connections to other neurons. Most importantly, it must be able to adjust the weights of those connections as it learns. Whereas biological neurons pass electrical impulses over connections of varying strengths, artificial neurons pass numbers over connections of various weight.
The Artificial Neural Network (ANN) When you group multiple artificial neurons into a network, you end up with an artificial neural network, or an ANN. When people use the popular term neural network, they really mean an ANN; after all, the brain is a neural network, too. Figure 24.3 shows an ANN. There are quite a few ways to arrange neurons, and a few different theories about what works best, but here are some typical characteristics of neural networks: ■■
The neurons are arranged in layers.
■■
The first layer is an input layer.
■■
The final layer is an output layer.
■■
There are frequently one or more hidden layers.
■■
Each neuron in a layer is connected to every other neuron in an adjacent layer. weights
inputs from other neurons
combination function
Figure 24.2 An Artificial Neuron.
activation function
output function
weights outputs to other neurons
71328_Pman_CH24I
12/14/01 2:31 PM
Page 469
Neural Networks
Figure 24.3 Artificial neural network.
Unlike the brain, artificial neural networks usually only connect neurons from one layer to another. The brain has more complex connections. There are different architectures for ANNs, reflected in the number of layers and the way in which they are connected. Some pass data in a forward direction only. Others feed backward and then forward as they learn.
The Learning Process Neural networks have two modes of operation: 1. Training 2. Processing You first train a neural network with training data, then put it to use processing live data. Training the network is through example. Sets of input values and expected output values are supplied. In training mode, the network processes the input values and compares its own output values to the expected output values. At first they will be very different. The network then adjusts its weights and repeats the process, until it is producing output values acceptably close to the expected output values. In processing mode, input values are supplied and the neural network generates output values in response. If the neural network has been well-trained, it will perform well even with input values it has never encountered before. What has happened is that the neural network has turned itself into the kind of device you need it to be by learning.
469
71328_Pman_CH24I
470
12/14/01 2:31 PM
Page 470
Network Query Language
This learning ability can seem kind of spooky, but it’s actually fairly simple under the hood. When you first create a neural network, it is full of random numbers and generates absolute gibberish. Its sole redeeming value is that you can show it training data—inputs and expected outputs—that it can learn from. It does this by processing the inputs and comparing its own outputs (nonsense at first) against the expected outputs. It then alters the weights between its neurons to better favor these results and repeats the entire process. This cycle of processing training inputs, comparing the actual output to the expected output, and adjusting weight continues as long as necessary until the neural network has literally turned itself into a machine able to generate correct values. In ideal situations, the neural network is then able to process new (previously unseen) inputs and generate accurate outputs. This is what makes a neural network useful for pattern matching and prediction applications. What is really neat about this is that you can train a neural network to do something that you yourself have no idea how to go about doing. Let’s say you want to do pattern recognition, so that your computer can identify certain kinds of objects from images. That’s hard to do, and beyond the ability of many programmers. With a neural network, you don’t have to know how to do it. You feed lots of pictures and describe the objects they represent to the network. Once it has learned enough, it gets pretty good at identifying new pictures of objects it has seen in the past.
The Catch If neural networks sound too good to be true, that’s because they sometimes are! Despite their utility, the actual job of choosing an architecture for a neural network (How many layers? How many nodes?) is something of a black art. Likewise, properly training a neural network is a mysterious discipline. One might design a neural network, carefully train it, and not find out how good or bad the system is until it is tried. With new inputs not previously encountered, you are trusting the neural network. Keep in mind that a neural network cannot tell you how it arrives at the conclusions it does.
Neural Network Architectures There are different ways to arrange neural networks. An artificial neural network consists of nodes (artificial neurons) that are usually arranged in layers. The first layer of a neural network is known as the input layer. The final layer of a neural network is known as the output layer. Depending on the type and size of the network, there may or may not be one or more hidden layers between the input layer and the output layer. The nodes are connected with varying weights (connection strengths). These weights are altered as the network is being trained to learn a particular kind of task. NQL supports the following four neural network architectures: ■■
Adaline network
■■
Backpropagation forward-feed network
■■
Kohonen self-organizing network
■■
Bidirectional associative memory (BAM)
71328_Pman_CH24I
12/14/01 2:31 PM
Page 471
Neural Networks
Figure 24.4 Adaline network with four input nodes.
Adaline Networks A simple kind of neural network is the ADAptive LINear Element, or Adaline (Figure 24.4). This kind of network is also known as a perceptron. In an adaline network, there is an input layer and an output layer, but no hidden layers. The output layer has only one node, which means the adaline network is only useful for sorting its input data into one of two categories. Adaline networks are trained using a supervised learning process. Data sets of input values and the desired output values are run through the network repeatedly, while the network adjusts its connection weights between nodes to reduce the degree of error. Eventually the network becomes a generalized system that can process new values. Adaline networks can be trained to map their input values to one of two categories. For example, you could use an adaline network to learn to distinguish between points on a chart that are above or below a particular formula—perhaps indicating profit or loss. In an adaline network, input values and the output value are in the range ⫺1.0 to 1.0. Rounding the output value to ⫺1 or ⫹1 is common. Although somewhat limited, adaline networks form the basis from which many of the more sophisticated kinds of neural networks are created.
Backpropagation Networks A backpropagation forward-feed network has three (or more) layers (Figure 24.5). The input, hidden, and output layers can have any number of nodes. The greater complexity of the backpropagation network allows it to be used for more ambitious tasks than the primitive Adaline network. The middle layer of nodes provides an additional level of processing that permits multiple output nodes. Backpropagation networks are trained using a supervised learning process. Data sets of input values and desired output values are run through the network repeatedly, while the network adjusts its connection weights between nodes to reduce the degree of error. Eventually the network becomes a generalized system that can process new values.
471
71328_Pman_CH24I
472
12/14/01 2:31 PM
Page 472
Network Query Language
Figure 24.5 Backpropagation Network with five input nodes, four hidden nodes, and three output nodes.
Backpropagation networks are one of the more popular forms of neural networks in use today. They are able to learn to recognize patterns, such as handwriting, speech, or images. They can be used to make predictions, such as forecasting economic activity or indicating the likelihood that a credit card transaction is fraudulent based on the user’s previous profile of use. In a backpropagation network, input values and output values are in the range 0.0 to 1.0. Rounding the output value to 0 or 1 is common.
Kohonen Networks Kohonen networks, also called self-organizing networks, map a set of input values onto a grid (Figure 24.6). Unlike the other kinds of neural networks, Kohonen networks don’t have to be trained with a set of input and output values. As they process data, Kohonen networks cluster similar data. These kinds of networks are called self-organizing because they do not need to undergo any kind of supervised training using known desired output values. Instead, they undergo unsupervised training: As a Kohonen network processes more and more input data, like values are grouped together. The results group together data with inherent similarities. The other types of neural networks can be taught a particular task through the use of training data. Kohonen networks are suited for operating on a set of data where the kinds of results expected are not known in advance. For example, you might run customer and order profiles through a Kohonen network to discover new affinities between customer demographics and product types.
71328_Pman_CH24I
12/14/01 2:31 PM
Page 473
Neural Networks
Figure 24.6 Kohonen Network with three input nodes and a 3 ⫻ 3 output grid.
In a Kohonen network, input values and output values are in the range 0.0 to 1.0. The output for a set of input patterns is a grid location, expressed as a row and column coordinate.
Bidirectional Associative Memory (BAM) Networks A bidirectional associative memory (BAM) network functions like a random-access memory and is able to remember patterns (Figure 24.7). BAM networks have an input layer and an output layer.
Figure 24.7 BAM Network with five input nodes and four output nodes.
473
71328_Pman_CH24I
474
12/14/01 2:31 PM
Page 474
Network Query Language
A BAM network is trained using a supervised learning process. Data sets of input values and desired output values are run through the network repeatedly, while the network adjusts its connection weights between nodes to reduce the degree of error. Eventually the network memorizes the input value and the corresponding output values. A BAM network is a good choice if you will be issuing input values to the network that you are sure were also a part of the training data set. A BAM network is not the best choice for a predictive system, in which new input values have to be handled. One good use for BAM networks is to memorize images. In a BAM network, only ⫺1.0 and 1.0 are valid input and output values (values in between are disallowed).
Neural Network Support in NQL NQL includes about a dozen statements related to neural networks, but only a handful are needed on a regular basis. There are two basic sequences of operation: ■■
Create-and-train. Create, train, and save a new neural network.
■■
Open-and-run. Open a previously saved neural network and process live data with it.
The first sequence involves issuing createneural, trainneural, saveneural, and closeneural statements. For example: createneural "backprop", 3, 4, 2 trainneural "net1.trn" saveneural "net1.nnf" closeneural
The second sequence involves issuing openneural, processneural, and closeneural statements. For example: openneural "backprop", "net1.nnf" processneural "net1.inp", "net1.out" closeneural
The NQL Neural Network Statements The NQL neural network statements are listed in Table 24.1. Of these, the five commonly used statements are createneural, openneural, processneural, saveneural, and trainneural. There are function versions of some of the neural network statements. Table 24.2 lists the neural network functions. The neural network statements and functions are described individually in the following sections.
71328_Pman_CH24I
12/14/01 2:31 PM
Page 475
Neural Networks Table 24.1 Neural Network Statements STATEMENT
PARAMETERS
closeneural
DESCRIPTION Closes the neural network
createneural
“adaline”, inputs
Creates an adaline network
createneural
“backprop”, inputs, hidden, outputs
Creates a backpropagation network
createneural
“kohonen”, inputs, x, y
Creates a Kohonen network
createneural
“bam”, inputs, outputs
Creates a bidirectional associative memory network
hideneural
Hides the neural network display
logneural
filespec
Logs neural network details to the specified text file
neuraltimeout
seconds
Causes training or processes to time-out after the specified interval
openneural
type, filespec
Opens a previously-saved neural network
processneural
inputfile, outputfile
Runs a neural network against the specified input data file
roundneural
boolean
Enables or disables rounding of output values
saveneural
filespec
Saves the neural network to disk
setneural
learning-rate
Sets parameters for an adaline network
setneural
learning-rate, momentum
Sets parameters for a backpropagation network
setneural
initial-learning-rate, final-learning-rate, initial-neighborhoodsize, neighborhooddecrement-level, maxiterations
Sets parameters for a Kohonen network
showneural
Displays a neural network diagram with default title, size, and position
showneural
title
Displays a neural network diagram with the specified title
showneural
title, x, y
Displays a neural network diagram with the specified title and position continues
475
71328_Pman_CH24I
476
12/14/01 2:31 PM
Page 476
Network Query Language Table 24.1 Neural Network Statements (continued) STATEMENT
PARAMETERS
DESCRIPTION
showneural
title, x, y, width, height
Displays a neural network diagram with the specified title, position, and size
trainneural
trainingfile
Trains a neural network with the specified training file
Table 24.2 Neural Network Functions FUNCTION
DESCRIPTION
boolean closeneural()
Closes the neural network
boolean openneural(type, filespec)
Opens a previously-saved neural network
boolean processneural(inputfile, outputfile)
Runs a neural network against the specified input data file
Creating a New Neural Network The createneural statement creates a new neural network (in memory). The first parameter is the network type, which must be one of the following: adaline, backprop, kohonen, or bam. The createneural statement requires additional parameters. The number and nature of those parameters vary depending on the network type, and are individually described in the four sections that follow.
Creating an Adaline Network To create an adaline network, this form of the createneural statement is used: createneural "adaline", inputs
The first parameter specifies the network type, adaline. The second parameter specifies the number of input nodes, which must be greater than or equal to 1. There is no need to specify hidden layer nodes or output nodes, because adaline networks have no hidden layer and there is always exactly one output node. The following sample createneural statement creates an adaline network with four input nodes and one output node. createneural "adaline", 4
71328_Pman_CH24I
12/14/01 2:31 PM
Page 477
Neural Networks
Creating a Backpropagation Network To create a backpropagation network, this form of the createneural statement is used: createneural "backprop", inputs, hidden, outputs
The first parameter specifies the network type, backprop. The second parameter specifies the number of input nodes, which must be greater than or equal to 1. The third parameter specifies the number of nodes in the hidden layer, a number greater than or equal to 1. The fourth parameter specifies the number of output nodes, which must be greater than or equal to 1. The following sample createneural statement creates a backpropagation network with two input nodes, a hidden layer with three nodes, and one output node. createneural "backprop", 2, 3, 1
Creating a Kohonen Network To create a Kohonen self-organizing network, this form of the createneural statement is used: createneural "kohonen", inputs, x, y
The first parameter specifies the network type, kohonen. The second parameter specifies the number of input nodes, which must be greater than or equal to 1. The third parameter specifies the X dimension of the results grid. The fourth parameter specifies the Y dimension of the results grid. The following sample createneural statement creates a Kohonen network with eight input nodes and a 3 ⫻ 3 results grid. createneural "kohonen", 8, 3, 3
Creating a BAM Network To create a BAM network, this form of the createneural statement is used: createneural "bam", inputs, outputs
The first parameter specifies the network type, bam. The second parameter specifies the number of input nodes, which must be greater than or equal to 1.
477
71328_Pman_CH24I
478
12/14/01 2:31 PM
Page 478
Network Query Language
The third parameter specifies the number of output nodes, which must be greater than or equal to 1. The following sample createneural statement creates a BAM network with 16 input nodes and three output nodes. createneural "bam", 16, 3
Training a Neural Network Once a neural network has been created or opened, it can be trained. The trainneural statement specifies the name of a training data file. The training file contains both input values and expected output values. The neural network repeatedly processes the data in the training file, adjusting connection weights between neurons, until it starts generating similar output. trainneural "sample.trn"
Once a network has been trained, the usual next step is to save it to disk so that the network can be used in the future without repeating the training step. What is in the training file? One data set per line, which includes both inputs and outputs. Numbers can be separated with spaces and/or commas. If you had a neural network with two inputs and one output, a training file might look like this: 0 0 1 1
0,0 1,1 0,1 1,0
This particular training file is very simple: It teaches a neural network how to perform a logical operation, the Exclusive-OR function. The preceding training file is interpreted as follows: ■■
Inputs 0 and 0 should yield an output of 0.
■■
Inputs 0 and 1 should yield an output of 1.
■■
Inputs 1 and 0 should yield an output of 1.
■■
Inputs 1 and 1 should yield an output of 0.
At times it is helpful to be able to express the input data on more than one line; this is especially true if the input data represents an image, where there are rows of pixels to be represented. In these cases, the plus sign (⫹) may be used to continue one line to the next. The following partial example training file teaches responses to board positions in a Tic Tac Toe game. The use of continuation lines allows the board positions to be expressed in a visually familiar 3 ⫻ 3 grid. There are nine inputs and four outputs for each record of training information. Although they could be coded into a single line, the use of continuation lines makes the information more meaningful for the person entering or modifying the training data.
71328_Pman_CH24I
12/14/01 2:31 PM
Page 479
Neural Networks 0 0 0 0
0 0 0 0
0+ 0+ 0+ 0 1
1 0 0 1
0 0 0 0
0+ 0+ 0+ 0 1
0 0 0 1
1 0 0 0
0+ 0+ 0+ 0 0
Saving a Neural Network The saveneural statement saves the current open network to a disk file. A filename is specified. The file type .nnf (neural network file) is recommended as a convention. saveneural "test.nnf"
After the network has been saved, it is possible to open it in the future to reuse the network.
Closing a Neural Network When finished using a neural network, the closeneural statement closes the network and releases its resources. closeneural
Opening a Neural Network A previously saved neural network file (saved with saveneural) can be opened with the openneural statement. The network type and filename are specified. openneural "backprop", "test.nnf"
After the network has been opened, it can process data.
Processing Data with a Neural Network To process data with a neural network, first open it and then use the processneural statement. The two parameters are the names of an input file and an output file. The input
479
71328_Pman_CH24I
480
12/14/01 2:31 PM
Page 480
Network Query Language
file must be an existing file that contains input data, one set of values per line. Lines that end in a plus sign (⫹) are continued on to the next line. The output file is generated by the network and contains output values, one set per line, that correspond to the input data. processneural "test1.inp", "test1.out"
The output results will be floating-point numbers or rounded to integer whole numbers, depending on a rounding setting. The default condition is to enable rounding. To change the setting, use the roundneural statement. roundneural false
Displaying a Neural Network You can see a visible diagram of a neural network while it is open. The showneural statement displays a window showing the network’s topology (Figure 24.8). The hideneural statement removes the diagram window. hideneural
Figure 24.8 Example of the diagram window displayed by showneural.
71328_Pman_CH24I
12/14/01 2:31 PM
Page 481
Neural Networks
Tutorial: Recognizing Symbols Now it is time to see neural networks in action. In this tutorial, you will create a neural network that is able to recognize character symbols such as A, B, and C from a matrix of pixels. When finished, the network will examine characters such as the ones shown in Figure 24.9 and do a fairly good job of identifying them. There are five steps in this tutorial: 1. Select a neural network design. 2. Create a training file. 3. Create and run a training script. 4. Create an input file. 5. Create and run a processing script.
Step 1: Select a Neural Network Design We first need to consider the type and topology of the neural network that will be needed. Since the application is to supply training data and then process additional data, the appropriate choice is a backpropagation network. The topology of the network is primarily influenced by the number of inputs and outputs that will be needed. The number of inputs depends on the size of the character matrix (box of pixels) we will be processing. For the purposes of this tutorial, we will use a 5 ⫻ 7 pixel character matrix. Because we are assuming only two kinds of pixels (black and white), the total number of inputs will be 35 bits. The number of outputs depends on the number of symbols we want to be able to accommodate. For this tutorial, we’ll use four bits of output, which is enough to accommodate 16 symbols. One final decision about our network design is the number of nodes in the center, hidden layer of neurons. Since there is no exact rule of thumb, we’ll use a value of 24, somewhere between the 35 inputs and the four outputs. You can easily change the number of inputs or outputs to reflect other sizes, and you should feel free to experiment after completing this tutorial; just make sure your training file and input file contain the expected number of inputs and outputs. Similarly, you can experiment with varying the number of nodes in the hidden layer of neurons.
Figure 24.9 Character Symbols.
481
71328_Pman_CH24I
482
12/14/01 2:31 PM
Page 482
Network Query Language
At this point, we know our neural network design. It will be a backpropagation network with three layers. The first layer is the input layer and has 35 inputs, reflecting a 5 ⫻ 7 matrix of pixels. The second layer is the output layer and has 24 neurons. The third and final layer is the output layer of four outputs.
Step 2: Create a Training File Now it is time to come up with the training data for the neural network. This will require the creation of a text data file containing sequences of inputs and outputs. Because we want to be able to handle variations in the ways characters are expressed, it is important to have more than one example of each symbol in the training file. For example, you might include three or four variations of the letter A. The training file we will use will be named symbols.trn. You can create this file using a text editor such as WordPad or NotePad, or use the symbols.trn file included on the companion CD. Whether you create your own training file or use the one from the CD, the training information must be formatted in accordance with the neural network design: each training set is 35 input values followed by four output values. Listing 24.1 is a partial listing of the training data. In this case, we have arranged the input values on multiple lines to make it easy to see the symbol being described. At this point you should have created a text file named symbols.trn with training data similar to that shown in Listing 24.1, or copied this file from the companion CD.
Step 3: Create and Run a Training Script Now that the training file has been created, we can write and run the NQL script that will create, train, and save our neural network. 1. Launch the NQL development environment from your desktop. 2. Enter this script, or copy symbols1.nql from the companion CD. createneural "backprop", 35, 24, 4 trainneural "symbols.trn" saveneural "symbols.nnf" closeneural
3. Save the script as symbols1.nql in the same directory where you saved the neural network training file, symbols.trn. 4. Now, run the script. If the script runs successfully, a new file will be created named symbols.nnf in the same directory where you saved the NQL script. If the script does not run successfully, this is probably due to a typo in the script or the needed training file (symbols.trn) is missing or has invalid contents. Let’s be clear on how the statements in the script work. The first line of the script creates a backpropagation neural network in memory of 35 input nodes, 24 hidden
71328_Pman_CH24I
12/14/01 2:31 PM
Page 483
Neural Networks
0 0 0 0 0 0 0 0
0 0 0 0 0 0 0 0
0 0 0 0 0 0 0 0
0 0 0 0 0 0 0 0
0+ 0+ 0+ 0+ 0+ 0+ 0+ 0,0 0 0 0
; 0 = blank
0 0 1 1 1 1 1
0 1 0 1 0 0 0
1 0 0 1 0 0 0
0 1 0 1 0 0 0
0+ 0+ 1+ 1+ 1+ 1+ 1,0 0 0 1
; 1 = A
0 0 0 0 1 1 1
0 0 1 1 0 0 0
0 1 0 1 0 0 0
0 0 1 1 0 0 0
0+ 0+ 0+ 0+ 1+ 1+ 1,0 0 0 1
; 1 = A
1 1 1 1 1 1 1
1 0 0 1 0 0 1
1 0 0 1 0 0 1
1 0 0 1 0 0 1
0+ 1+ 1+ 0+ 1+ 1+ 0,0 0 1 0
; 2 = B
1 1 1 1 1 1 1
1 0 0 1 0 0 1
1 0 0 1 0 0 1
1 0 1 1 0 0 1
0+ 1+ 0+ 1+ 1+ 1+ 0,0 0 1 0
; 2 = B
Listing 24.1 Neural network training file.
layer nodes, and four output nodes. The second line of the script trains the neural network by processing the input and output values from the training file, symbols.trn. The third line of the script saves the neural network to disk as a neural network file named symbols.nnf. Lastly, the fourth line of the script closes the neural network.
483
71328_Pman_CH24I
484
12/14/01 2:31 PM
Page 484
Network Query Language
At this point you should have created, saved, and run an NQL script that looks identical to the one shown.
Step 4: Create an Input File In step 2 we created a text file that contained training data. Now it is time to create a text file with the true input data we wish to process. This will again require creation of a text data file, this time containing only inputs—the outputs will be produced by the neural network itself in step 5. The input file we will use will be named symbols.inp. You can create this file using a text editor such as WordPad or NotePad, or use the symbols.inp file included on the companion CD. Whether you create your own input file or use the one from the CD, the input information must be formatted in accordance with the neural network’s expectations: Each input set contains 35 inputs. Listing 24.2 is a partial listing of an appropriate input data file. In this case, we have arranged the input values on multiple lines to make it easy to see the symbol being described. Notice that we’re free to vary from the original set of training data: Our neural network is intended to recognize new previously-unseen variations of symbols. At this point you should have created a text file named symbols.inp with input data similar to that shown in Listing 24.2, or copied this file from the companion CD.
Step 5: Create and Run a Processing Script Now that the input file has been created, we can write and run the NQL script that will open the previously-created neural network, process the input data, and generate results. 1. Launch the NQL development environment from your desktop. 2. Enter this script, or copy symbols2.nql from the companion CD. openneural "backprop", "symbols.nnf" processneural "symbols.inp", "synmbols.out" closeneural
3. Save the script as symbols2.nql in the same directory where you saved the other neural network files. 4. Now, run the script. If the script runs successfully, a new file will be created named symbols.out in the same directory where you saved the NQL script. If the script does not run successfully, this is probably due to a typo in the script or the needed input file (symbols.inp) is missing or has invalid contents. To view the results, open symbols.out in a text editor. Each line contains the results from processing a set of input bits. The values in this case indicate which symbol the network identified with each input character: 1 for A, 2 for B, and so on. Listing 24.3 shows a partial listing of the output results for the input data provided on the CD.
71328_Pman_CH24I
12/14/01 2:31 PM
Page 485
Neural Networks
0 0 0 0 0 0 0 0
0 0 0 0 0 0 0 0
0 0 0 0 0 0 0 0
0 0 0 0 0 0 0 0
0+ 0+ 0+ 0+ 0+ 0+ 0+ 0
1 1 1 1 1 1 1
1 0 0 1 0 0 1
1 0 0 1 0 0 1
0 1 0 1 0 0 1
0+ 1+ 1+ 0+ 1+ 1+ 0
1 1 1 1 1 1 1
1 0 0 1 0 0 1
1 0 0 1 0 0 1
1 0 1 0 1 0 1
0+ 1+ 0+ 1+ 1+ 1+ 0
0 0 1 1 1 1 1
1 1 0 1 0 0 0
1 0 0 1 0 0 0
1 1 0 1 0 0 0
0+ 0+ 1+ 1+ 1+ 1+ 1
0 0 0 1 1 1 1
0 0 1 1 0 0 0
0 1 0 1 0 0 0
0 0 1 1 0 0 0
0+ 0+ 0+ 1+ 1+ 1+ 1
Listing 24.2 Neural network input file.
Let’s be clear on how the statements in the script work. The first line of the script opens the neural network we created back in step 3, which has been trained for symbol recognition. The second line of the script puts the neural network to work, specifying the existing input file (symbols.inp) and the name of an output file to be generated (symbols.out). The third line of the script closes the neural network.
485
71328_Pman_CH24I
486
12/14/01 2:31 PM
Page 486
Network Query Language
0,0,0,0 0,0,1,0 0,0,1,0 0,0,0,1 0,0,0,1
Listing 24.3 Output data from a neural network.
At this point you should have created, saved, and run an NQL script and experienced firsthand the results of symbol recognition by a neural network.
Further Exercises You could amend this example in a number of ways, either to learn more about neural networks or to apply the scripts to an application need. Here are some interesting modifications that can be made: ■■
Change the number of inputs to reflect a different size character matrix, such as 7 ⫻ 9 characters. Of course, this means changing the scripts, training file, and input files to match the new number of input bits.
■■
Change the number of outputs to reflect a larger symbol set. The number of bits in the output should be determined by the binary number that can hold the total number of symbols you want to deal with. For example, to support 26 letters of the alphabet you need five output bits (0-32), because four bits (0-15) are too few.
■■
Change the number of nodes in the middle layer to see if there is a perceptible difference in how well the neural network performs. Too few nodes may result in a network that retains too little and guesses wrongly much of the time. Too many nodes may result in a network that memorizes the training patterns rather than learning how to generalize.
■■
Add additional code to the NQL scripts so that the training data and input data do not have to come from text data files. For example, your script could read data from another source, such as a database table, and generate the input files at runtime for the processneural statement.
Chapter Summary Neural networks simulate the learning ability of the human brain in software. They provide the developer with a powerful tool: Software that can be taught to do a job through example. The seductive appeal of neural networks must be balanced with an appreciation for their varying reliability. Practice and experience in designing and training neural networks is a necessary ingredient in applying neural networks successfully.
71328_Pman_CH24I
12/14/01 2:31 PM
Page 487
Neural Networks
NQL supports four neural network architectures: Adaline, backpropagation, Kohonen self-organizing, and bidirectional associative memory. A small collection of statements is all that is needed to create, train, and run neural networks. In NQL, neural networks are initially created, trained, and saved. They may then be opened to process live data. Training data, input data, and output data are all stored in text data files. The NQL statements for neural networking are closeneural, createneural, hideneural, logneural, neuraltimeout, openneural, processneural, roundneural, saveneural, setneural, showneural, and trainneural.
487
71328_Pman_CH24I
12/14/01 2:31 PM
Page 488
71328_Pman_CH25I
12/14/01 2:30 PM
Page 489
CHAPTER
25 Bayesian Inference
Network Query Language includes the ability to compute probabilities using Bayesian inference. Bayesian inference is a useful tool in some applications of artificial intelligence, probability, and statistics. This chapter provides some background on Bayes’ theorem, then explores how it is used in NQL programming. The tutorial at the end of the chapter computes the likelihood of having a disease, given an imperfect test for it.
Introduction to Bayesian Inference Bayesian inference is a form of statistical analysis that enables one to infer causes from effects, rather than the usual inferring of effects from causes. Thomas Bayes published his ideas in 1763. They were used successfully and improved by Laplace (1812), but they were later discredited and forgotten for many years. Bayesian inference was rediscovered in the twentieth century and has been found to have great application in statistics and computing applications. Unlike other methods, Bayesian inference takes prior knowledge into account when computing a probability. Bayesian inferences generally involve two variables: A and B are generally used in this manual. There is a specific notation and terminology normally used in Bayesian inference. The symbol | means given; ~ means not; , means and; + means or. Table 25.1 shows some Bayesian terms and how they are understood.
489
71328_Pman_CH25I
490
12/14/01 2:30 PM
Page 490
Network Query Language Table 25.1 Bayesian Notation NOTATION
PRONOUNCED
MEANING
P(A)
Probability of A
The probability that A is true
P(B)
Probability of B
The probability that B is true
P(~A)
Probability of NOT A
The probability that A is false
P(~B)
Probability of NOT B
The probability that B is false
P(A|B)
Probability of A, given B
The probability that A is true, given the fact that B is true
P(B|A)
Probability of B, given A
The probability that B is true, given the fact that A is true
P(A,B)
Probability of A AND B
The probability that both A and B are true
P(B,A)
Probability of B AND A
The probability that both B and A are true
P(A+B)
Probability of A OR B
The probability that either A or B are true
P(B+A)
Probability of B OR A
The probability that either B or A are true
The Sum Rule In Bayesian inference, 1.0 represents completely true and 0.0 represents completely false. An important concept is that the true and false possibilities of a probability add up to 1.0. In Bayesian terminology, P(A) + P(~A) = 1, and P(~A) = 1.0 ⫺ P(A) . P(A) + P(~A) = 1 P(~A) = 1 - P(A)
This is known as the sum rule.
The Product Rule In Bayesian inference, the probability of two probabilities both being true can be computed by the following formula: P(A,B) = P(A|B) x P(B)
This is known as the product rule.
Bayes’ Theorem The central Bayes’ theorem is shown in Figure 25.1, from which there are many derivatives.
71328_Pman_CH25I
12/14/01 2:30 PM
Page 491
Bayesian Inference
P(B|A) x P(A) P(A|B) =
P(B)
Figure 25.1 Bayes’ theorem,
Table 25.2 Derivations IF YOU KNOW
THEN YOU CAN INFER
FORMULA
P(A), P(B|A), P(B|~A)
P(B)
P(B) = P(A) ⫻ P(B|A) + P(~A) ⫻ P(B|~A)
P(A), P(B|A), P(B)
P(A|B)
(P(B|A) ⫻ P(A)) / P(B)
P(A), P(B|A), P(B|~A)
P(A|B)
P(B) = P(A) ⫻ P(B|A) + P(~A) ⫻ P(B|~A), P(B) = P(A) ⫻ P(B|A) + P(~A) ⫻ P(B|~A)
P(A), P(B|A)
P(A,B)
P(A,B) = P(B|A) ⫻ P(A)
P(A), P(B), P(A,B)
P(A+B)
P(A+B) = P(A) + P(B) ⫺ P(A,B)
The implications of Bayes’ theorem are shown in Table 25.2. Given certain known probabilities, other values can be inferred.
Bayesian Computations in NQL When using NQL to express Bayesian terms like those listed in the previous section, the notation is similar, but square brackets are used in place of P( ). For example: [B|A] is how you express P(B|A) in an NQL script. The NQL statements for Bayesian inference operations are listed in Table 25.3. There is also a function version of the infer statement. The Bayesian inference statements and functions are described individually in the following sections.
Table 25.3 Bayesian Inference Statements STATEMENT
PARAMETERS
DESCRIPTION
bayes
var1, var2
Declares Bayesian variables
prob
term, value
Declares a known value
probability
term, value
Declares a known value
infer
term, var
Computes a term using Bayesian inference
491
71328_Pman_CH25I
492
12/14/01 2:30 PM
Page 492
Network Query Language
Performing Bayesian Inferences To perform a Bayesian inference in NQL, the following sequence is used: 1. Use a bayes statement to indicate that a new Bayesian inference problem is being solved. This serves to identify the two variable names you will be using and clears away any prior result. 2. Use one or more probability statements to declare known values. 3. Use an infer statement to compute a desired value and store it in a result variable. The following code computes a Bayesian inference. bayes A, B probability [A], 0.1 prob [B], 0.5 prob [B|A], 0.8 infer [A|B], result show "The likelihood is " result
The preceding code is understood as follows: The probability of A is 0.1; the probability of B is 0.5; the probability of B given A is 0.8. Given what has been stated, compute the probability of A given B and store it in the variable result. Display result.
Starting a Bayesian Inference Problem The first statement to use in a Bayesian inference problem is bayes. The two parameters are the names of the variables you will be using in the problem. These can be as generic as A and B or X and Y, or very specific such as WhichCandidateWins and EconomyImproves. The bayes statement also clears away the results of any prior Bayesian computations in order to start with a clean slate. bayes var1, var2
Declaring Known Values Next, one needs to declare the probability values that are known. The probability (or prob) statement declares a Bayesian reference and a value for it. The term is a Bayesian term such as [A] or [A|B]. The value can be any expression that evaluates to a floatingpoint number. probability [term], value
The following code declares two Bayesian variables, then states three known values for the terms [X], [Y], and [Y|X]. bayes X, Y probability [X], 0.1
71328_Pman_CH25I
12/14/01 2:30 PM
Page 493
Bayesian Inference prob [Y], 0.5 prob [Y|X], 0.8
Which Bayesian references do you specify? The ones that you already know and that are germane to the problem you are trying to solve. Network Query Language can compute any of the terms listed in Table 25.2.
Performing a Computation The infer statement computes a desired Bayesian value. The parameters are the term to compute and a variable to receive the result. infer term, var bool infer(term, var)
The term is computed using Bayes’ theorem. The following code shows the use of infer to perform a computation. bayes X, Y probability [X], 0.1 prob [Y], 0.5 prob [Y|X], 0.8 infer [X|Y], result
Tutorial: HealthTest In this tutorial, we will apply Bayesian statistics to predict the likelihood of having a rare disease if you test positive for it, given some known information about the disease and the accuracy of the test. Let’s say we know the following facts: ■■
A rare disease exists, and one person in 1000 has this disease.
■■
There is a test for this disease, but it isn’t completely accurate.
■■
If someone who has the disease is tested, 95 percent of the time the test will show positive, but 5 percent of the time it will erroneously indicate negative.
■■
If someone who does not have the disease is tested, 90 percent of the time the test will show negative, but 10 percent of the time it will erroneously show positive.
Here’s the problem we want to solve: If you take the test for this disease and test positive, how worried should you be? What is the probability that you actually have the disease? Our NQL script will compute the probability using Bayesian inference. In Bayesian terms, the information we already know can be represented as follows:
493
71328_Pman_CH25I
494
12/14/01 2:30 PM
Page 494
Network Query Language P(Disease) = 1/1000 (0.001) P(No Disease) = 0.999 P(Positive Test | Disease) = 0.95 P(Negative Test | Disease) = 0.05 P(Negative Test | No Disease) = 0.90 P(Positive Test | No Disease) = 0.10
What we want to compute is P(Have Disease | Positive Test). We can compute this with Bayes’ theorem, as shown in Figure 25.2. There are four steps in this tutorial: 1. Launch the NQL development environment. 2. Enter the HealthTest script. 3. Run the HealthTest script. 4. Understand the HealthTest script. When you are finished with this tutorial, you will have seen how to do the following in NQL: ■■
Set up a Bayesian problem.
■■
Compute Bayes’ theorem.
Let’s begin!
Step 1: Launch the NQL Development Environment On a Windows system, launching the NQL development environment can be accomplished by clicking on the NQL Client desktop icon, or by selecting Program Files, Network Query Language, NQL Client from the Start Menu. On other platforms, you should have a desktop icon and/or a command-line method of launching the NQL Client. At this point, you should have the NQL development environment active on your desktop, with an empty code window. Now you are ready to enter the tutorial script.
Step 2: Enter the HealthTest Script In the NQL development environment, enter the script shown in Listing 25.1 and save it under the name HealthTest.nql. Enter the script, then save it by clicking the Save toolbar button (which has a disk icon).
P(Positive Test | Disease) x P(Disease | Positive Test) =
Figure 25.2 Bayesian solution.
P(Positive Test)
71328_Pman_CH25I
12/14/01 2:30 PM
Page 495
Bayesian Inference
//HealthTest - applies Bayes' theorem to rare disease test problem. //Declare Bayesian variables bayes HaveDisease, PositiveTest //Define known information probability [HaveDisease], 0.001 probability [PositiveTest|HaveDisease], 0.95 probability [PositiveTest|~HaveDisease], 0.10 //Infer the probability we want to solve. infer [HaveDisease|PositiveTest], Likelihood show "If you test positive, your likelihood of having the disease is: " Likelihood
Listing 25.1 HealthTest script.
If you prefer, you may copy HealthTest.nql from the companion CD. If you have installed the companion CD on your system, you will have all of the book’s tutorial materials in a \Tutorials directory on your hard drive. Click the Open toolbar button (folder icon), and select HealthTest.nql from the Tutorials\ch25 folder. At this point, the script in Listing 25.1 should be in your code window, either because you entered it by hand, or because you opened the script from the companion CD.
Step 3: Run the HealthTest Script You are now ready to run the script. You can do this by selecting Build, Run from the menu, clicking the Run toolbar button, or pressing F5. The script displays the answer: If you test positive, your likelihood of having the disease is: 0.0094
You can breathe a sigh of relief, because your likelihood of actually being ill is quite low—less than 1 percent. If the script does not run as expected, check the following: ■■
Check your script for typographical errors.
■■
Check the NQL client’s Errors tab for error messages.
At this point you should have seen the HealthTest script run, performing a simple Bayesian computation. In the next step, we’ll dissect the script and explain exactly how it works.
495
71328_Pman_CH25I
496
12/14/01 2:30 PM
Page 496
Network Query Language
Step 4: Understand the HealthTest Script We now want to make sure we understand every part of the HealthTest script. The first line is a comment line. //HealthTest - applies Bayes' theorem to rare disease test problem.
The two Bayesian variables for this problem are defined: HaveDisease and PositiveTest. //Declare Bayesian variables bayes HaveDisease, PositiveTest
Next, probability statements define the information that is already known: the incidence of the disease in the population, the accuracy of the test when the result is positive, and the accuracy of the test when the result is negative. //Define known information probability [HaveDisease], 0.001 probability [PositiveTest|HaveDisease], 0.95 probability [PositiveTest|~HaveDisease], 0.10
We can now compute the desired value, the likelihood of having the disease if you test positive. The infer statement performs the computation, leaving the result in Likelihood. A show statement displays the result. //Infer the probability we want to solve. infer [HaveDisease|PositiveTest], Likelihood show "If you test positive, your likelihood of having the disease is: " Likelihood
At this point, you have seen an NQL script perform a Bayesian inference.
Chapter Summary Bayes’ theorem is a theorem about conditional probabilities that takes prior information into account. Bayesian inference allows causes to be inferred from effects, and is useful in artificial intelligence applications. ■■
The bayes statement sets up a Bayesian problem and declares variables.
■■
The probability statement declares known information.
■■
The infer statement performs a Bayesian computation.
Bayesian inference is a useful tool for making software more intelligent.
71328_Pman_CH26I
12/14/01 2:27 PM
Page 497
CHAPTER
26 Interacting with the Desktop
When NQL applications are deployed on desktop computers, interaction with the desktop and users may be desirable. Network Query Language has features for opening documents, displaying console windows, prompting users for input, speaking, and playing multimedia files. This chapter covers each of the aforementioned areas. The tutorial at the end of the chapter plays MP3 music files from a Web site and displays status information in a console window.
Desktop Operations The NQL desktop statements are summarized in Table 26.1. Some of the desktop statements are also available as functions. Table 26.2 lists the desktop functions. The desktop statements and functions are described individually in the following sections.
Opening Documents Many operating systems associate applications with documents. For example, in Microsoft Windows a .doc file is associated with Microsoft Word and a .xls file is associated with Microsoft Excel. Double-clicking on a file type from Windows Explorer opens
497
71328_Pman_CH26I
498
12/14/01 2:27 PM
Page 498
Network Query Language Table 26.1 Desktop Statements STATEMENT
PARAMETERS
DESCRIPTION
ask
caption, message
Displays a message and retrieves a yes or no response
closeconsole
Closes a console window
closespeech
Closes a text-to-speech session
getallvoices
Returns a list of available speech engine voices
getcurrentvoice
var1, var2
isspeaking
Returns the current voice name and speaking speed Reports on whether text-to-speech is still in progress
openconsole
[caption [, stay-on-top]]
Opens a console window
opendoc
file [, verb]
Opens a document on the desktop
openspeech
Opens a text-to-speech session
play
filespec
Plays a multimedia (audio or video) file
prompt
caption, message, [default [, allow-blank]]
Prompts for an input value
sendkeys
characters
Sends keystrokes to the current active application
setconsole
control, value
Updates a control of a console window
setvoice
voice-name [, speed]
Selects a voice and speaking speed
show
[value-list]
Displays data in a message window
speak
[text]
Speaks text and waits for completion
speakcontinue
[text]
Speaks text without waiting for completion
Status
type [, value]
Updates the display of an agent’s desktop skin
stopspeaking
Stops speaking
waitconsole
Waits for a user to close a console window
the specified file in its default application. Your NQL scripts can similarly open documents and, through association, their applications. This capability is useful for displaying the results of a task. For example, you might use the image statements to create a graphic file, then wish to have the graphic file opened on the desktop for presentation.
71328_Pman_CH26I
12/14/01 2:27 PM
Page 499
Interacting with the Desktop Table 26.2 Desktop Functions FUNCTION
DESCRIPTION
boolean closespeech( )
Closes a text-to-speech session
boolean ask(caption message)
Displays a message and retrieves a yes or no response
string getallvoices( )
Returns a list of available speech engine voices
boolean getcurrentvoice(var1, var2)
Returns the current voice name and speaking speed
boolean isspeaking( )
Reports on whether text-to-speech is still in progress
boolean openspeech( )
Opens a text-to-speech session
boolean prompt(caption, message, [default [, allow-blank]])
Prompts for an input value
boolean setvoice(voice-name [, speed])
Selects a voice and speaking speed
boolean speak([text])
Speaks text and waits for completion
boolean speakcontinue([text])
Speaks text without waiting for completion
boolean stopspeaking( )
Stops speaking
The opendoc statement opens a document on the desktop. The parameters are the file specification of a document (file) to open, and an optional verb. The verb defaults to the operating system standard open verb (“Open” in Windows). opendoc filespec [, verb]
The opendoc statement does not change the success/failure condition.
Sending Keystrokes To control another application on the desktop, you can send it keystrokes as if a user were entering keystrokes from a keyboard. The sendkeys statement takes one parameter, a string of character values to send to the current active application on the desktop. sendkeys characters
For non-printing characters, the names listed in Table 26.3 may be embedded in the character text. The specified character(s) are sent to the current active application. The following code opens a document in Microsoft Word, then uses sendkeys to close the application by selecting File, Exit from the menu.
499
71328_Pman_CH26I
500
12/14/01 2:27 PM
Page 500
Network Query Language Table 26.3 Special Character Names for Sendkeys NOTATION
MEANING
{CTRL+c}
Sends a character with Ctrl pressed
{SHIFT+c}
Sends a character with Shift pressed
{ALT+c}
Sends a character with Alt pressed
{ENTER}
Sends the Enter key
{ESC}
Sends the Escape key
{TAB}
Sends the Tab key
{SPACE}
Sends the Space key
{RIGHT}
Sends the Right Arrow key
{LEFT}
Sends the Left Arrow key
{UP}
Sends the Up Arrow key
{DOWN}
Sends the Down Arrow key
{PAGEUP}
Sends the Page Up key
{PAGEDOWN}
Sends the Page Down key
{INSERT}
Sends the Insert key
{DELETE}
Sends the Delete key
{BACK}
Sends the Backspace key
{F1}...{F12}
Sends the corresponding Function key
opendoc "c:\\letter.doc" sendkeys "{ALT+F}x"
The sendkeys statement does not change the success/failure condition.
Console Windows NQL scripts can display a desktop console window that can be used to communicate general status, percentage of progress, and messages. Figure 26.1 shows a console window. The sequence for using console windows is as follows: 1. Open a console window with openconsole. 2. During the course of script execution, update the console with setconsole.
71328_Pman_CH26I
12/14/01 2:27 PM
Page 501
Interacting with the Desktop
Figure 26.1 Console window.
3. If you want to wait for the user to explicitly close the console window, issue a waitconsole statement. 4. Close the window with closeconsole.
Opening a Console Window The openconsole statement opens a console window. The parameters are an optional window caption and a stay-on-top flag. The stay-on-top flag, if set to true, keeps the console window top-most on the desktop. It defaults to false. openconsole [caption [, stay-on-top]]
The console window displays, managed by its own user-interface thread, and vanishes when one of the following occurs: The user closes the window; the user clicks Cancel; a closeconsole statement executes; or the script ends. If a user closes the console window or clicks its Cancel button, the NQL script halts after it completes the statement it is currently executing. The following code opens a console window using openconsole. openconsole "Mail Agent Status", true
After a console is opened, use setconsole to update its display.
Updating a Console Window The setconsole statement updates the display of a console window. The parameters are a control name (“action”, “log”, or “progress”) and a value for the control. setconsole control, value
501
71328_Pman_CH26I
502
12/14/01 2:27 PM
Page 502
Network Query Language
The console window updates according to the parameters. If a control of “action” is specified, the action label of the console window is set to the text of the value parameter. If a control of “log” is specified, the text of the value parameter is added to a growing list box on the console window. If a control of “progress” is specified, the progress bar on the window is set to the percentage of the value parameter, which should be a number between 0 and 100. The following code shows all three forms of setconsole. openconsole "Agent", true setconsole "action", "Retrieving files" setconsole "log", "Retrieved aaaa.dat" setconsole "log", "Retrieved aaab.dat" setconsole "log", "Retrieved aaac.dat" setconsole "log", "Retrieved aaad.dat" setconsole "log", "Retrieved aaae.dat" setconsole "progress", 15 closeconsole
Waiting for a Console Window The waitconsole statement waits for a user to click a Close button on the console. There are no parameters. Use waitconsole when you want the user to be aware of and acknowledge that a script has completed. waitconsole
The caption of the Close button is changed from “Cancel” to “Close”. The script waits until the console window has been closed by the user before proceeding with execution. The following code shows the use of waitconsole. openconsole "Agent", true setconsole "action", "Retrieving files" setconsole "progress", 10 .... setconsole "action", "Completed" setconsole "progress", 100 waitconsole closeconsole
Closing a Console Window The closeconsole statement closes a console window. There are no parameters. closeconsole
The console window is closed. The following code shows the use of closeconsole. openconsole "Agent", true ....
71328_Pman_CH26I
12/14/01 2:27 PM
Page 503
Interacting with the Desktop setconsole "action", "Completed" setconsole "progress", 100 closeconsole
Dialogs NQL has features for using dialog windows to display messages, ask questions, and accept input.
Displaying Messages The show statement displays text in a message window. The parameters are one or more values to display. If no values are listed, the top data item on the stack is displayed. show [value-list]
Figure 26.2 shows the appearance of the show dialog window. The following code shows the use of show to display stack data, computed values, and a text message. push "test" show a = 5 b = 3.5 show a, b, a * b show "The End"
If multiple values are specified, each value is displayed serially in its own window.
Accepting Input The prompt statement or function displays a message and accepts input from the keyboard. The parameters are a dialog window caption, a message to display, and optionally a default input value and an allow-blank flag which defaults to true. An empty input will only be accepted if the allow-blank parameter is true.
Figure 26.2 Show window.
503
71328_Pman_CH26I
504
12/14/01 2:27 PM
Page 504
Network Query Language prompt caption, message, [default [, allow-blank]] boolean prompt(caption, message, [default [, allow-blank]])
The caption and message are displayed in a dialog window which has a text box for data entry. If a default value is specified, it is pre-loaded into the text box. The user enters input and clicks OK. If the user enters input, a success code results (the function returns true) and the input data is pushed onto the stack. If the user cancels the dialog, a failure condition results (the function returns false). Figure 26.3 shows the appearance of the show dialog window. The following code shows the use of prompt to collect input fields. prompt "Data Entry", "What is your first name?" pop first prompt "Data Entry", "What is your last name?" pop last show first, last
Asking Yes/No Questions The ask statement or function displays a message and waits for a yes or no response. The parameters are a caption and a message for the dialog window. ask caption, message boolean ask(caption, message)
The dialog is displayed with Yes and No buttons. If Yes is selected, a success condition results (the function returns true). If No is selected, a failure condition results (the function returns false). Figure 26.4 shows the appearance of the ask dialog window. The following code shows the use of ask to collect input fields. if !ask("Continue scanning?", "Do you want to continue scanning the web?") { end }
Figure 26.3 Prompt window.
71328_Pman_CH26I
12/14/01 2:27 PM
Page 505
Interacting with the Desktop
Figure 26.4 Ask window.
Text-to-Speech NQL can speak text, if your computer has the appropriate hardware and software. For a Windows PC, this means speakers, a sound card, and a Microsoft SAPI speech engine. The common sequence for text-to-speech operations is as follows: 1. Open a text-to-speech session with openspeech. 2. Optionally select a voice and a speaking speed with setvoice. 3. Speak text using speak or speakcontinue. 4. Close the text-to-speech session with closespeech.
Opening a Text-to-Speech Session The openspeech statement opens a text-to-speech session. There are no parameters. openspeech boolean openspeech()
If a text-to-speech session is successfully opened, a success condition results (the function returns true). The following code shows the use of openspeech. openspeech speak "It's 5:00, you can go home now." closespeech
Note that the use of openspeech is an optional formality because most of the speech statements perform an automatic openspeech if necessary. However, openspeech is useful for checking the availability of a speech engine early in your program.
Speaking The speak statement or function speaks text. The optional parameter is the text to speak; if omitted, the top data item on the stack is used as the text to speak. speak [text] boolean speak([text])
505
71328_Pman_CH26I
506
12/14/01 2:27 PM
Page 506
Network Query Language
The text is spoken through the computer’s sound card and speakers. The NQL script does not continue execution until the speech rendering completes. The following code shows the use of speak. speak "Attention! Your stock is at an all-time high!"
To speak without waiting, use speakcontinue instead of speak.
Speaking without Waiting The speakcontinue statement or function speaks text. It is identical to speak except that it does not wait for the speaking to complete. The text-to-speech occurs in parallel, allowing your script to race ahead on to other statements while the text is being spoken. The optional parameter is the text to speak; if omitted, the top data item on the stack is used as the text to speak. speakcontinue [text] boolean speakcontinue([text])
The text is spoken through the computer’s sound card and speakers. The following code shows the use of speakcontinue. speakcontinue "As we speak, your computer is being rebooted." reboot
To speak and wait for speech to be rendered before continuing, use speak instead of speakcontinue.
Stopping Speech If speech is rendered using speakcontinue, you may wish to stop it at a later point even if it has not finished, as in the case of a fatal error. The stopspeaking statement or function halts text-to-speech in progress. There are no parameters. stopspeaking boolean stopspeaking()
Any text-to-speech in progress is halted. If the speech engine could not be initialized, a failure condition results (the function returns false). The following code shows the use of stopspeaking to break off a narrative after a certain amount of time has passed. get sURL speakcontinue at "12:00p" stopspeaking show "Time for lunch"
71328_Pman_CH26I
12/14/01 2:27 PM
Page 507
Interacting with the Desktop
Checking for Speech in Progress The isspeaking statement or function checks if any text-to-speech is still in progress. If the speakcontinue statement is used to begin speech in parallel, isspeaking may be used to determine if it is finished or not. There are no parameters. isspeaking boolean isspeaking()
If text-to-speech is still in progress, a success condition results (the function returns true). The following code shows the use of isspeaking. load "filibuster.txt" speakcontinue while isspeaking() { sleep 5 } show "Done at last!"
Selecting a Voice The setvoice statement selects a voice and a speaking speed. The parameters are a voice name and, optionally, a speaking speed. setvoice voice-name [, speed] boolean setvoice(voice-name [, speed])
If the specified voice is available, it is loaded and a success condition results (the function returns true). The following code shows the use of setvoice. openspeech setvoice "Sam" speak "It's 5:00, you can go home now." setvoice "Mary", 200 speak "Don't forget to get some milk on the way home." closespeech
Declaring a voice is not mandatory when using text-to-speech; a default voice is selected when the speech session is opened. You can discover the available voice names with the getallvoices statement.
Determining Available Voices The getallvoices statement or function returns a list of available speech engine voices. There are no parameters.
507
71328_Pman_CH26I
508
12/14/01 2:27 PM
Page 508
Network Query Language getallvoices string getallvoices()
The available voices are returned as a single string value with a newline separating each voice in the list. In the case of the statement, the string is pushed onto the stack. In the case of the function, the string is the function result. If a speech engine could not be initialized, a failure condition results. The following code shows getallvoices in action. getallvoices while nextline(voice) { show voice() }
To determine the current voice in use by the speech engine, use getcurrentvoice.
Determining the Current Voice The gecurrentvoice statement or function returns the name and speed of the current voice in use by the speech engine. The parameters are a variable name to receive the voice name and a variable name to receive the speaking speed. getcurrentvoice var1, var2 boolean getcurrentvoice(var1, var2)
The current voice name and speed are returned in the specified variables. If a speech engine could not be initialized, a failure condition results (the function returns false). The following code shows the use of getcurrentvoice. string VoiceName, VoiceSpeed getcurrentvoice VoiceName, VoiceSpeed
To determine all voices available to the speech engine, use getallvoices.
Playing Audio and Video NQL can display images and play audio and video files. Images can be displayed with the opendoc statement, described earlier in this chapter. Audio and video files can be played with the play statement. The parameter is the file specification of an audio or video file. play filespec
If the specified audio or video file is found and is of a type supported on your computer, a success condition results and it is played on the desktop. The following code shows the use of play to play audio.
71328_Pman_CH26I
12/14/01 2:27 PM
Page 509
Interacting with the Desktop Table 26.4 Supported Audio and Video Types FILE TYPE
DESCRIPTION
.mid
MIDI audio
.mp3
MP3 audio
.wav
Wave audio
.mpg
MPEG video
.mpeg
MPEG video
.mov
QuickTime video
play "http://www.my-music-site.com/oldies/videostar.mp3"
The supported file types for Windows PCs are shown in Table 26.4. Your computer must also have the necessary drivers and software for playing these kinds of files.
Desktop Skins One of the options available in the Windows edition of NQL is the ability to generate an .exe file for a script that is destined to run on a desktop. These generated .exe files make use of desktop skins for a customized appearance that resembles a modern MP3 player. Figure 26.5 shows the appearance of a desktop .exe file. While the script is running, the status statement may be used to update the display. The parameters are the function to perform and a value to go with it. Not all functions require a value. status type [, value]
With a few status statements, your script can show ongoing status, display errors, indicate progress, and turn on and off lights indicating input/output is in progress. The available types and values are listed in Table 26.5. The desktop skin facility gives your NQL scripts a professional, cutting-edge look.
Figure 26.5 Desktop agent .exe file.
509
71328_Pman_CH26I
510
12/14/01 2:27 PM
Page 510
Network Query Language Table 26.5 Status Types and Values TYPE
VALUE
start
DESCRIPTION Indicates that the script is running
input
“on”
Turns on the input indicator
input
“off”
Turns off the input indicator
output
“on”
Turns on the output indicator
output
“off”
Turns off the output indicator
message
text
Displays a short message (script continues)
messagebox
text
Displays a message in a window (script waits)
errorbox
text
Displays an error message in a window (script waits)
progress
Increments the progress bar
done
Indicates that the script is finished
Tutorial: MP3 Now it’s time to put some of this information to work in NQL. In this tutorial, you will create a script that reads a Web page from a music site and plays all of the MP3 music files on the page. The script will also display a console window to show its progress. There are four steps in this tutorial: 1. Launch the NQL development environment. 2. Enter the MP3 script. 3. Run the MP3 script. 4. Understand the MP3 script. When you are finished with this tutorial, you will have seen how to do the following in NQL: ■■
Retrieve and play MP3 files.
■■
Display and update a console window.
Let’s begin!
Step 1: Launch the NQL Development Environment On a Windows system, launching the NQL development environment can be accomplished by clicking on the NQL Client desktop icon, or by selecting Program Files, Network Query Language, NQL Client from the Start Menu. On other platforms, you
71328_Pman_CH26I
12/14/01 2:27 PM
Page 511
Interacting with the Desktop
should have a desktop icon and/or a command-line method of launching the NQL Client. At this point, you should have the NQL development environment active on your desktop with an empty code window. Now you are ready to enter the tutorial script.
Step 2: Enter the MP3 Script In the NQL development environment, enter the script shown in Listing 26.1 and save it under the name MP3.nql. Enter the script, then save it by clicking the Save toolbar button (which has a disk icon).
//MP3 - plays all MP3 files on a web page. GetWebSite: prompt "MP3 Player - Select Web Site", "Enter a web page that contains MP3 (.mp3) music files", "http://www.my-music-site.com" else Exit pop sURL if sURL = "" then Exit push sURL absurl sURL pop sURL sAbsolute = sURL //open a console window on the desktop and keep it topmost openconsole "MP3 Player", true // Get the page containing the music files get sURL else Exit setconsole "log", sURL //count how many music files there are count '.mp3' pop total played = 0 continues
Listing 26.1 Client script.
511
71328_Pman_CH26I
512
12/14/01 2:27 PM
Page 512
Network Query Language
//find each link on the page, and play the ones that are .mp3 (MP3) files match ' Library Demo - Login
555
71328_Pman_CH28I
556
12/14/01 2:22 PM
Page 556
Network Query Language
| DEMO LIBRARY | You are now entering a secure
section of our library site. Please enter your password below. | %>
If the page needs to report an incorrect login error, Error will be true. When this is the case, an appropriate error message is displayed on the page, in red. if Error = true { output 'UserID or Password incorrect, please try again
' Error = false websessionsave Error }
The output of HTML continues, and the script is complete. document.loginForm.UserID.focus(); %>
At this point, you’ve seen how to create a login page whose purpose is to accept a user ID and password and submit them to the search page.
Step 7: Understand the Search Page Script We now want to understand the script for the search page, menu.nql. The first line is a comment line.
557
71328_Pman_CH28I
558
12/14/01 2:22 PM
Page 558
Network Query Language //menu - Search page of the Library Search application.
Next, two parameters are retrieved from the URL: UserID and password. The login page submits these form fields in the Web address that causes menu.nql to be activated. They are retrieved into variables with the input statement. input UserID, Password
A check for the logged in cookie is made with websessiongetcookie. Unless there is a logged-in cookie already set, the user ID and password are now validated. If the script dislikes the user ID and password, the variable Error is set to true and stored in a Web session variable with websessionsave, and the browser is redirected to the login page, login.nql. The login script will redisplay the login page, and seeing the value of Error it will display an error message about an invalid login. Error = False websessiongetcookie "loggedin", sLoggedIn if sLoggedIn = "" { if UserID == "nql" { if Password != "nql" { Error = true websessionsave Error websessionredirect "login.nql" } } else { Error = true websessionsave Error websessionredirect "login.nql" }
After a successful login, a cookie is set that will mark the user as logged in for the remainder of the day. date sDate call FormatDate sCookieDate = sDayofWeek & ", " & sDay & "-" & sMonth & "-" & sYear sCookie = "yes; expires=" & sCookieDate & " 23:59:59 GMT; path=/; domain=nqli.com" websessionsetcookie "loggedin", sCookie
71328_Pman_CH28I
12/14/01 2:22 PM
Page 559
Web Applications websessiongetcookie "loggedin", sLoggedIn }
The HTML of the search page is now displayed, which includes a form for entering search text and selection of keyword, author, or title. <meta name="GENERATOR" content="Microsoft FrontPage 4.0"> Demo Library - Search Menu
| DEMO LIBRARY | | Thank you for entering the Demo Library Lookup system. Please enter your search information below. | Text:
Search by: |
<select size="1" name="type"> Keyword Author Title
| | | | |